

random user submitted photo
Cooling System
Re: Cooling System
I had surgery on my hand back in May this year and was unable to fly for a while, so I used this time to completely rethink my cooling systems (which were performing great in the air but poorly on the ground), my exhaust system which had to be relocated to accommodate cooling system, my oil tank also had to be relocated slightly due to exhaust relocation and while I was at this, I also changed the thrust line of the propeller because it was now or never as I needed to already do major cowl modifications.
Oil cooler 10 row in front of standard size radiator. Next size up was 16 row but filled way too much of the inlet for my liking. Hoping this size will be more than enough but testing will prove/ disprove....
I had to support the radiator from top and bottom, as you can see the rows have bowed from previous use. Only been to 2.5 G to do this, so I added support to mitigate this.
A bit annoyed that the inlet isn't parallel! Not sure how that happened, the mold must have sagged during curing.
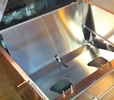
I tried to keep the inlet a thin profile and sized it to be 30% of radiator frontal area in accordance with my research on Meredith effect optimization. The outlet is set to 130% of inlet but I incorporated an outlet flap to minimize this at cruise settings.
Murray Parr
WXB0015
Rotax 912ULS
MGL Explorer Lite
First flight May 6/23
RV9 builder (Sold)
WXB0015
Rotax 912ULS
MGL Explorer Lite
First flight May 6/23
RV9 builder (Sold)
- Murray Parr
- Posts: 255
- Joined: Fri Nov 18, 2016 6:50 pm
Re: Cooling System
Lots of blocking off old blisters etc.
Sealing is done with sticky foam and allows cowl to be removed with ducting remaining in position. I know from previous experience with the old system, that any leak effects efficiency greatly.
About as streamlined as I can get it.
Sealing is done with sticky foam and allows cowl to be removed with ducting remaining in position. I know from previous experience with the old system, that any leak effects efficiency greatly.
About as streamlined as I can get it.
Murray Parr
WXB0015
Rotax 912ULS
MGL Explorer Lite
First flight May 6/23
RV9 builder (Sold)
WXB0015
Rotax 912ULS
MGL Explorer Lite
First flight May 6/23
RV9 builder (Sold)
- Murray Parr
- Posts: 255
- Joined: Fri Nov 18, 2016 6:50 pm
Re: Cooling System
Nice work Murray!
Bryan Cotton
Poplar Grove, IL C77
Waiex 191 N191YX
Taildragger, Aerovee, acro ailerons
dual sticks with sport trainer controls
Prebuilt spars and machined angle kit
Year 2 flying and approaching 200 hours December 23
Poplar Grove, IL C77
Waiex 191 N191YX
Taildragger, Aerovee, acro ailerons
dual sticks with sport trainer controls
Prebuilt spars and machined angle kit
Year 2 flying and approaching 200 hours December 23
-

Bryan Cotton - Posts: 5501
- Joined: Mon Jul 01, 2013 9:54 pm
- Location: C77
Re: Cooling System
Here is the outlet flap. I hinged it to the lower firewall and will pin through the flap from center and secure the lower cowl with the same 2 pins. That way, I can back out the pins and keep the flap pinned and still be able to remove the lower cowl without disturbing any of the cooling duct. The duct is completely isolated from the cowl air and will only see air flow straight through this ducting arrangement.
The extra space beside the outlet flap is where the exhaust outlet will be placed.
Outlet flap in fully opened position. Once I determine what the maximum opening is needed, I can trim the excess side plates back a bit and gain another milli knot....
I have also incorporated a heater outlet using a 2" scat hose coming off the outlet duct and through the firewall using a stainless shut off flap I purchased from aircraft spruce. I will get some pictures of this soon.
Murray Parr
WXB0015
Rotax 912ULS
MGL Explorer Lite
First flight May 6/23
RV9 builder (Sold)
WXB0015
Rotax 912ULS
MGL Explorer Lite
First flight May 6/23
RV9 builder (Sold)
- Murray Parr
- Posts: 255
- Joined: Fri Nov 18, 2016 6:50 pm
Re: Cooling System
Murray,
Looks familiar! I hope that gives you great success!
I know on my kits a 10 row was not enough. 13 was perfect. I know the gap surrounding the oil cooler isn’t very big, but it allows ample air to pass through and around the oil cooler and through the radiator. Make sure to seal your ducting well! The air will bypass your cooling system if not. When 95 degrees at altitude (105 give or take on the ground) I’ll see 225 cht (old style heads) and 220-225 oil temp at max when operating through climb and cruise. I hope that gives you some numbers to shoot for or perceive as “normal”.
Looks great!
N7777X
Tailwheel
Rotax 912
3 blade Warp Drive
Tailwheel
Rotax 912
3 blade Warp Drive
- CaseyCooper
- Posts: 56
- Joined: Sat Aug 01, 2020 6:49 pm
- Location: Tucson, Az
Re: Cooling System
CaseyCooper wrote:Murray,
Looks familiar! I hope that gives you great success!
I know on my kits a 10 row was not enough. 13 was perfect. I know the gap surrounding the oil cooler isn’t very big, but it allows ample air to pass through and around the oil cooler and through the radiator. Make sure to seal your ducting well! The air will bypass your cooling system if not. When 95 degrees at altitude (105 give or take on the ground) I’ll see 225 cht (old style heads) and 220-225 oil temp at max when operating through climb and cruise. I hope that gives you some numbers to shoot for or perceive as “normal”.
Looks great!
Thanks Casey,
I was amazed how close my system was to yours once you released it. You must have studied the 'Meredith effect' too!
I have the standard Rotax size radiator, so I built everything around that in the limited space available, it was a real challenge to match it all up and pin it to the lower firewall hinge pin (probably made harder because I originally wasn't going to do that). I also tried to keep it streamlined and used flush rivets inside the duct which if I'm lucky should find another milli knot increase in speed. I probably undid all that when I installed a heater duct above the discharge plenum!
I was at a loss as to how I was going to connect it to the lower cowl and still be able to remove the cowl without disturbing the cooling system, so I tried to do something similar to what you produced but only using stick on seals. I think with my system I will still have to tape up the seals which won't be too much effort considering I don't take the lower cowl off that often.
I might have to find a 13-row cooler if testing shows it isn't enough, although the 10 row is larger than what I had before, and it worked great. That's the thing with the science of cooling; small differences can produce big changes so hopefully all will be good.
I am also uncertain that the inlet size is enough, hoping I won't be too disappointed once I start testing it. Going into summer over here so I should be able to test it well.
I agree that sealing the ducting is crucial, my old system was terrible any time I didn't have a perfect seal!
Murray Parr
WXB0015
Rotax 912ULS
MGL Explorer Lite
First flight May 6/23
RV9 builder (Sold)
WXB0015
Rotax 912ULS
MGL Explorer Lite
First flight May 6/23
RV9 builder (Sold)
- Murray Parr
- Posts: 255
- Joined: Fri Nov 18, 2016 6:50 pm
Re: Cooling System
Murray,
Exactly! By no means was my design original. It was just something that worked well given the circumstances.
There’s definitely a few details to iron out. Sealing is the biggest for sure but it sounds like you have it figured out. I like that you made an adjustable baffle. That’ll be very helpful. Get that thing flying already! Luckily it’s a great time of year to test it!
N7777X
Tailwheel
Rotax 912
3 blade Warp Drive
Tailwheel
Rotax 912
3 blade Warp Drive
- CaseyCooper
- Posts: 56
- Joined: Sat Aug 01, 2020 6:49 pm
- Location: Tucson, Az
Who is online
Users browsing this forum: No registered users and 2 guests


