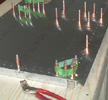


random user submitted photo
Easy B model windscreen install proces
1 post
• Page 1 of 1
Easy B model windscreen install proces
I talked with Sonex about building the windscreen flat on the table and they gave me some pointers and I found a few of my own along the way. It turned out to be really easy.. This was mentioned on the Sonex Flight podcast but I couldn't find many details. I thought I would share what worked for me as it seems to be a frequently asked question here.
1) Sand the edges of the windshield smooth to prevent cracking when bending it.
2) align the rear edge of the lexan windscreen with the rear edge of the windscreen skit and center it.
3) Drill and cleco ALL the holes to #40 (Yes, while it is flat on the table)
4) Measure the size of the upper firewall flange + 3/4" (The required overhang of the windscreen skit over the engine bay) and verify the lexan will not interfere with the upper firewall flange. I made sure there was about 1/8" of clearance so the upper firewall flange didnt bang into the lexan edge and crack it later down the road (I had to trim mine back about 1/4". See Trimming Windscreen image)
5) Test fit on the fuselage. (With JUST the front 2 holes drilled as mentioned on the plans. Do not drill the remainder of the holes in the longerons yet until after you have fit the windscreen bow and Bow Strap)
6) Mark a center line on the windscreen bow and drill the center hole, then attach via top center trailing edge hole in windscreen skirt to the center of the bow and work your way around the skirt removing cleco's and drilling the holes into the windscreen bow with #40 drill and clecos. The skirt will want to slide up the lexan and make the holes not line up. Dont take out too many clecos at once and take your time. I started in the middle and drilled 1 or 2 per side working my way down from the top center, then moved to the other side. Repeat this back and forth till all are drilled.
I hope this helps someone else along the line. It went on pretty easy this way for me. Your mileage may vary.
- BradPayne
- Posts: 9
- Joined: Tue Jan 04, 2022 6:51 pm
1 post
• Page 1 of 1
Who is online
Users browsing this forum: No registered users and 31 guests


