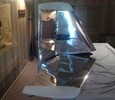


random user submitted photo
Stites Cleanex SNX-0414
14 posts
• Page 1 of 2 • 1, 2
Stites Cleanex SNX-0414
I figure it's about time for me to get this going. I purchased my Sonex from an estate. It was for everything identifiable as airplane related. It included a disassembled Corvair engine (including a bunch of William Wynn "gold" parts and a Weseman installed 5th bearing (with SPA invoice.),engine mount and nose bowl. Lots of misc. stuff, literally enough rivets to fill a 5 gallon bucket. It was literally a basket case.
And ... I have absolutely zero experience building an airplane.
My Dunning Kruger side was in full tilt.
Stay tuned for the next installment...
And ... I have absolutely zero experience building an airplane.
My Dunning Kruger side was in full tilt.
Stay tuned for the next installment...
- flyguy0609
- Posts: 46
- Joined: Tue Aug 03, 2021 12:17 pm
Re: Stites Cleanex SNX-0414
[quote="flyguy0609"]
And ... I have absolutely zero experience building an airplane.
[/quote
Everyone starts somewhere.
Just like eating an elephant, one bite at a time.
And ... I have absolutely zero experience building an airplane.
[/quote
Everyone starts somewhere.
Just like eating an elephant, one bite at a time.
Bob Dz...
Sonex B, Tri-gear
(technically within walking distance of Sonex)
N624DZ (reserved)
Plans exist to eliminate confusion, not create it.
Sonex B, Tri-gear
(technically within walking distance of Sonex)
N624DZ (reserved)
Plans exist to eliminate confusion, not create it.
- BobDz
- Posts: 265
- Joined: Mon Oct 02, 2023 3:44 pm
Re: Stites Cleanex SNX-0414
The first thing to do was to try and figure out what exactly I had. The aft fuselage side skins were corroded way beyond repair with heavy white corrosion and deeply pitted. They were trashed. The upper and lower wing skins were showing much less white corrosion, and I decided they needed to be replaced. The few parts that were riveted had anywhere from 25% to 40% bad rivets, so I decided to reject anything with rivets.
Finding a home for the project was net easy. I live in a high-rise condo in large urban area, no chance of "home" building. I was unable to find any space that was suitable within 50 miles. I ended up hitting pay dirt when I went to EAA chapter 260 at C56. I reached out to Jay Vieaux, an EAA technical counselor at 260 and I can't say enough about him. My hangar is next to his and he stops by at least once a weekend. The support I get from him, and the rest of the chapter, is phenomenal. It's good to be in a community of builders.
I'm feeling a bit frustrated about my progress lately. Life happens, Thanksgiving through new years is always slow build time, I made progress in Jan and Feb, and March. This month I has been slow at the hangar, Spent time in Texas visiting my Grand-kids and this weekend I'm recovering from oral surgery. (ugh)
Progress to date. Vertical stabilizer is ready to have the skin riveted. Not happy with the fiberglass tips. They were cut and pilot drilled by the previous builder, I'm trying to decide if I should Use, replace or fabricate the stabilizer tips. Jay is an expert with an English Wheel. The glass tips are asymmetric about the vertical longitudinal axis. see photos.
The vertical stab appears to lean to the left because it is only clamped to the table on the left side. I found the asymmetry in another Sonex of the same vintage as my kit.
What a long strange trip it's been....
- flyguy0609
- Posts: 46
- Joined: Tue Aug 03, 2021 12:17 pm
Re: Stites Cleanex SNX-0414
Last weekend I was back at the hangar. I usually start with a bit of clean up and returning to a some sort of orderly work area. I have a clothes basket on the floor next to my work bench full of chunks of HDPE and wood. The wood is salvaged from the skids used to transport steel coils and are made out of red oak and poplar. The Poplar is nice to use, but the red oak is literally harder than nails. Broke a band saw blade. I use the HDPE to make forms to fit inside ribs and channel stock. I mill them to a snug fit so they immobilize the part while drilling holes. At the present time I use the end mill to fabricate the gazillion clips. The HDPE and wood is also used to stabilize thin section material while milling. This reduces chatter to a bare minimum and creates a much nicer cut. The quality of the cut is also influenced by the way the material is fed to the mill. (see image) I prefer climb milling because, the material is being forced against the stabilizing material, minimizing chatter (vibration) and the initial contact area (where most of the schmutz/ burrs are formed) is cut away, minimizing burring. When machining or cutting aluminum, stay away from the titanium bits. They have an affinity for aluminum and get really gunked up. Tool alert, I recently purchase some 30 x 40 double margin piloted drill bits from Pan American Tool. https://www.panamericantool.com/double- ... s-937.html
The pilot is a # 40 and the full size is a #30 drill. They are a bit pricey, however, they replace 3 drill bits and bit changes and the associated clecoing, unclecoing, and deburring.
The pilot is a # 40 and the full size is a #30 drill. They are a bit pricey, however, they replace 3 drill bits and bit changes and the associated clecoing, unclecoing, and deburring.
- flyguy0609
- Posts: 46
- Joined: Tue Aug 03, 2021 12:17 pm
Re: Stites Cleanex SNX-0414
It's been a month since my last post. Quick synopsis of progress; Horizontal Stab spars and ribs fitted to each other and skin. Main h-stab spar cleaned, primed and riveted. H-stab ribs cleaned and primed. With the exception of the elevator root ribs, elevator ribs match drilled to elevator skins.
For the readers who are interested, I used a new Ti-Al 'gold' end mill once. photo below. My preferred mill is a HSS 1" diameter 6 flute bit for a number of reasons. HSS steel doesn't get gunked up, The relatively large diameter provides a higher rotational velocity, creating a cleaner edge, and the extra mass helps with heat management. Cutting oil helps and WD40 works with Al.
When fabricating a part, the first thing is to cut out a blank. I usually cut the raw material between 1/16" and 1/8" large, then mill it square and to spec.
A typical mount for milling has the material being cut mounted next to the white HDPE, with Aluminum face plates between the vice and the part. The mill table is hand cranked laterally (x axis), transversely (y axis) and vertically (z axis). A full turn of the hand crank moves the table 1/16". There are scales on each of the cranks that are graduated in .001" increments. With a little practice, tolerances of +- 0.005" are relatively easy.
One of the things I really like about the end mill is the drill chuck that came with it. The photo below shows the drill chuck being used to spot the pilot holes in a horizontal stab root rib. In this case, I am using the HDPE beneath to support the rib below the spotting bit. HDPE is also used in the center of the channel stock to provide support to the flanges when clamped in the vice.
- flyguy0609
- Posts: 46
- Joined: Tue Aug 03, 2021 12:17 pm
Re: Stites Cleanex SNX-0414
Last Saturday, I left for the hangar a little earlier than usual. I was pacing the car 50 yards ahead of me and glanced at the speedometer. It read 90 mph. I'm really excited about going to the airport. Just as excited as a 13 year old being dropped off alone at the EAA fly-in Convention for the day. It is so different now.
However, I didn't really need to be going that fast, so I moved right, dropped into the flow and smiled. It's still the same.
Meanwhile, back in the real world, the elevators are progressing. I needed an elevator rib. Do I buy or fabricate? Earliest I can buy and use is the next weekend.I can fabricate this weekend, either way, or if I am completely inept at fabricating, buy it.
- flyguy0609
- Posts: 46
- Joined: Tue Aug 03, 2021 12:17 pm
Re: Stites Cleanex SNX-0414
Picking up where I left off last night. Cutting the blank material for the blank. 1st operation. Cutting the material. When cutting sheet material, it is best to have, if possible, at least one edge a mill edge to provide a straight reference edge for layout. I didn't have a mill edge as the material was repurposed from the scrap bin. The plans only provide the finished dimensions which have to be flattened to 2 dimensions. In this case it is a triangle, so the two long dimensions get a 1/2 inch inch added for the flanges (for a total of 1 inch) and the short side gets 1/2 inch added for its flange, add a 1/8th inch to the resultant dimensions. Cut to rough size on the band saw. Then mill to square, final dimensions. The blank must be clamped vertically in order to be milled. In the photo below, on the right hand side,one can see that the end of the blank is supported by an angle block. I purchased the angle blocks on Amazon I believe they were about $65.00 for a set. They come in various angles and can be stacked to get accuracy to 1 degree.
Remove from the machine and check. We are looking for 110 degrees. Note, the location of the corner holes has been marked for the next operation.
The next step is spotting and drilling the holes in the corners. I have a set of spotting/countersink bits. Start by marking the location of the hole. In this case I use the intersection of two lines. Other times it may be a spot, or circle. The photo below shows a good sight picture. The shadow/reflection of the bit on the part should point directly to the center of the hole from two views 90 degrees apart. My mill allows me to bring the bit right down close to the part and holds it there while I make any fine adjustments. With this method, I can locate a hole within a few thousands of an inch. When the drill is turned on, the tip of the bit presents a point which aides precision. Then drill to final size.
The next operation is notching the ends so the flanges can be bent. Here, I am using a machinist square to mark the cuts. The blue marker is a fine line marker with a long tip, designed as a through-hole marker. Cheap and readily available through Amazon. I have an assortment of blue, black and red through hole markers.
Finally, I used tin snips to cut out the corner notches, and de-burr.
Then bend, starting with the short side and trial fit..
- flyguy0609
- Posts: 46
- Joined: Tue Aug 03, 2021 12:17 pm
Re: Stites Cleanex SNX-0414
Looks good! For the sheetmetal airplanes and gliders that Schweizer used to build, they worked to a 1/16" nominal tolerance IIRC.
Bryan Cotton
Poplar Grove, IL C77
Waiex 191 N191YX
Taildragger, Aerovee, acro ailerons
dual sticks with sport trainer controls
Prebuilt spars and machined angle kit
Year 2 flying and approaching 200 hours December 23
Poplar Grove, IL C77
Waiex 191 N191YX
Taildragger, Aerovee, acro ailerons
dual sticks with sport trainer controls
Prebuilt spars and machined angle kit
Year 2 flying and approaching 200 hours December 23
-

Bryan Cotton - Posts: 5489
- Joined: Mon Jul 01, 2013 9:54 pm
- Location: C77
Re: Stites Cleanex SNX-0414
We need a "LIKE" button for these posts! Following along ...
Dale
3.0 Corvair/Tailwheel
Dale
3.0 Corvair/Tailwheel
-

daleandee - Posts: 877
- Joined: Fri Feb 01, 2013 6:14 pm
Re: Stites Cleanex SNX-0414
Back to the airport today. Back to the horizontal stabilizer (HS). The last time I worked on the HS, I made and fit the root ribs and clecoed the HS frame together. When I went to cleco the tip rib The flanges on the right main spar channel and the tip rib were overlapping each other. The HS main spar is riveted, it is the correct length, just needed the corner notch lengthened 1/4 " . The photo below shows the corners milled and the flanges sniped.
Looks kind of ugly to me. The upper notch looks quite different than the lower notch. When the part was milled, it had an HDPE channel block in the center for support and it was mounted on the end mill with the side facing the camera facing down. Starting with the mini Dremel, followed by the bastard file, the the mill file and ending with 400 grit emery cloth ( the insides of the corners are a pita to get).
In a few minutes, it looks like this:
Next on the agenda, adding the HS skin into the mix. Cleco the HS back together, and add the wing skins. I use a combination of Sonex preformed & drilled along with parts I fabricated. All of the factory matched parts were drilled to plans previously. This assembly was to check the fit and location of the builder fabricated parts, specifically the root ribs and the main spar channels.
Round 1. I marked the location of the mfg holes in the skin to the channels with a through hole blue marker. Then take the skin off and see how it looks. The main spar channels looked good, the left HS root rib looks good. The right hand HS root rib is off center. Too close to the edge to accept.
Round 2 I removed the offending rib and put a machinists square on it and straightened it up. Cleaned off the blue marks and put it back together. This time I used a Red through hole marker. Took photos this round. The HS main spar channels :
Here I'm measuring the hole clearance from the edge with the tang on my calipers. I built a jig for drilling pilot holes in piano hinges. Lets see how that works:
. The spacing is spot on, I"ll have to double check the edge clearances on the hinge though.
Checked the offending HS root rib......The variance was somewhat better and consistent, but still unacceptable.
Round 3 Measured the angles on the attach angles.
Looks ok.
Round 4. No photos, Made sure the attach angles are square to the spar. No issues there.
Round 5. This is getting, shall we say, interesting?. Everything is square, validated by both the consistency of the variance and direct measurement. Somebody isn't in the right place.
It's not this guy.
The location for the attach angle on the main spar is measured from the center of a hole to the angles face. It is difficult to measure. I needed a pin gauge to extend, if you will, the hole to make measurement easier. Pin gauges are very useful. At work I have a set which goes from .005" to 1.00" on .001 increments.
For our purposes, we don't need that. I use my drill bit set as pin gauges. I usually calibrate (measure diameter) with my calipers. I pulled the micrometer out for this one.
It's .002" under the plans diameter of the hole. It will wiggle a bit, but work. We are looking for 7/8 " from angle face to the center of the hole.
The left side is good.
The right side?
Going to have to drill it out, fabricate new one.
What a long strange trip its been.
- flyguy0609
- Posts: 46
- Joined: Tue Aug 03, 2021 12:17 pm
14 posts
• Page 1 of 2 • 1, 2
Who is online
Users browsing this forum: No registered users and 25 guests
