

random user submitted photo
control surfaces
9 posts
• Page 1 of 1
control surfaces
As a novice, I'm in a "paralysis by analysis" moment in making control surfaces. I'm especially nervous about attaching the long hinge segments and keeping them straight. Can someone walk me through a recommended order of drilling, upsizing, and deburring the various ribs and hinges? Do I drill through both of the front surfaces (where they overlap) at the same time or individually? I've searched, looked at some blogs, and read some posts and I still feel like I need it spoon-fed to me more.
Also, it seem like a good idea to lay out and attach the hinges with them mated to the other half, so as to prevent binding. Is this true?
Andrew
Also, it seem like a good idea to lay out and attach the hinges with them mated to the other half, so as to prevent binding. Is this true?
Andrew
- N43WX
- Posts: 16
- Joined: Sun Jan 03, 2021 9:56 pm
Re: control surfaces
It can be scary to get started. Although others have successfully match drilled the hinges to the control surface as separated halves, I never do. They are much easier to keep straight when they remain attached to the other half of the hinge with the hinge pin.
It is also easier to:
Mark and the drill the hinges first, (#40 bit), the plans show the spacing; drill those holes on a drill press, then:
Clamp the control surface to the worktop, (keeps everything flat and square), then:
Clamp the pre-drilled hinge, (while attached to its other hinge half) to the control surface where shown on the plans. (Check the plans for dimensions).
Once the pre-drilled hinge is clamped to the work, you drill through the existing hinge holes and through the overlapping skins. (This is match drilling and is the best way to get everything lined up correctly. Use a #40 bit and Cleco with 3/32 Clecos as you go. When everything is drilled correctly, check for flatness and straightness, then, finally, you can updrill with a #30 bit, disassemble, deburr and rivet with the appropriate finish rivets.
Measure 6 times, drill once. Pay attention to the measurements on the plans and the drawings. Make sure you understand what they are asking. Once you do the first few holes....the rest are a breeze.
Lou Pappas
Phoenix, AZ
RV-7A Flying (2024)
Waiex B Turbo (2016)
RV-8 (2009)
Waiex Legacy 3300 (2007)
Hiperlight SNS-9 (1991)
Falcon Ultralight (1989)
Phoenix, AZ
RV-7A Flying (2024)
Waiex B Turbo (2016)
RV-8 (2009)
Waiex Legacy 3300 (2007)
Hiperlight SNS-9 (1991)
Falcon Ultralight (1989)
- pappas
- Posts: 352
- Joined: Wed Feb 15, 2017 11:27 am
Re: control surfaces
That is exactly what I needed to know to get started. Thank you.
- N43WX
- Posts: 16
- Joined: Sun Jan 03, 2021 9:56 pm
Re: control surfaces
I think I drilled the hinge to the top skin first, because I could clamp the hinge to the edge of the skin. Then I took the hinge off and transferred the holes. I'll update this post if I can find a link to my thread that seems helpful.
Edit:
Ruddervators:
viewtopic.php?f=39&t=578&start=30
Flaps, ailerons:
viewtopic.php?f=39&t=578&start=510
Edit:
Ruddervators:
viewtopic.php?f=39&t=578&start=30
Flaps, ailerons:
viewtopic.php?f=39&t=578&start=510
Bryan Cotton
Poplar Grove, IL C77
Waiex 191 N191YX
Taildragger, Aerovee, acro ailerons
dual sticks with sport trainer controls
Prebuilt spars and machined angle kit
Year 2 flying and approaching 200 hours December 23
Poplar Grove, IL C77
Waiex 191 N191YX
Taildragger, Aerovee, acro ailerons
dual sticks with sport trainer controls
Prebuilt spars and machined angle kit
Year 2 flying and approaching 200 hours December 23
-

Bryan Cotton - Posts: 5496
- Joined: Mon Jul 01, 2013 9:54 pm
- Location: C77
Re: control surfaces
I recommend you buy an alum 3 ft. yard stick and drill #40 holes on each inch mark. Use this as a drill guide to predrill the hinges.
OneX 107
N2107X
N2107X
- Onex107
- Posts: 506
- Joined: Mon Mar 24, 2014 6:44 pm
- Location: Peoria, IL
Re: control surfaces
N43WX wrote:Also, it seem like a good idea to lay out and attach the hinges with them mated to the other half, so as to prevent binding. Is this true?
Andrew
Andrew,
I'm not sure you need to do this extra step. Probably no harm, but as long as you are building on a flat surface you shouldn't need that.
Onex107 wrote:I recommend you buy an alum 3 ft. yard stick and drill #40 holes on each inch mark. Use this as a drill guide to predrill the hinges.
I believe the yardstick is also handy for getting the right positioning on the control surface. You lay it flat on the table against the control surface, and put the hinge loops on top of it.
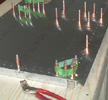
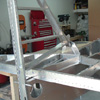
This is what I used to drill all my hinges:
Bryan Cotton
Poplar Grove, IL C77
Waiex 191 N191YX
Taildragger, Aerovee, acro ailerons
dual sticks with sport trainer controls
Prebuilt spars and machined angle kit
Year 2 flying and approaching 200 hours December 23
Poplar Grove, IL C77
Waiex 191 N191YX
Taildragger, Aerovee, acro ailerons
dual sticks with sport trainer controls
Prebuilt spars and machined angle kit
Year 2 flying and approaching 200 hours December 23
-

Bryan Cotton - Posts: 5496
- Joined: Mon Jul 01, 2013 9:54 pm
- Location: C77
Re: control surfaces
Haven't seen anyone mention it yet, so it may go without saying, but make sure you have the ribs clecoed in place before drilling the hinges to the skin, or the skin's overlap probably won't be correct.
Using a yardstick with predrilled holes is a "pretty good" idea, but not ideal. For one thing, there are hinges longer than 3' to consider. Another is the actual indexing of the hole spacing, and finally, the holes in the yardstick will tend to wallow-out with use.
It's quite easy to make a dedicated "hinge hole indexing tool" that will make repeatable holes in a hinge-half of any length.
PM me your email and I'll send you pictures of my set-up. FYI....I copied someone else's rig and their pictures may be here on this site somewhere.
- Area 51%
- Posts: 804
- Joined: Thu Feb 18, 2016 7:57 am
Re: control surfaces
Area 51% wrote:Haven't seen anyone mention it yet, so it may go without saying, but make sure you have the ribs clecoed in place before drilling the hinges to the skin, or the skin's overlap probably won't be correct.
Excellent point. I also shared an old email with N43WX and had mentioned having the ribs clecoed in, but didn't include that reason. I had forgotten.
I'm a big fan of drilling the hinge to the short flange, then later transferring the holes from the short flange to the long flange. Then even later cleco it all together and updrill.
I really liked building the control surfaces.
Area 51% wrote:FYI....I copied someone else's rig and their pictures may be here on this site somewhere.
Maybe two posts up?
Bryan Cotton
Poplar Grove, IL C77
Waiex 191 N191YX
Taildragger, Aerovee, acro ailerons
dual sticks with sport trainer controls
Prebuilt spars and machined angle kit
Year 2 flying and approaching 200 hours December 23
Poplar Grove, IL C77
Waiex 191 N191YX
Taildragger, Aerovee, acro ailerons
dual sticks with sport trainer controls
Prebuilt spars and machined angle kit
Year 2 flying and approaching 200 hours December 23
-

Bryan Cotton - Posts: 5496
- Joined: Mon Jul 01, 2013 9:54 pm
- Location: C77
Re: control surfaces
That wasn't there when I hit submit. But yeah.........something like that. Or exactly like that.
- Area 51%
- Posts: 804
- Joined: Thu Feb 18, 2016 7:57 am
9 posts
• Page 1 of 1
Who is online
Users browsing this forum: No registered users and 24 guests


