

random user submitted photo
Rocker Arm Studs?
7 posts
• Page 1 of 1
Rocker Arm Studs?
All -
I'm back on track with my Aerovee Turbo build, and got to the point of test-fitting the rocker arms today. Unfortunately that's when I realized that the heads did not have the studs pre-installed (which the video and the Manual indicate should be there already).
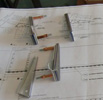
I rummaged through the box that the heads came in, and found a bunch of studs in some bubble-wrap. 4 of them appear like they might be the right stud for the job - can anyone confirm if these look like your AeroVee cylinder-head/rocker-arm studs?
In case they are, I've installed them in my heads and they seem to fit OK. I'm not sure how deep they're supposed to be installed, though. Here are a few photos of the studs and the rocker-arm assemblies temporarily pressed into place:
https://flic.kr/p/Ug18BC
https://flic.kr/p/UDtd2p
https://flic.kr/p/Tyyabf
https://flic.kr/p/Ug1aHG
Can any experienced Aerovee builder give me some feedback / guidance on these?
Thanks!
--Noel
- NWade
- Posts: 527
- Joined: Mon Aug 08, 2011 3:58 pm
Re: Rocker Arm Studs?
Noel,
My replacement heads also came with them out:
viewtopic.php?f=7&t=3232&start=20
Later in the thread there is a picture with them installed and they look the same.
My replacement heads also came with them out:
viewtopic.php?f=7&t=3232&start=20
Later in the thread there is a picture with them installed and they look the same.
Bryan Cotton
Poplar Grove, IL C77
Waiex 191 N191YX
Taildragger, Aerovee, acro ailerons
dual sticks with sport trainer controls
Prebuilt spars and machined angle kit
Year 2 flying and approaching 200 hours December 23
Poplar Grove, IL C77
Waiex 191 N191YX
Taildragger, Aerovee, acro ailerons
dual sticks with sport trainer controls
Prebuilt spars and machined angle kit
Year 2 flying and approaching 200 hours December 23
-

Bryan Cotton - Posts: 5493
- Joined: Mon Jul 01, 2013 9:54 pm
- Location: C77
Re: Rocker Arm Studs?
Those are the ones Noel! You got it right. Just twist them in as far as they'll go; they should bottom out into the threaded insert locations in the heads. By your pictures I'd say you did that as they look fine.
Your engine looks fantastic!
Your engine looks fantastic!
Mike Farley
Waiex #0056 - N569KM (sold)
Onex #245
Waiex #0056 - N569KM (sold)
Onex #245
- MichaelFarley56
- Posts: 1485
- Joined: Thu Jun 02, 2011 11:38 pm
- Location: Columbus, Ohio
Re: Rocker Arm Studs?
MichaelFarley56 wrote:Those are the ones Noel! You got it right. Just twist them in as far as they'll go; they should bottom out into the threaded insert locations in the heads.
Your engine looks fantastic!
Thanks, Michael and Bryan!
The studs never bottomed-out, though. The threads had a bit of interference to them when screwing them in, so I double-nutted them and used that to gently twist them into place until they reached the depth you see in the photos.
BTW, Bryan (and others) - For trimming the head studs, which some people really find a PITA to do on the engine itself (not to mention the metal filings it throws all over your engine), here's what I did:
I torqued the nuts to 10 ft-lbs, then gently double-nutted one of the studs that needed to be trimmed. I used the double-nut arrangement to unscrew that one stud from the engine block, took it over to the other side of my workshop, and trimmed off the excess with a Dremel. Then I wiped it down with a bit of alcohol/solvent (to clean off any metal dust), undid the double-nut arrangement, and reinstalled the stud onto the engine. I put the washer & nut back on, seating it down finger-tight. After doing this for all 3 studs on each head, I used the torque pattern shown in the assembly manual to re-torque all of the nuts to 10 ft-lbs. Worked like a charm! The only grumble-worthy moments were with the studs what retain one end of each super-tin. The friction from the tin meant that I couldn't simply thread the stud into the block by hand. So I used one hand to pull the corner of the super-tin down (to free up the stud) while I worked it into the block with the other hand.
I'm now using the same procedure for the head studs that interfere with the rocker arms. Tedious, but after building the airframe I'm no stranger to assembling something, then taking it apart once or twice! :-)
Thanks again,
--Noel
- NWade
- Posts: 527
- Joined: Mon Aug 08, 2011 3:58 pm
Re: Rocker Arm Studs?
Noel, regarding the cylinder-head studs: I notice that the threaded holes for several of these go completely through to the inside of the engine case; however, there is no mention in the AeroVee manual or video about using sealant on the associated studs. Seems to me that, without sealant, one would expect to see oil seepage around them. Tom Wilson's book, How to Rebuild Your Volkswagen Air-Cooled Engine, (recommended by Sonex) specifies the application of Permatex 3H to the stud threads prior to installation.
Don
Onex 0095
N464D (reserved)
Onex 0095
N464D (reserved)
-

Don_P - Posts: 39
- Joined: Thu Apr 11, 2013 1:33 pm
- Location: Seabrook, Texas
Re: Rocker Arm Studs?
Update to my last post: I posed the question about sealant on the head studs to Kerry Fores at Sonex. His response was that no sealant was required, so apparently Sonex has not experienced any problems in this area.
Don
Onex 0095
N464D (reserved)
Onex 0095
N464D (reserved)
-

Don_P - Posts: 39
- Joined: Thu Apr 11, 2013 1:33 pm
- Location: Seabrook, Texas
Re: Rocker Arm Studs?
Has something similar once on the way out to Oshkosh. Landed to refuel and couldn't get it to restart. I ended up pulling the mixture almost all the way lean and was able to get it to catch. After it caught I went back rich and it started normally. I don't know why but it worked.
gclub
gclub
- harry56
- Posts: 4
- Joined: Wed Jul 19, 2017 4:33 am
7 posts
• Page 1 of 1
Who is online
Users browsing this forum: No registered users and 88 guests


