

random user submitted photo
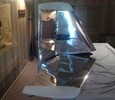
How to cut the canopy
18 posts
• Page 2 of 2 • 1, 2
Re: How to cut the canopy
Michael my first msg must not have gone through, again, what attachment did you use to cut the canopy. I used the Dremel on my windshield and it worked okay but I'd like to try the tool you used. Thanks
David
David
- onex28
- Posts: 220
- Joined: Thu Jun 09, 2011 9:43 pm
- Location: MN
Re: How to cut the canopy
Hi David,
I can't remember for sure if I bought it separately or if it came with the tool, but I used something just like this:
http://www.harborfreight.com/half-moon- ... 67279.html
I would fit the canopy, mark a new line with painters tape, and then take the canopy off and prop it up on saw horses to stabilize it to cut. Then, as soon as the rough cut was made, smooth it with some sandpaper.
Mike Farley
Waiex #0056 - N569KM (sold)
Onex #245
Waiex #0056 - N569KM (sold)
Onex #245
- MichaelFarley56
- Posts: 1485
- Joined: Thu Jun 02, 2011 11:38 pm
- Location: Columbus, Ohio
Re: How to cut the canopy
Frank, I got the drills from ACS
http://www.aircraftspruce.com/catalog/m ... idrill.php
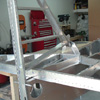
Kieth, there are no rivets in the canopy. They are counter sunk M3 screws. The lower row is drilled and tapped ino the lower rails. The wide strips are in fact two identical pieces per side with the outer pieces dimpled. There is a piece 1/2" x 1/8" aluminium with the screw holes countersunk. This is sandwiched between the strips using the bottom row of screws, this piece is just used as a spacer the thickness of the canopy. The canopy is fastened between the strips using the upper row of slightly loosened screws and nyloc nuts. The canopy sides are cut 1/2" shorter than the plans say and almost rests on the aluminium strip. There is a small gap.
Here is a photo that might help my explanation
Steve 892
- sonex892
- Posts: 169
- Joined: Fri Jun 03, 2011 4:49 am
- Location: Port Macquarie Australia
Re: How to cut the canopy
Thanks Michael, I have one.
David
David
- onex28
- Posts: 220
- Joined: Thu Jun 09, 2011 9:43 pm
- Location: MN
Re: How to cut the canopy
Ok, I think I understand the two rows of screws (not rivets). The next question I have is why did you do it this way? The plans have you putting the canopy between the square frame tube and the .032 strip and sandwiching it all together with screws or rivets. What is the advantage of cutting the canopy shorter and attaching it above the frame rail?
Keith
Keith
- kmacht
- Posts: 772
- Joined: Tue Jun 21, 2011 11:30 am
Re: How to cut the canopy
.
Kieth
Doing it that way allows a greater edge distance to the mounting holes. Less stress here hopefully means, less chance of cracking. The latching system is as per plans
Steve 892
kmacht wrote: What is the advantage of cutting the canopy shorter and attaching it above the frame rail?
Kieth
Doing it that way allows a greater edge distance to the mounting holes. Less stress here hopefully means, less chance of cracking. The latching system is as per plans
Steve 892
- sonex892
- Posts: 169
- Joined: Fri Jun 03, 2011 4:49 am
- Location: Port Macquarie Australia
Re: How to cut the canopy
Ok, quick update. I made the initial cuts on the canopy last night with the bandsaw. It was much easier than I thought it was going to be. The material goes through the saw like butter. I think that my dad had the harder job of trying to support the canopy so it was flat to the table than I did trying to keep it on line. I did notice a few things that I am going to change when I make the final cuts. The first is that the canopy has to be flat where it goes through the blade. When I got towards the end of the cut the canopy was slightly off of the table and ended up chipping the edge of the canopy. The chips were small and easily sanded out but still not something I wanted to deal with. The other oberservation is that I think my saw blade is too agressive. It was very easy to start going off line as the saw just chewed right through the material. I was using a wood cutting 8tpi blade. I bought an 18tpi blade today and am going to give it a try tomorrow night when I make the next cuts. Also, the new material seemed to be very resistant to cracks. I took a piece of the scrap and bent and twisted it into all sorts of shapes and it didn't crack. This was without even sanding the sides of the scrap smooth. We will see how it does once it gets some holes in it but for at least the initial cutting the material doesn't seem to want to crack easily.
Keith
#554
Keith
#554
- kmacht
- Posts: 772
- Joined: Tue Jun 21, 2011 11:30 am
Re: How to cut the canopy
Night #2 of cutting the canopy. I switched the bandsaw blade to an 18tpi blade and it worked much better. There was virtually no chipping on the edges of the canopy no matter if it was flat to the saw or not. I got both the front side and rear side cut and initially sanded. The front fits near perfectly but for some reason my line on the back side was too big and will need some more trimming. I have found that the belt sander with a 120 grit paper does a good job of sanding the material the last 1/8" down to the cut line. I then followed that up with 150 grit on an orbital palm sander and then finally with a fine grit sanding sponge. The result of that process is a perfectly clear and smooth edge. The sanding belt leaves a semi rough edge and a little bit of melted plastic. The orbital sander removes those rough spots and the plastic to make the edge smooth and the sanding sponge rounds the edges slightly and polishes the edge back clear. It takes me about a 45 minutes to cut, sand, and polish each edge.
I also did some testing with different drill bits on the new material. The first was with a standard drill bit with the material backed up by a piece of wood. It resulted in no cracks. I next tried a standard drill bit with the material unsupported and slightly bent to simulate the side edges of the canopy. It resulted in a small crack/chip on the back edge of the hole just like John descibes in his canopy fitting video. The next trial was with a regular drill bit that had been dulled. It resulted in no cracks either supported or unsupported and bent. What I didn't like though is that once the bit broke through it wanted to pull the drill in because of the flutes on the side of the drill grabbing. Finally I tried a unibit. This resulted in no cracks either supported or unsupported and bent. It also didn't seem to pull at the material and more or less scraped its way through. I think this is going to be the method I use when drilling my holes. Also, as a note it was only around 55 to 60 degrees in the shop last night when I was doing the drill testing. I plan on running the heater to get it up at least to the 80's when doing the acutal canopy drilling.
Keith
- kmacht
- Posts: 772
- Joined: Tue Jun 21, 2011 11:30 am
18 posts
• Page 2 of 2 • 1, 2
Who is online
Users browsing this forum: No registered users and 92 guests


