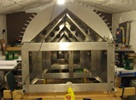


random user submitted photo
Tail Spars
4 posts
• Page 1 of 1
Tail Spars
Hey Everyone,
I've been fabricating the tail spars from hell? Think thats what some builders are calling them. T06-03 is the one I have a question with. I'm using a router with 1/2" Dia x 1" long bit with a bottom bearing (face trim bit) to clean off the half angle to get the 3/16 flat area required in the plan. The first two attempts at making these parts was a mess. I had used a 2x4 clamped to the the back part of the angle to rest the router on and square the router to the surface, big mistake as the 2x4 was not square. and chopped off more then 3/16 thickness of the edge of the piece, Fail. Second attempt I used a piece of cutoff 2.5 x 2.5 aluminum angle clamped to the piece to be routed. this worked out well as long I kept the router square and took small steady bites at a time. It cam out nearly perfect, However I now have only two spot on the part that the router took a bit to much out ( not square ). After filing and buffing things up one spot is 1/8" wide and only 11/64 thick and the other spot is the same 1/8 width 23/128 thick. I still need to cut the V's on each side of the part. Will the few 32nds make a difference? Can I get away with using this part and continue fabricating it or should i try a third attempt. And is there a better way to get the angle down other then a router. I had clamped the part in a vise then clamped the scrap angle to the back of it facing the opposite direction. Any tips on the part from hell =)
Thanks,
Rob
- FlyingPilot
- Posts: 14
- Joined: Tue Apr 05, 2016 1:38 pm
Re: Tail Spars
Hi Rob, I don't think any of us are qualified to say whether the part is OK or not, and even if you contact Sonex I think they will just say that the part must be made to the plans. It even depends on where the gouge is - near the bend at the root is bad. Most people make these using just a drill, file and band-saw. Drill a hole to get a neat radius, band-saw up to the hole and then file the edges. It's surprisingly quick to do. A small sanding drum in a drill will tidy up the edges and radii nicely and get all the scratches going in the right direction. If you do decide to make another part, you haven't lost out completely. You can use the first ones to try out the bend.
Peter
Sonex 894
Yes, it was scratch built
Peter
Sonex 894
Yes, it was scratch built
- peter anson
- Posts: 558
- Joined: Thu Jul 31, 2014 2:34 am
- Location: Mount Macedon, Australia
Re: Tail Spars
peter anson wrote:Hi Rob, I don't think any of us are qualified to say whether the part is OK or not, and even if you contact Sonex I think they will just say that the part must be made to the plans. It even depends on where the gouge is - near the bend at the root is bad. Most people make these using just a drill, file and band-saw. Drill a hole to get a neat radius, band-saw up to the hole and then file the edges. It's surprisingly quick to do. A small sanding drum in a drill will tidy up the edges and radii nicely and get all the scratches going in the right direction. If you do decide to make another part, you haven't lost out completely. You can use the first ones to try out the bend.
Peter
Sonex 894
Yes, it was scratch built
That's how I made them, drill holes with spade drills (and lots of candle wax to lubicate), then bandsaw, belt sander, vixen file, metal files, sandpaper, dremel with sanding wheel & scotch-brite wheel, scotch-brite pads:
http://www.mykitlog.com/users/display_l ... 13&row=130
http://www.mykitlog.com/users/display_l ... 14&row=129
Be aware!
If you decide to bend the angle using a 1" steel pipe as I've done seen in the pictures in my log, make sure you make a "slot" in the pipe for the other leg of the angle, otherwise it will move the pipe out of position outwards as you're bending the material. (Don't ask how I know), I drew a picture of the problem when it occurred:

Michael
Sonex #145 from scratch (mostly)
Taildragger, 2.4L VW engine, AeroInjector, Prince 54x48 P-Tip
VH-MND, CofA issued 2nd of November 2015
First flight 7th of November 2015
Phase I Completed, 11th of February 2016
http://www.mykitlog.com/rizzz/
Sonex #145 from scratch (mostly)
Taildragger, 2.4L VW engine, AeroInjector, Prince 54x48 P-Tip
VH-MND, CofA issued 2nd of November 2015
First flight 7th of November 2015
Phase I Completed, 11th of February 2016
http://www.mykitlog.com/rizzz/
- rizzz
- Posts: 869
- Joined: Tue Jun 21, 2011 2:07 am
- Location: Wollongong, NSW, Australia
Re: Tail Spars
Thanks for the replies and tips fellas, I have been using the Shopsmith table saw with an 80 tooth blade to take down the angle to within 1/8" of the surface, then routed the rest. I'm going to do the next piece the the same and get it closer to the surface with the table saw then file/sand the rest of the way. I might attempt using a router table on a test piece as for the previous two attempts I was holding the router. The 1/2" wide router bit did a perfect job leaving a 32nd bump to be filed down and a perfectly clean 1/4" radius, however the trick is keeping the router bit square to the piece to eliminate the gouges which I think a router table will help do. The table saw with the 80 tooth blade cuts like butter and works great for long straight cuts and leaves a smooth edge with minimal after prep.
Michael I have been viewing your build log and videos for a long time and they have been very helpful and inspiring, thank you for those Mate =). I'll definitely put a 3/16" notch in the pipe for the bend, That makes total sense as it tucks the pipe in closer to the 1/4" radius and closer to the apex of the bend, as well as keeping it straight and steady during the bend. Thanks for the illustrations!
Rob
- FlyingPilot
- Posts: 14
- Joined: Tue Apr 05, 2016 1:38 pm
4 posts
• Page 1 of 1
Who is online
Users browsing this forum: No registered users and 39 guests


