
random user submitted photo
Scott's Sonex 1629 - N629SX
Re: Scott's Sonex #1629 - Progress
Since last Sunday I have started working on the wind screen fitting and installation. I first had to get the bow to fit right. The "pre-bent" bow from Sonex leaves a lot of bending still to be done at the ends. Used my CAD skills and redrew the radius and plotted a template full scale, then used some solid wood block screwed down on both sides for bending blocks.
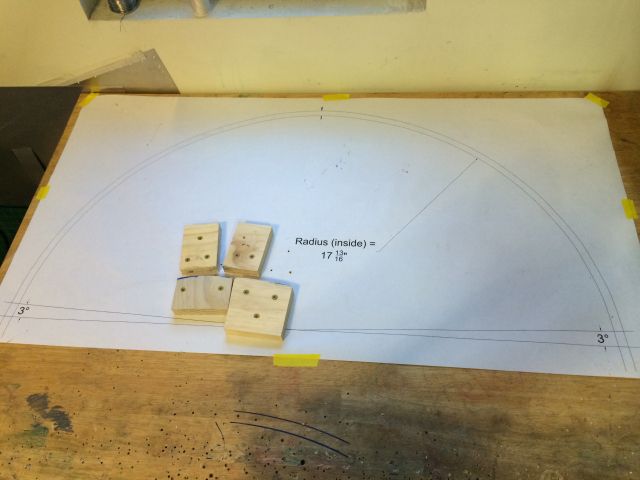
Once I got that to fit into the longeron holes, I started to see what trimming was required on the lexan.
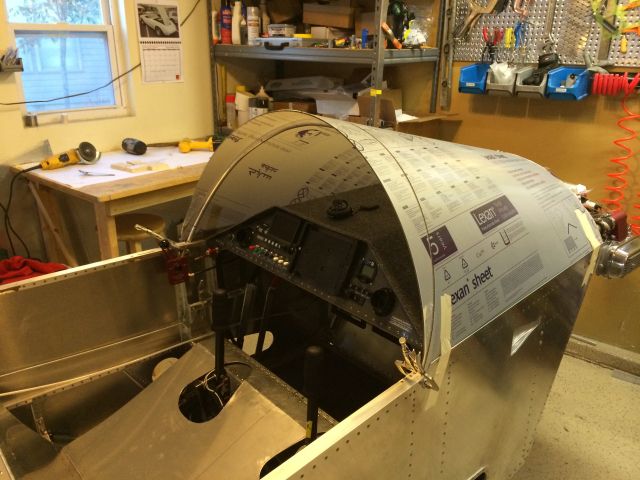
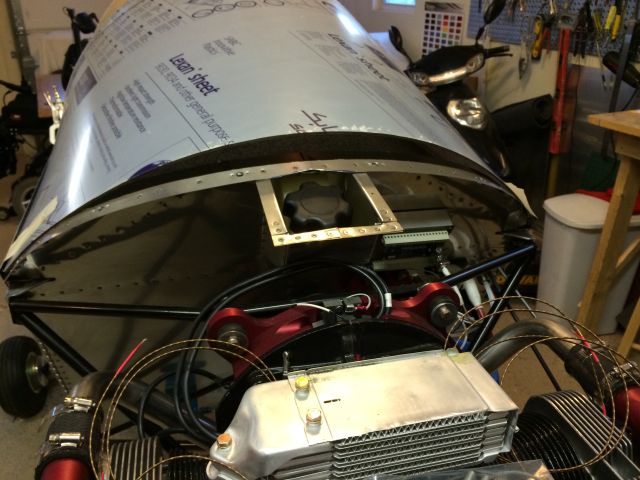
Pretty much as others have done:
1. Left the rear width alone, trimmed the rest of the material away at the routered location Sonex provides.
2. Marked up from the front sides about 5/8" on each side and trimmed at a taper from front to rear (caution to others, don't start off by trimming this much away). I thought it would be okay but once I trimmed this much off thought I was in trouble. I moved the rear of the windscreen up to the end of the fuselage extended side so the long portion of the windscreen was hanging over the upper firewall, and I was okay on the width (remember the windscreen panel is essentially a trapezoid with the sides tapering from rear to front).
3. Got the rear bow and rear edge to play well together, taped the sides down tight to the fuselage, and marked the front edge 1" in from the front lip of the upper firewall flange (this gives space for the cowling to attach).
4. Sanded all of the cut edges with a belt sander, the flexible foam sanding pads with 120 grit and the. 320 grit.
5. Reinstalled the wind screen one more time, made sure everything looked good, and then drilled the holes for the rear bow attach point through the fuselage / upper longeron.
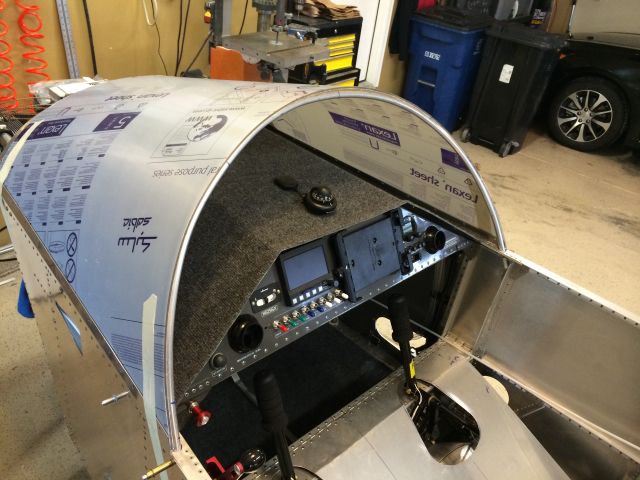
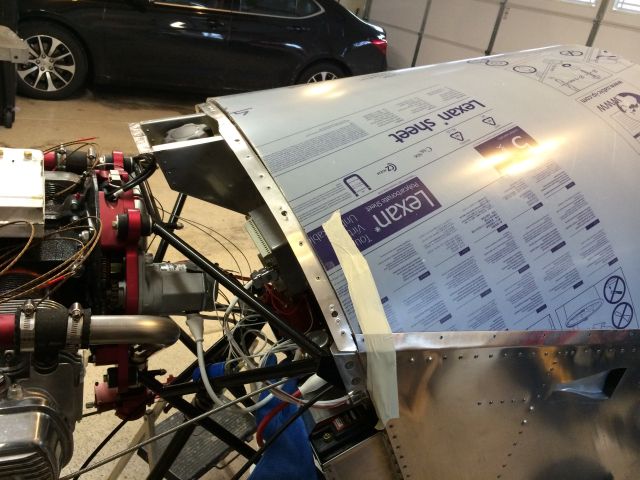
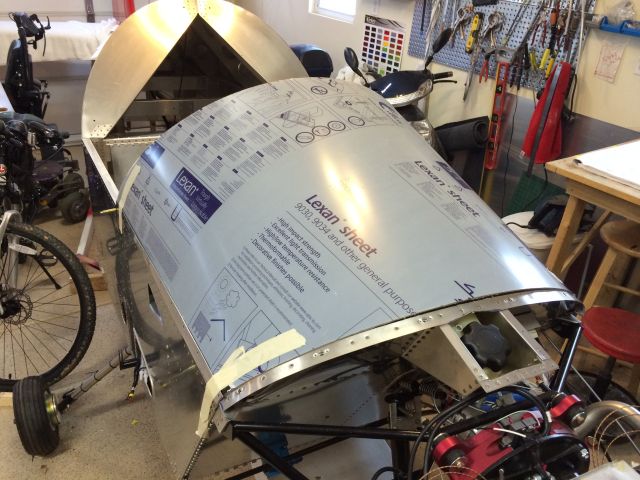
I may have a little fine tuning to do with the front, but when I push down on the middle I can get the edges to squeeze further down at the sides, it's a bit of a 3D puzzle since this is a flat piece of lexan twisting into a semi-complex curve...
It feels more like a airplane every time I sit inside the cockpit.
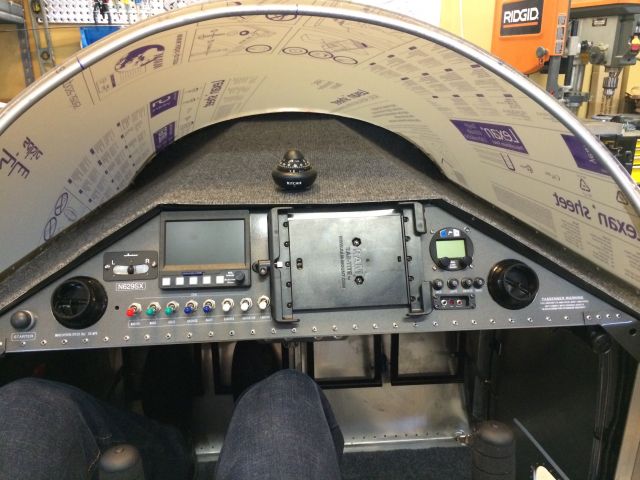

Once I got that to fit into the longeron holes, I started to see what trimming was required on the lexan.


Pretty much as others have done:
1. Left the rear width alone, trimmed the rest of the material away at the routered location Sonex provides.
2. Marked up from the front sides about 5/8" on each side and trimmed at a taper from front to rear (caution to others, don't start off by trimming this much away). I thought it would be okay but once I trimmed this much off thought I was in trouble. I moved the rear of the windscreen up to the end of the fuselage extended side so the long portion of the windscreen was hanging over the upper firewall, and I was okay on the width (remember the windscreen panel is essentially a trapezoid with the sides tapering from rear to front).
3. Got the rear bow and rear edge to play well together, taped the sides down tight to the fuselage, and marked the front edge 1" in from the front lip of the upper firewall flange (this gives space for the cowling to attach).
4. Sanded all of the cut edges with a belt sander, the flexible foam sanding pads with 120 grit and the. 320 grit.
5. Reinstalled the wind screen one more time, made sure everything looked good, and then drilled the holes for the rear bow attach point through the fuselage / upper longeron.


I may have a little fine tuning to do with the front, but when I push down on the middle I can get the edges to squeeze further down at the sides, it's a bit of a 3D puzzle since this is a flat piece of lexan twisting into a semi-complex curve...
It feels more like a airplane every time I sit inside the cockpit.

Scott Meyer
Sonex 1629 - Sold...9/2019
Sonex 1629 - Sold...9/2019
- ScottM-Sonex1629
- Posts: 441
- Joined: Sun Aug 11, 2013 10:00 pm
- Location: Dublin, Ohio (MRT)
Re: Scott's Sonex #1629 - Progress
Looks great. One tip I acted on based on a recommendation from another builder was to incorporate additional screw holes in the forward strap. What I found is that the windscreen will bulge up about 1/16 to 1/8 between the forward screws and if you incorporate some extra screws it helps to control this...and like everything else, it's easier to do now than later.
Frank Alvarez
Sonex #800, Aerovee 2.1
Scratch Building (working on Cowl)
Sonex #800, Aerovee 2.1
Scratch Building (working on Cowl)
- falvarez
- Posts: 143
- Joined: Wed Sep 28, 2011 2:30 pm
- Location: Middleburg, FL
Re: Scott's Sonex #1629 - Progress
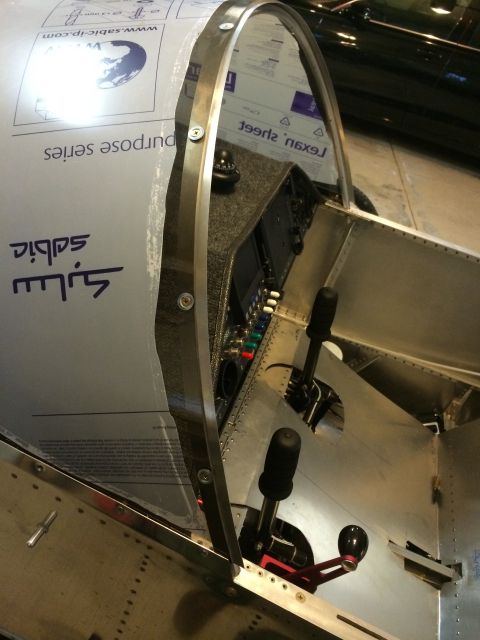
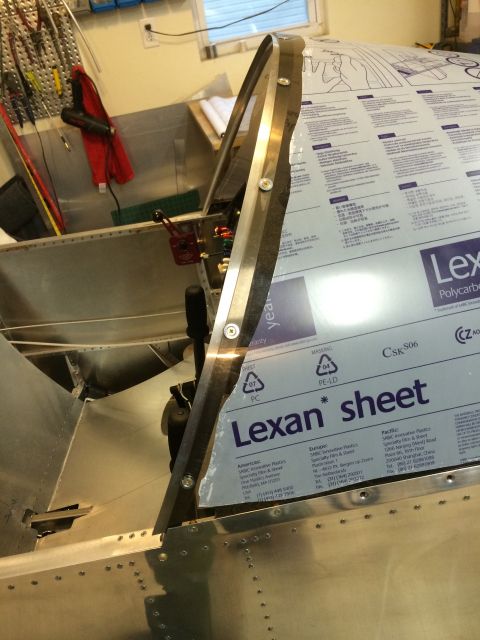
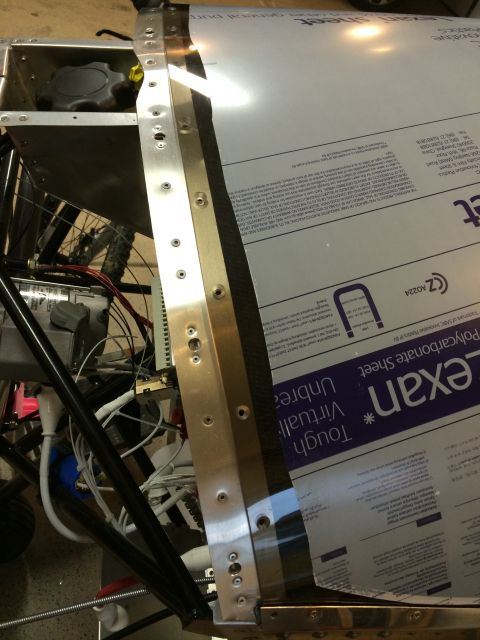
Windscreen is almost done. Completed the trimming, drilling, countersinking, etc. Not a fun assembly...which means the canopy will be even less fun :(
Several struggles with the fitment, mostly due to my process of installing the bow strap last after drilling the bow and windscreen. Got it to all fit back into place today and the rear bow is screwed together.
Like other builders, I found the countersunk machine screws called out on the plans are too short for proper thread engagement on the elastic nuts. Ordered more of the '50s and extra nuts and tinnerman washers (since I added extra screw holes for the firewall lip). Once hardware arrives I can finish this task.


Scott Meyer
Sonex 1629 - Sold...9/2019
Sonex 1629 - Sold...9/2019
- ScottM-Sonex1629
- Posts: 441
- Joined: Sun Aug 11, 2013 10:00 pm
- Location: Dublin, Ohio (MRT)
Scott's Sonex #1629 - Progress
Looking great Scott!
Robbie Culver
Sonex 1517
Chicagoland
Tails and Wings complete - finishing fuselage.
N1517S reserved
Robbie Culver
Sonex 1517
Chicagoland
Tails and Wings complete - finishing fuselage.
N1517S reserved
Robbie Culver
Sonex 1517
Aero Estates (T25)
First flight 10/10/2015
375+ hours
Jabiru 3300 Gen 4
Prince P Tip
Taildragger
N1517S
Sonex 1517
Aero Estates (T25)
First flight 10/10/2015
375+ hours
Jabiru 3300 Gen 4
Prince P Tip
Taildragger
N1517S
-

Sonex1517 - Posts: 1670
- Joined: Fri Jun 03, 2011 10:11 am
- Location: T25 Aero Estates, Frankston, TX
Re: Scott's Sonex #1629 - Progress
That is awesome Scott! Keep the heat on, I'm catching up!
Bryan Cotton
Poplar Grove, IL C77
Waiex 191 N191YX
Taildragger, Aerovee, acro ailerons
dual sticks with sport trainer controls
Prebuilt spars and machined angle kit
Year 2 flying and approaching 200 hours December 23
Poplar Grove, IL C77
Waiex 191 N191YX
Taildragger, Aerovee, acro ailerons
dual sticks with sport trainer controls
Prebuilt spars and machined angle kit
Year 2 flying and approaching 200 hours December 23
-

Bryan Cotton - Posts: 5492
- Joined: Mon Jul 01, 2013 9:54 pm
- Location: C77
Re: Scott's Sonex #1629 - Progress
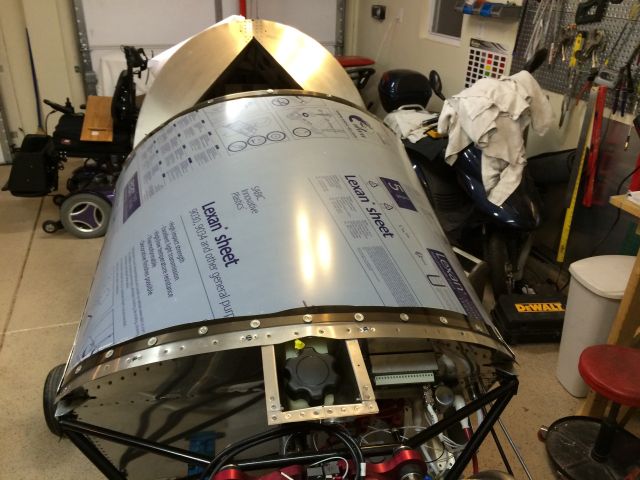
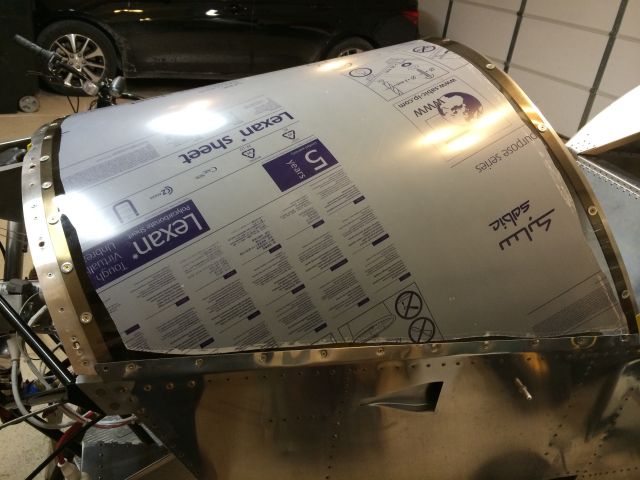
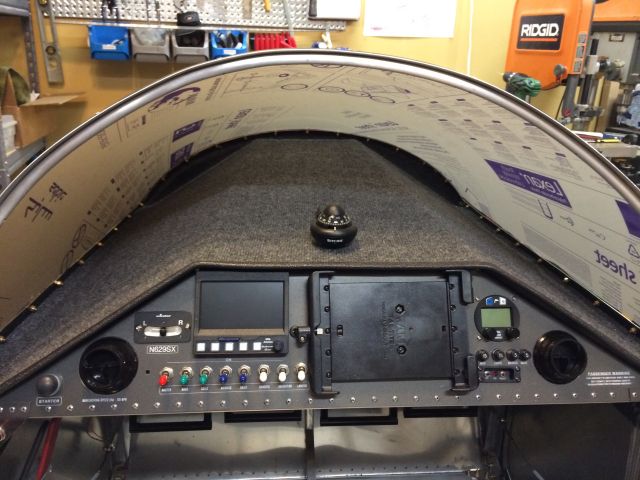
Windscreen is bolted on now...time to move on to the canopy frame! Or maybe the cowling? Decisions...


Scott Meyer
Sonex 1629 - Sold...9/2019
Sonex 1629 - Sold...9/2019
- ScottM-Sonex1629
- Posts: 441
- Joined: Sun Aug 11, 2013 10:00 pm
- Location: Dublin, Ohio (MRT)
Re: Scott's Sonex #1629 - Progress
Almost have the canopy frame finished. Both front and rear bows have been trimmed to length. The front required quite a bit of re-bending to get the radius to match the windscreen bow. The rear fit much better and didn't take long to get correct. The powder coated canopy corner fame connectors need to have the powder coat nearly completely removed to fit inside of the bow hoop and 1/2" square side frames. I ended up using the torch and wire brush method to remove the PC, then once done fitting and updrilling the rivet holes, sprayed the piece with primer, and aluminum color paint. I'm leaving my canopy frame in the natural aluminum finish.
I made a modified hook angle latch using 2.5" material to get an extra position in there to keep the canopy slightly open while taxing, etc on the ground.
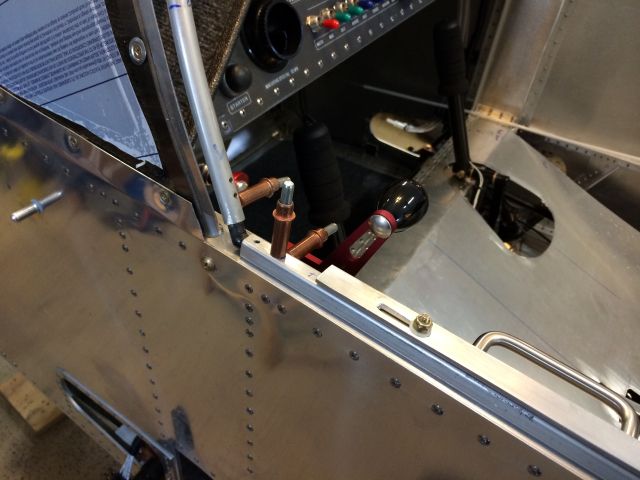
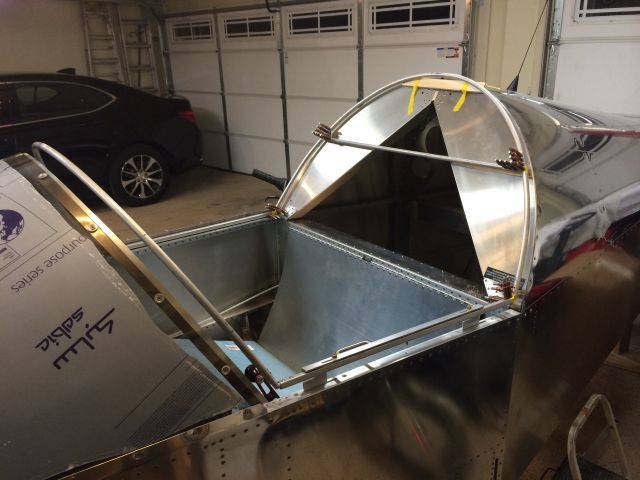
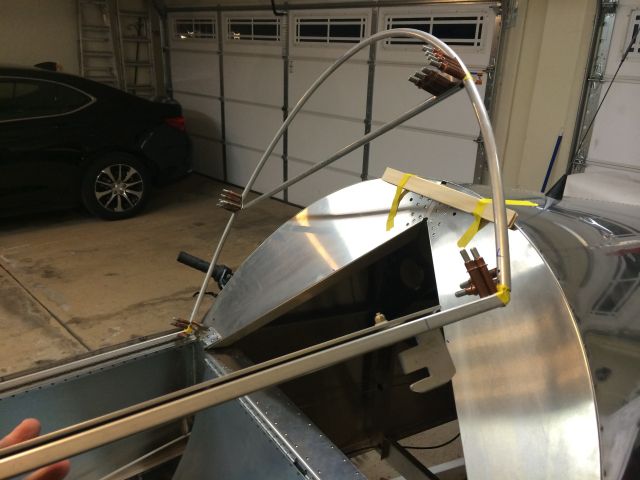
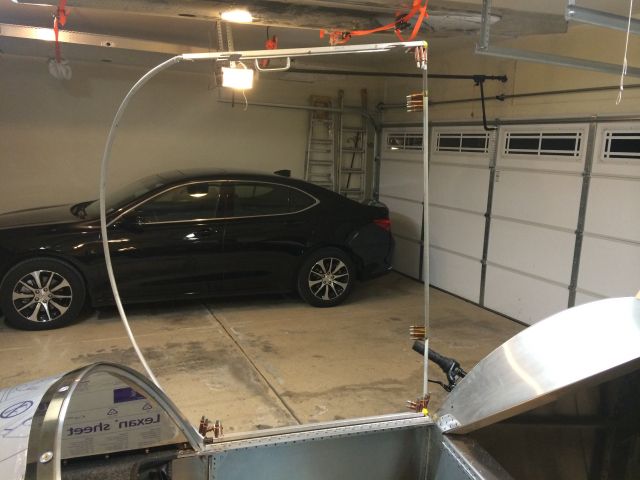
I made a modified hook angle latch using 2.5" material to get an extra position in there to keep the canopy slightly open while taxing, etc on the ground.


Scott Meyer
Sonex 1629 - Sold...9/2019
Sonex 1629 - Sold...9/2019
- ScottM-Sonex1629
- Posts: 441
- Joined: Sun Aug 11, 2013 10:00 pm
- Location: Dublin, Ohio (MRT)
Scott's Sonex #1629 - Progress
Lookin' great Scott!!
Robbie Culver
Sonex 1517
Aero Estates (T25)
First flight 10/10/2015
375+ hours
Jabiru 3300 Gen 4
Prince P Tip
Taildragger
N1517S
Sonex 1517
Aero Estates (T25)
First flight 10/10/2015
375+ hours
Jabiru 3300 Gen 4
Prince P Tip
Taildragger
N1517S
-

Sonex1517 - Posts: 1670
- Joined: Fri Jun 03, 2011 10:11 am
- Location: T25 Aero Estates, Frankston, TX
Re: Scott's Sonex #1629 - Progress
Canopy frame is done...
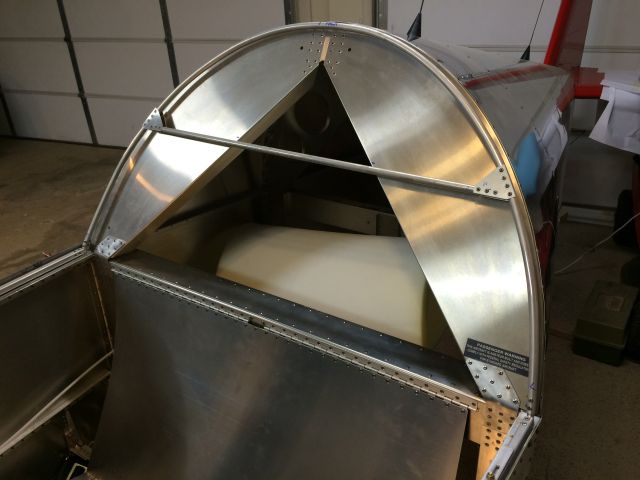
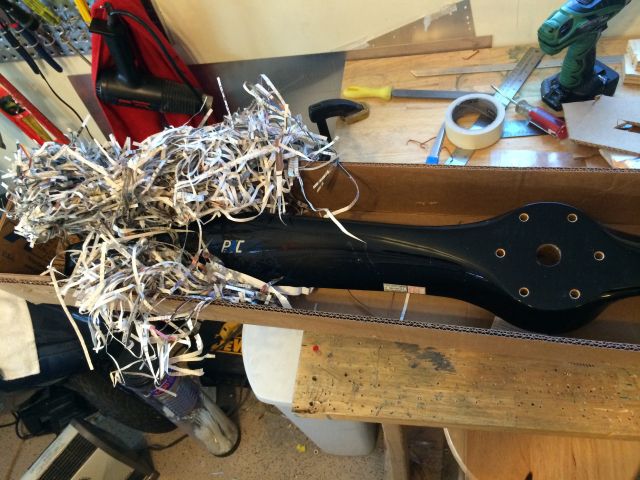
Package from Prince arrived yesterday (finally). New P-tip carbon fiber prop...54x44
I'm mailing into the FAA my registration package today!
Also spent some time writing out a detailed to do list which covers all remaining construction items like cowling/baffles/remianing FWF items and final prep before move to airport and A/W inspection.

Package from Prince arrived yesterday (finally). New P-tip carbon fiber prop...54x44

I'm mailing into the FAA my registration package today!
Also spent some time writing out a detailed to do list which covers all remaining construction items like cowling/baffles/remianing FWF items and final prep before move to airport and A/W inspection.
Scott Meyer
Sonex 1629 - Sold...9/2019
Sonex 1629 - Sold...9/2019
- ScottM-Sonex1629
- Posts: 441
- Joined: Sun Aug 11, 2013 10:00 pm
- Location: Dublin, Ohio (MRT)
Who is online
Users browsing this forum: No registered users and 10 guests


