

random user submitted photo
Substandard CCC-44 Cherry Rivets
Forum rules
Lessons-learned submissions follow a standardized format designed to identify the issue, draw out the relevant factors and present useful guidance to others facing a similar situation. The submitter answers the following 5 questions:
1) What went wrong (or right), and why?
2) What were the shortcomings, and why did they exist?
3) What actions were taken to fix the problem?
4) What preventive actions should be taken into account for future efforts?
5) What overall recommendations should be made for future projects?
The length of the write-up and amount of detail presented are left up to each individual. Some lessons learned can be perfectly conveyed in a few simple sentences, while others will require much more. The goal is to be as clear and succinct as possible, not to generate literary masterpieces!
All posts submitted to this forum are held in a review queue for approval by a moderator. Information in the posts will be reviewed, vetted, and modified as needed before going public. Additionally, any replies that are submitted would also be reviewed to ensure they add value and remain on topic. This will avoid normal threat drift of general discussions.
1 post
• Page 1 of 1
Substandard CCC-44 Cherry Rivets
Identified a substandard batch of rivets and what I did about it. Lesson to avoid sub-standard rivets.
---------
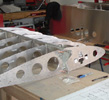
In late April 2021 I ordered a bunch of CCC-44 rivets from Aircraft Spruce. I was performing a repair in the wing leading edge skin using the methodology for a "Stressed Skin Repair" outlined in AC_43.13-1B which calls for a doubler plate and staggered rows of 1" rivets.
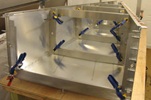
With the job all drilled, deburred, dimpled, Scotchbrighted and Primed - I clecoed the whole thing back together to start riveting. Lots of extra Cleco's around the tight nose bend.
I carefully riveted the job so that every second hole was filled between the Clecos. With the job all now held by the in-between rivets - Clecos out and fill in the rivets where the Clecos had been.
At which point things did not go well. The in-between rivets were not pulling correctly. It had gone fine when I was applying the doubler plate to the outside of the hole. But filling in with the patch - Rivet mandrels were breaking deep below the surface of the rivet. With the mandrel not pulled up to the surface - I had doubts about the shear strength of the job - which comes from the rivet being filled with mandrel. Test drilling out of these rivets confirmed they were not firmly squeezed - too many just immediately "spun" on the drill tip.
Then I realized that the second pass with the "in-between" rivets had been from a different bag of rivets. Spruce had provided the order in two batches which came from different warehouses. Just to confirm my suspicions - I set the job up on some scrap and watched the hidden side of the rivet to see what was happening. No matter how perfectly square I was pulling the rivets at exactly the same pull pressure with the electric riveter - the back of the rivets were not deforming evenly. I mean they never do pull perfectly evenly - but these were curling over significantly to one side and the mandrel would then fail deep inside.
Contacted Spruce. I don't blame them for being a little skeptical. I had used all the "good to me" rivets in my first passes - so I was struggling to get a comparison on my test job. They had me measure the "bad" rivets to confirm they had sent the correct thing in the labelled bag. They had. They wanted details of the job, thicknesses being riveted together, methodology, tools used, pressures used. They then sent me replacement rivets from a batch that was different than the "bad" rivets. I also got an RMA to send back the remaining bad rivets.
I set up the same test with scrap and tried the new rivets with the same electric riveter and pressure. Rivets pulled evenly with almost no curl and broke off correctly at the surface. Transferred job to the repair on the plane and the rivets all pulled correctly. (So I wasn't crazy). Sent Spruce pictures of how much better the replacement rivets had worked.
So this is a long winded way of saying:
- There are some bad rivets out there
- Test your rivets on some scrap before using in production
- If you have Cherry rivets and you can't see the tip of the mandrel where it broke at the surface - you might want to investigate further.
--
OK - I know - you all want to know - why was I having to do this repair? We had all decided to stop flying / jumping / giving helicopter tours. A not remotely forecast clear air squall line came through and we all aborted. I got down fine - head to wind. But on the back taxi downwind - blown clean around on the taxiway as the plane weather vaned. Even taxiing dead slow, controls correctly set and with differential brakes - she was going to weather vane and did. A taxiway light lost big time. I dented the skin and pooched a nose rib. Main spar was fine - skin only deformed the first 3" in from the leading edge. Darn it!
Took wing off plane - brought it home. Repaired in garage over a few nights and back to plane. Down time 13 days including sourcing all materials. HUGE thank you to the team at Sonex who prebent me a "piece" of wing leading edge as I didn't need the whole thing. I asked for and they sent me enough to do twice the bit I actually did and three ribs just in case - I only needed one rib.
Graeme JW Smith
-

GraemeSmith - Posts: 939
- Joined: Sat May 18, 2019 8:58 am
- Location: RI
1 post
• Page 1 of 1
Who is online
Users browsing this forum: No registered users and 5 guests


