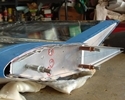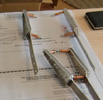


random user submitted photo
WIX-F11 (Fuselage Box assembly)
1 post
• Page 1 of 1
WIX-F11 (Fuselage Box assembly)
Couple of things I've learned as I progress through this assembly.
-Do this assembly with the fuselage upside down. Flip the aft fuselage over first (there's enough room to wedge a sawhorse in front of the turtledeck to support the cross tie box upside down. Install (cleco) the aft fuselage skin in place and be sure ALL of the longeron splice plates are installed and bolted. (You can unbolt the lower horozontal cross tie later to remove the aft floor once again, but you want everything tight before drilling through the splice plates into the fwd longerons.) Do all of this before adding the fwd side panels.
-Support the side panels with another sawhorse or small table. I taped some 2x2's onto the upper longerons to protect the side skin that protrudes for the windshield. Much of the work on this page will be from within and beneith the fwd fuselage, so it's nice to have a table/sawhorse narrow enough to give you good access.
-It took some thinking to understand what Detail-S was callling for with the solid rivets. Drill these holes as normal #30, and countersink from the tunnel side. The rivets are domed head (installed in a later assembly) inserted from the top (seat) side, and the bucked head of the rivet will be squished into the countersink on the tunnel side. I emailed Kerry and they do not have an alternative method for this. It's so there's a smooth surface under the seat (domed rivet head) and flush on the tunnel side to clear the spars.
-You don't need any fancy angle drills to complete this page (spar tunnel especially), I did everything with normal and 6" drill bits.If you follow the suggested assembly order, you will always have straight-on access to pilot holes.
-Here's a discussion on whether to rivet or cleco the floor at the completion of this page.
viewtopic.php?f=21&t=855
Ryan Roth
N197RR - Waiex #197 (Turbo Aerovee Taildragger)
Knoxville, TN (Hangar at KRKW)
My project blog: http://www.rynoth.com/wordpress/waiex/
Time-lapse video of my build: https://www.youtube.com/watch?v=Q8QTd2HoyAM
N197RR - Waiex #197 (Turbo Aerovee Taildragger)
Knoxville, TN (Hangar at KRKW)
My project blog: http://www.rynoth.com/wordpress/waiex/
Time-lapse video of my build: https://www.youtube.com/watch?v=Q8QTd2HoyAM
-

Rynoth - Posts: 1308
- Joined: Fri Jul 26, 2013 1:32 pm
- Location: Knoxville, TN
1 post
• Page 1 of 1
Who is online
Users browsing this forum: No registered users and 5 guests


