

random user submitted photo
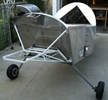
fuselage progress now visible
6 posts
• Page 1 of 1
fuselage progress now visible
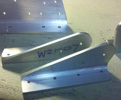
Months go by cutting aluminum smoothing edges, drilling holes, drilling holes again, deburring, dimpling, countersinking, reaming, cleaning and alodining, rerigging again, and here it is, time to start riveting. Here are some pictures of the start of the riveting. Next weekend will be the crossties and sideskins, then the turtledeck and formers.
- Attachments
-
- Mixer Area Riveted Sm.jpg (37.74 KiB) Viewed 5658 times
- racaldwell
- Posts: 400
- Joined: Thu May 22, 2014 4:52 pm
Re: fuselage progress now visible
I think I have avoided riveting myself into a corner so far. I have the interior of the aft fuselage riveted up. Here are some pictures. I got the turtledeck reinstalled now and that took about four times as many shims as I had made to close the gaps at the formers. This coming weekend will be riveting the turtledeck and then the back side skin. I plan to leave one back side skin off so I can rivet the rudder hinge on with 2117 rivets and my squeezer. Later on I will bolt on the Y after the tail feathers are final drilled, deburred, etc. Then the side will be final riveted on with access from the bottom as the bottom skins will stay off for a long while.
- racaldwell
- Posts: 400
- Joined: Thu May 22, 2014 4:52 pm
Re: fuselage progress now visible
Looks great! Fun to make a big pile of parts look like something, isn't it?
Bryan Cotton
Poplar Grove, IL C77
Waiex 191 N191YX
Taildragger, Aerovee, acro ailerons
dual sticks with sport trainer controls
Prebuilt spars and machined angle kit
Year 2 flying and approaching 200 hours December 23
Poplar Grove, IL C77
Waiex 191 N191YX
Taildragger, Aerovee, acro ailerons
dual sticks with sport trainer controls
Prebuilt spars and machined angle kit
Year 2 flying and approaching 200 hours December 23
-

Bryan Cotton - Posts: 5489
- Joined: Mon Jul 01, 2013 9:54 pm
- Location: C77
Re: fuselage progress now visible
Bryan, you got that right. After this weekend, I should be able to check off about a dozen branches on the plans tree. WhooHoo!
Rick
Xenos 0057
Rick
Xenos 0057
- racaldwell
- Posts: 400
- Joined: Thu May 22, 2014 4:52 pm
Re: fuselage progress now visible
Rick,
I see that you are going with all flush rivets. I did too. I'm building Xenos 068.I regret no alodining everything.
I see that you are going with all flush rivets. I did too. I'm building Xenos 068.I regret no alodining everything.
Bill Volcko XNS0068
Xenos A N68WV 99% flush rivets
Aerovee and Prince P-Tip
MGL Discovery Lite w/ Sandia STX 165R
V6
First hole 4/1/16
First flight 8/24/18
Phase I complete...finally!!!
Also flying a Challenger II since 1999
Xenos A N68WV 99% flush rivets
Aerovee and Prince P-Tip
MGL Discovery Lite w/ Sandia STX 165R
V6
First hole 4/1/16
First flight 8/24/18
Phase I complete...finally!!!
Also flying a Challenger II since 1999
-

bvolcko38 - Posts: 284
- Joined: Fri Feb 19, 2016 7:40 am
- Location: Finger Lakes
Re: fuselage progress now visible
Hey Bill,
Yep, It's a glider so flush rivets was an easy choice. The side benefit is that they are easier to rivet. No smileys. I'm trying to save weight where I can so I am using al. rivets where I can. I also have collected lots of riveting tools over the years and like to increase my experience in conventional sheetmetal techniques. Every plane seems to get a little better.
Alodine makes a difference and being here right on the coast I need all the corrosion protection I can get. I"ll paint the outside for that reason but not the inside to avoid the weight gain.
Rick
Xenos 0057
Camit 3300 waiting for the front end to get built
- racaldwell
- Posts: 400
- Joined: Thu May 22, 2014 4:52 pm
6 posts
• Page 1 of 1
Who is online
Users browsing this forum: No registered users and 22 guests


