Ready to Take It Apart!
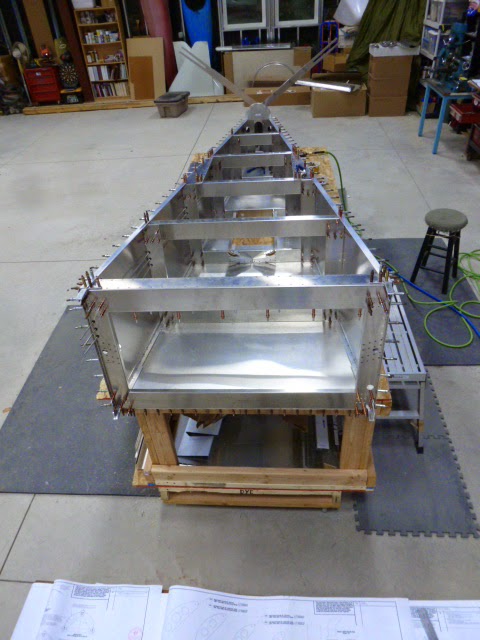
We’ve been making good progress on the Xenos, but have been so busy that we haven’t been posting as much as I’d like. Lots of little details we learned along the way to this point – the tail cone box is all clecoed together, fully drilled – and ready to take apart for deburring, then reassembly and riveting.

The shipping crate workbench has been great – just the right size to let the forward few in ches and aft foot hang over, and those are parts you need to get at from the bottom during this phase. We actually have the bottom skin and lower cross-ties clecoed to the table-top – that gives us a flat reference plain to work from when making things square. We had to actually do a couple of evolutions of this – with first the starboard, then the port side hanging off the edge to match drill from the skin holes (bottom-up) to the lower longerons. Then we slid the whole thing to center and drilled it to the table for the rest of the assembly.

It took a little while to figure out that to drill the aft deck in place, we had to do it on top of the longerons first – then open up the back end to get it inserted properly UNDER the longerons to drill it to the cross-bar at the front. I think we’ve worked out the re-assembly sequence to make sure we don’t paint ourselves into a corner with the tailwheel mount parts – but we’ll see when we get there!
Paul
The shipping crate workbench has been great – just the right size to let the forward few in ches and aft foot hang over, and those are parts you need to get at from the bottom during this phase. We actually have the bottom skin and lower cross-ties clecoed to the table-top – that gives us a flat reference plain to work from when making things square. We had to actually do a couple of evolutions of this – with first the starboard, then the port side hanging off the edge to match drill from the skin holes (bottom-up) to the lower longerons. Then we slid the whole thing to center and drilled it to the table for the rest of the assembly.
It took a little while to figure out that to drill the aft deck in place, we had to do it on top of the longerons first – then open up the back end to get it inserted properly UNDER the longerons to drill it to the cross-bar at the front. I think we’ve worked out the re-assembly sequence to make sure we don’t paint ourselves into a corner with the tailwheel mount parts – but we’ll see when we get there!
Paul