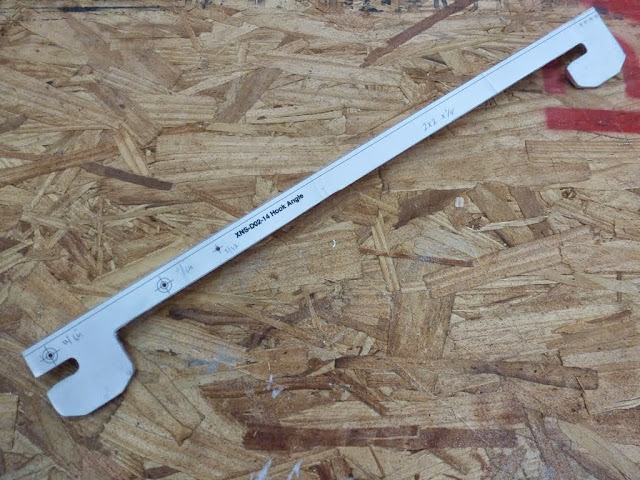
I Can’t Be the First…..
Ok, so I have been building airplanes for quite a few years (decades) – but I can still pull a dumb move now and again. I can’t be the first one to build one of these backwards, can I? It's been a long time since my first quarter of college when I took drafting, but still - I should remember the difference between a solid and a dashed line! :oops:

The worst part is how far along I got before discovering that SOLID line along the top that told me that the flange should be coming UP at me – not pointed down at the workbench….. Oh well, live and learn – you can’t just take the templates, cut them out, and paste them on the outside of the aluminum angel without a great deal of scrutinization of the plans page relating to the part to see if it makes sense. After this little screw-up, I checked several of the other templates, and a couple of them had to be reversed in order to glue them on the outside of the angle. Putting templates in the inside of aviation angel is problematic because of the fillets.
We’ve now made all of the pieces on the template page, and have learned a few good things along the way:
1) Low-tack spray adhesive was our final choice to attach the templates to the material. High-tack is too hard to get off later!
2) A brand new band saw blade is one of life’s little luxuries, and makes clean-up of the final edges so much easier.
3) All of those little W29 wing angles….we used our little 18” table-top, clamp-on brake to bend them – worked well. We also cut strips of the raw material the finished width of the little brackets, then pasted the templates on, drilled all the holes, then cut them in to individual pieces. Much easier to handle that way.
4) We keep the inventory sheets handy – they make finding the needed parts for the next drawing much easier, and also it helps when fabricating new parts from raw stock – makes it easy to know where the part should come from.
5) In our two-person shop, we are using the drawings as our build log – initialing and dating each part on the drawing when it is complete. A yellow highlighter is also used to show what has been done. That way, we can work independently and still keep track of where we are.
Oh….here is that part built the right way! (It’s really nice that Sonex gives you enough raw material to screw a few things up and not have to re-order because you ran out of stock….).

On to building stuff!
Paul
The worst part is how far along I got before discovering that SOLID line along the top that told me that the flange should be coming UP at me – not pointed down at the workbench….. Oh well, live and learn – you can’t just take the templates, cut them out, and paste them on the outside of the aluminum angel without a great deal of scrutinization of the plans page relating to the part to see if it makes sense. After this little screw-up, I checked several of the other templates, and a couple of them had to be reversed in order to glue them on the outside of the angle. Putting templates in the inside of aviation angel is problematic because of the fillets.
We’ve now made all of the pieces on the template page, and have learned a few good things along the way:
1) Low-tack spray adhesive was our final choice to attach the templates to the material. High-tack is too hard to get off later!
2) A brand new band saw blade is one of life’s little luxuries, and makes clean-up of the final edges so much easier.
3) All of those little W29 wing angles….we used our little 18” table-top, clamp-on brake to bend them – worked well. We also cut strips of the raw material the finished width of the little brackets, then pasted the templates on, drilled all the holes, then cut them in to individual pieces. Much easier to handle that way.
4) We keep the inventory sheets handy – they make finding the needed parts for the next drawing much easier, and also it helps when fabricating new parts from raw stock – makes it easy to know where the part should come from.
5) In our two-person shop, we are using the drawings as our build log – initialing and dating each part on the drawing when it is complete. A yellow highlighter is also used to show what has been done. That way, we can work independently and still keep track of where we are.
Oh….here is that part built the right way! (It’s really nice that Sonex gives you enough raw material to screw a few things up and not have to re-order because you ran out of stock….).
On to building stuff!
Paul