

random user submitted photo
Installing the turtle deck
13 posts
• Page 1 of 2 • 1, 2
Installing the turtle deck
Guys
The XENOS plans (and probably also other Sonex models’) tell you to first rivet both turtle deck skins to the “dorsal spine” channel assembly, then install this “Skin assembly” over the tail cone box, and only after that you go to install the #2 to #5 left and right formers.
Unless you are able to crawl inside the tail cone, I don’t see how to locate, drill and cleco those intermediate formers.
Everybody did the turtle deck like the plans say?
If yes, how did you reach inside the tail cone to install those formers?
If not, did you first install the formers in the tail cone box and only after you installed the turtle deck skins?
Any information and tips is welcome.
Thanks
Carlos
XENOS-B
- Carlos Trigo
- Posts: 154
- Joined: Fri Feb 14, 2020 3:46 pm
Re: Installing the turtle deck
Carlos - Did you already rivet on the fuselage floor skins? On Sonex/Waiex models it’s common practice to wait and rivet those on at the very end. By cleco’ing the skins in place when needed, and removing them for any work inside the aircraft, you make it *much* easier to do things like install the turtledeck formers, shoulder harnesses, instruments & wiring, and many other components.
Take care,
—Noel
Sonex #1339
Take care,
—Noel
Sonex #1339
- NWade
- Posts: 527
- Joined: Mon Aug 08, 2011 3:58 pm
Re: Installing the turtle deck
Carlos,
I did just what Noel said. Access is needed back there so leave the bottom skin just clecoed.
I just riveted mine last month so I could paint the fuselage excepting the forward bottom skin. The last work back there was making a transponder antenea mount.
I did crawl back there to buck the rivets. That was torture.
Rick Caldwell
Xenso 0057
- racaldwell
- Posts: 400
- Joined: Thu May 22, 2014 4:52 pm
Installing the turtle deck
NWade wrote:Carlos - Did you already rivet on the fuselage floor skins? On Sonex/Waiex models it’s common practice to wait and rivet those on at the very end. By cleco’ing the skins in place when needed, and removing them for any work inside the aircraft, you make it *much* easier to do things like install the turtledeck formers, shoulder harnesses, instruments & wiring, and many other components.
Take care,
—Noel
Sonex #1339
No, I still didn’t rivet the bottom skins, just because I was previously warned to leave that riveting for the later possible, for various reasons.
Even though I know that would leave me with some access to the tail cone guts, I am a 6ft 1”, 250 lb guy, therefore I am looking for another way to skin this cat.
Do you consider wrong to test the installation of the “spinal cord” channel with the formers, and then adding the turtle deck skins?
Carlos
XENOS-B #020
- Carlos Trigo
- Posts: 154
- Joined: Fri Feb 14, 2020 3:46 pm
Re: Installing the turtle deck
Carlos,
This is a great task to have a helper. We drew blue lines on the former flanges. I held the formers tight against the skin from underneath, my son centered the line in the hole, drilled and clecoed. I don't think you want to do this off the airplane, if that is what you are asking.
This is a great task to have a helper. We drew blue lines on the former flanges. I held the formers tight against the skin from underneath, my son centered the line in the hole, drilled and clecoed. I don't think you want to do this off the airplane, if that is what you are asking.
Bryan Cotton
Poplar Grove, IL C77
Waiex 191 N191YX
Taildragger, Aerovee, acro ailerons
dual sticks with sport trainer controls
Prebuilt spars and machined angle kit
Year 2 flying and approaching 200 hours December 23
Poplar Grove, IL C77
Waiex 191 N191YX
Taildragger, Aerovee, acro ailerons
dual sticks with sport trainer controls
Prebuilt spars and machined angle kit
Year 2 flying and approaching 200 hours December 23
-

Bryan Cotton - Posts: 5381
- Joined: Mon Jul 01, 2013 9:54 pm
- Location: C77
Installing the turtle deck
Bryan Cotton wrote:Carlos,
This is a great task to have a helper. We drew blue lines on the former flanges. I held the formers tight against the skin from underneath, my son centered the line in the hole, drilled and clecoed. I don't think you want to do this off the airplane, if that is what you are asking.
Hi Bryan
I recognise that I was not totally clear in my question.
This is what I mean:
Instead of riveting the backbone channel to the turtle deck skins, and after that install this assembly to the tail cone box, and lastly go inside and install the formers (this is the construction order indicated in the plans), is there any problem in firstly install all the internal structure (backbone channel plus the formers) in the tail cone box, and lastly add the turtle deck skins?
Thanks
Carlos
- Carlos Trigo
- Posts: 154
- Joined: Fri Feb 14, 2020 3:46 pm
Re: Installing the turtle deck
Hi Carlos,
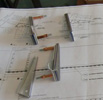
I do not see any advantage of your proposal. You still have to get inside (from the bottom since it is open) to align the formers, rebend them as to get the best fit, then make shims for the areas that still don't fit tight to the skin. Here is a picture of the shims I added on one formers. Most formers required no shims, just slight adjustments.
Rick Caldwell
Xenos 0057
- Attachments
-
- Turtledeck Former Shims Riveted Sm.jpg (96.64 KiB) Viewed 2696 times
- racaldwell
- Posts: 400
- Joined: Thu May 22, 2014 4:52 pm
Re: Installing the turtle deck
Carlos,
I don't think the parts are precise enough to get a good fit that way. There is some variability which is taken care of by the final positioning of the bulkheads.
I don't think the parts are precise enough to get a good fit that way. There is some variability which is taken care of by the final positioning of the bulkheads.
Bryan Cotton
Poplar Grove, IL C77
Waiex 191 N191YX
Taildragger, Aerovee, acro ailerons
dual sticks with sport trainer controls
Prebuilt spars and machined angle kit
Year 2 flying and approaching 200 hours December 23
Poplar Grove, IL C77
Waiex 191 N191YX
Taildragger, Aerovee, acro ailerons
dual sticks with sport trainer controls
Prebuilt spars and machined angle kit
Year 2 flying and approaching 200 hours December 23
-

Bryan Cotton - Posts: 5381
- Joined: Mon Jul 01, 2013 9:54 pm
- Location: C77
Installing the turtle deck
racaldwell wrote:Hi Carlos,
I do not see any advantage of your proposal. You still have to get inside (from the bottom since it is open) to align the formers, rebend them as to get the best fit, then make shims for the areas that still don't fit tight to the skin. Here is a picture of the shims I added on one formers. Most formers required no shims, just slight adjustments.
Rick Caldwell
Xenos 0057
Hello Rick
(I’m waiting for these COVID restrictions to end to book an airline ticket over the big pond - aka Atlantic ocean- to go and sneak into your Xenos with my own pair of eyes...)
The advantage of my proposal is that I am able to do all the alignment, placement, and making the holes in the formers to the tail cone box structure, and the formers with the backbone channel clips without having the skins covering the turtle deck.
Don’t forget that the formers don’t come (arrrgh...) with any pre-punched holes.
After making those holes matching the formers with the fuselage side verticals and the channel clips, I intend to put over the skins and then adapt the formers flanges to the skins, and lastly make the holes from the skins into the formers flanges.
Only these latter will need me to get inside the fuselage from the bottom.
Thanks
Carlos
- Carlos Trigo
- Posts: 154
- Joined: Fri Feb 14, 2020 3:46 pm
Installing the turtle deck
Bryan Cotton wrote:Carlos,
I don't think the parts are precise enough to get a good fit that way. There is some variability which is taken care of by the final positioning of the bulkheads.
Bryan
That is indeed my fear....
- Carlos Trigo
- Posts: 154
- Joined: Fri Feb 14, 2020 3:46 pm
13 posts
• Page 1 of 2 • 1, 2
Who is online
Users browsing this forum: No registered users and 25 guests


