


random user submitted photo
Labeling Electrical Wires
Forum rules
Lessons-learned submissions follow a standardized format designed to identify the issue, draw out the relevant factors and present useful guidance to others facing a similar situation. The submitter answers the following 5 questions:
1) What went wrong (or right), and why?
2) What were the shortcomings, and why did they exist?
3) What actions were taken to fix the problem?
4) What preventive actions should be taken into account for future efforts?
5) What overall recommendations should be made for future projects?
The length of the write-up and amount of detail presented are left up to each individual. Some lessons learned can be perfectly conveyed in a few simple sentences, while others will require much more. The goal is to be as clear and succinct as possible, not to generate literary masterpieces!
All posts submitted to this forum are held in a review queue for approval by a moderator. Information in the posts will be reviewed, vetted, and modified as needed before going public. Additionally, any replies that are submitted would also be reviewed to ensure they add value and remain on topic. This will avoid normal threat drift of general discussions.
1 post
• Page 1 of 1
Labeling Electrical Wires
![]() by Rynoth » Fri Sep 04, 2020 3:34 pm
by Rynoth » Fri Sep 04, 2020 3:34 pm
When wiring your electrical system it is important to label your wires at both ends for future reference. Here is a method I used to provide legible and durable labels for your wires.
Print a sheet of paper with the appropriate labeling for your wires. Use a small but legible font size. Remember to print TWO of each label since you will be putting the labels on either end of each wire.
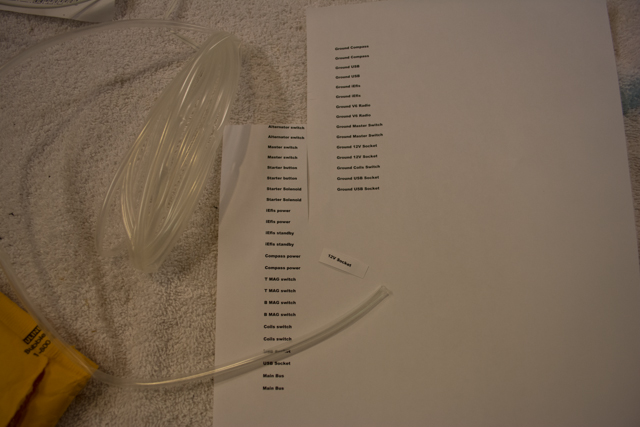
Get some clear heat-shrink tubing and cut it to length a bit longer than each label. BEFORE you crimp/solder the connector to the end of the wire, slide the heat-shrink tube onto the wire, then cutout your paper label with scissors and slide it under the heat-shrink. I found a pick-tool useful to push the label under the heat-shrink.

Use your heat source/gun to shrink the tubing, then crimp/solder your connector.
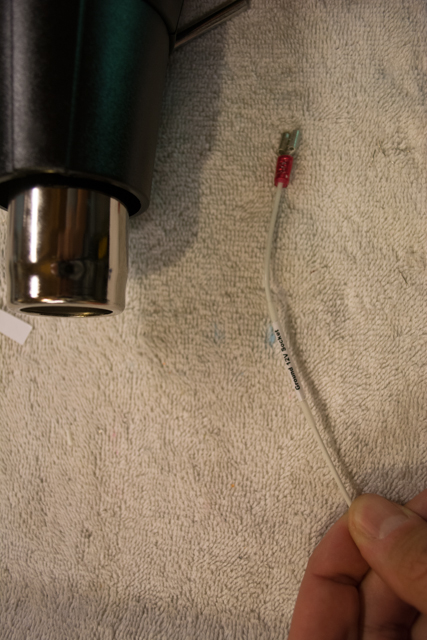
Now you have permanent/durable/legible labeling on your wires!
Print a sheet of paper with the appropriate labeling for your wires. Use a small but legible font size. Remember to print TWO of each label since you will be putting the labels on either end of each wire.
Get some clear heat-shrink tubing and cut it to length a bit longer than each label. BEFORE you crimp/solder the connector to the end of the wire, slide the heat-shrink tube onto the wire, then cutout your paper label with scissors and slide it under the heat-shrink. I found a pick-tool useful to push the label under the heat-shrink.
Use your heat source/gun to shrink the tubing, then crimp/solder your connector.
Now you have permanent/durable/legible labeling on your wires!
Ryan Roth
N197RR - Waiex #197 (Turbo Aerovee Taildragger)
Knoxville, TN (Hangar at KRKW)
My project blog: http://www.rynoth.com/wordpress/waiex/
Time-lapse video of my build: https://www.youtube.com/watch?v=Q8QTd2HoyAM
N197RR - Waiex #197 (Turbo Aerovee Taildragger)
Knoxville, TN (Hangar at KRKW)
My project blog: http://www.rynoth.com/wordpress/waiex/
Time-lapse video of my build: https://www.youtube.com/watch?v=Q8QTd2HoyAM
-

Rynoth - Posts: 1308
- Joined: Fri Jul 26, 2013 1:32 pm
- Location: Knoxville, TN
1 post
• Page 1 of 1
Who is online
Users browsing this forum: No registered users and 3 guests


