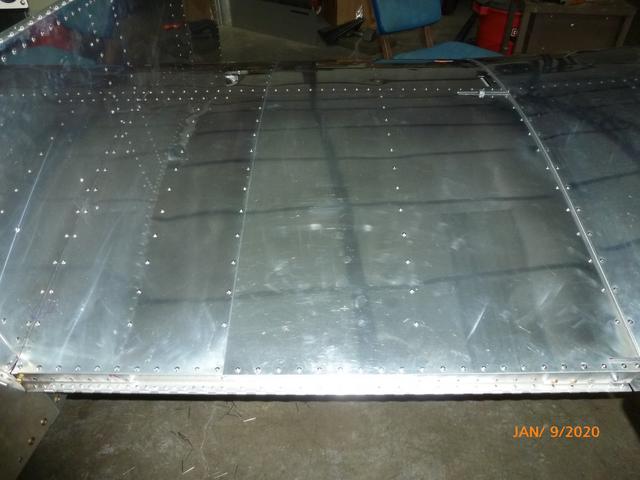
Page 4 of 5

Re: Onex Wings

PostPosted: Mon Dec 30, 2019 7:06 pm
by WesRagle
Ok, I checked with the factory and they didn't have the swivel set screws in stock. I went ahead and ordered the stainless version of what Tom suggested from MCS. A bit expensive but it will keep the project moving.

In the meantime I rough polished the wing stub skins.

Image

There has to be a better way. I think I'll experiment with Zephyr after Phase I and see if that's less of a mess.

On to wing skinning.

Wes

Re: Onex Wings

PostPosted: Tue Dec 31, 2019 12:27 am
by WesRagle
Hi Guys,

I started fitting the wing stub skins. Starting with the right wing. Had to open up the various holes to accommodate the wing fold handle and pivots. I got the top of the skin to lay down but it's very tight span wise. At that point I decided to check the fold to make sure everything cleared. To my surprise the skin popped out of place. It looks like the "paddle ribs" can't be jammed together. Is that right? do I need to file the edges of the skins and put a thin spacer between the paddle ribs before drilling? I'll read the plans closely tomorrow to see if they contain any advice.

Also, silly question I know, but what did you guys do with the two unused holes in the top skin?


Image

Thanks,

Wes

Re: Onex Wings

PostPosted: Tue Dec 31, 2019 11:12 am
by thomasjones42
WesRagle wrote:Hi Guys,

I started fitting the wing stub skins. Starting with the right wing. Had to open up the various holes to accommodate the wing fold handle and pivots. I got the top of the skin to lay down but it's very tight span wise. At that point I decided to check the fold to make sure everything cleared. To my surprise the skin popped out of place. It looks like the "paddle ribs" can't be jammed together. Is that right? do I need to file the edges of the skins and put a thin spacer between the paddle ribs before drilling? I'll read the plans closely tomorrow to see if they contain any advice.

Also, silly question I know, but what did you guys do with the two unused holes in the top skin?


Image

Thanks,

Wes


Wes
I had to trim the skins on both sides for a good fit with the wings folded. Quite a lot on the right side versus the left as I recall. Paddles worked OK after that. I think I just put rivets in the two unused holes as filler.

Tom Jones
Onex 0133
Turbo Aerovee

Re: Onex Wings

PostPosted: Tue Dec 31, 2019 6:03 pm
by WesRagle
WesRagle wrote:Wes
I had to trim the skins on both sides for a good fit with the wings folded. Quite a lot on the right side versus the left as I recall. Paddles worked OK after that. I think I just put rivets in the two unused holes as filler.


Hi Tom,

One of the deleted rivets is right on the edge of the spar cap. Can't fill that one. Might have to "glue" a rivet head over it :-) After a lot of filing fiddling around I got the skin to wrap around, lay down, and clear everything. After looking at it some more I don't think the fold action is going to be a problem once the skin is riveted.

At first glance it looks like the bell crank cross brace holes aren't going to match. I'll deal with that after all the ribs are drilled.

Image

Time to clean up and get ready for the festivities :-)

Happy New Year everyone!

Wes

Re: Onex Wings

PostPosted: Mon Jan 06, 2020 11:41 pm
by WesRagle
Hi Guys,

I have the right wing stub skin ready to rivet. Should have the new swivel set screws in a day or two.

I test rigged the ailerons with the old screws and the counter weight travel is limiting the aileron control movement instead of the movement being limited at the stick. Right now the counter weight arm is hitting the rear spar first. I'll clearance that tomorrow but ..., it looks like the counter weight will hit the top wing skin after I clearance for the rear spar. I'll know tomorrow.

Question: Is this the norm? If so, how did you guys deal with it?

I want all the aileron authority I can get but the aileron travel must be limited at the stick.

Thanks,

Wes

Re: Onex Wings

PostPosted: Tue Jan 07, 2020 12:15 pm
by Mike53
I'm not sure what you mean.The counter weight is a fixed entity .It will move with the full movement of the aileron no matter what.If you disconnect the push rod the aileron will move up and down as it should through the full movement allowed by the hinge and should not hit the skin or the any thing else Having said that it is possible that the lead weight might need chamfering where it would meet the skin but that is a matter of how you attached the lead to the arms. I don't believe you needed a new longer set screw ,the ones supplied are sufficient to get the job done.
As I said in an earlier post ,having your outer wings skinned prevents you from seeing the whole picture with the paddles. Being able to look down and see what the paddles and set screws are interacting as you move the aileron would have been priceless for me not to mention easy to readjust..I never did get full down aileron.I achieved 24 deg up and 10 degrees down and called it a day.

I can take some pics to show you where my set screws are if you think that would help.
Mike

Re: Onex Wings

PostPosted: Tue Jan 07, 2020 3:38 pm
by WesRagle
HI Mike,

Thanks for the reply.

I think I got it figured out. I got "wrapped around the axle" thinking that the paddles needed to be parallel to the rib in the neutral position. Due to the asymmetric nature of the aileron movement that just doesn't work.

What worked was to adjust the rod ends on the long aileron push rod until there was no interference between the inboard paddles and the rib as the stick was moved full left to right. Once that was done the remaining adjustment has to be made with the swivel screws. That's all there was to it. I'm now getting the specified aileron movement at the stops.

For the moment I'm sane again.

Thanks Again,

Wes

Re: Onex Wings

PostPosted: Tue Jan 07, 2020 11:11 pm
by WesRagle
Hi Guys,

I didn't get a lot done today. Just fiddled with the aileron rigging and making sure I got stop to stop movement without any interference. I did have to work on the aileron counter balance plates a little to get them to clear the rear spar at full up travel. The pic isn't very good but maybe you can get the idea.

Image

One thing that I did find interesting is how little the swivel set screw actually moves on the opposing paddle. Makes me wonder if the ball really needs to "roll". Regardless, new swivel screws due tomorrow. Keep in mind that the following pic shows the marks made while I had the ailerons mis-rigged as well as when it was properly rigged. Also, for some reason, my paddles had an extra hole opposite the threaded holes. If you look closely you can see where I plugged the hole with a solid rivet. Now I worry about the set screw working right on the edge of the solid rivet. The rivet is surly a different allow/temper than the 6061-T6 surrounding it. Time will tell.

Image

Forever Forward,

Wes

Re: Onex Wings

PostPosted: Thu Jan 09, 2020 10:38 pm
by WesRagle
One Down!!

Image

One to go :-(

Wes

Re: Onex Wings

PostPosted: Mon Jan 27, 2020 12:56 am
by WesRagle
Second down!

Image

That's about it on the wings. A little bit anti-climatic but oh well. I will say that the wing stubs, wing mating, and rigging is probably the most tedious part of the build. Just be careful and go slow. You have to pull out most of the odd tools and techniques you can come up with while building the stubs. You will need a rivet wedge to pull the rivets on the root ribs. You will need the simple dimple die for those odd hard to reach holes that need dimpling. You'll need shorter rivets (CCP-41?) in a couple of places. I just shortened CCP-42s by pushing the rivets off the mandrel, sanding them down a little, and pushing them back on the mandrel. Worked just fine. And of course you will need a C-Frame dimpler. Oh yea, don't forget to use flush rivets for the #2 rib on the left side. It falls under the anti-skid material on the wing walk.

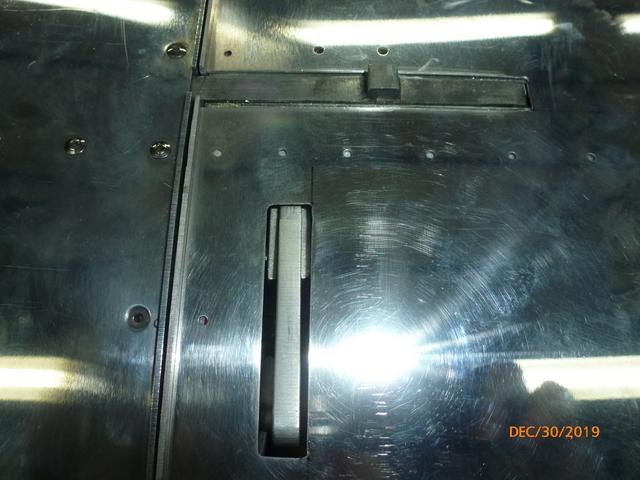
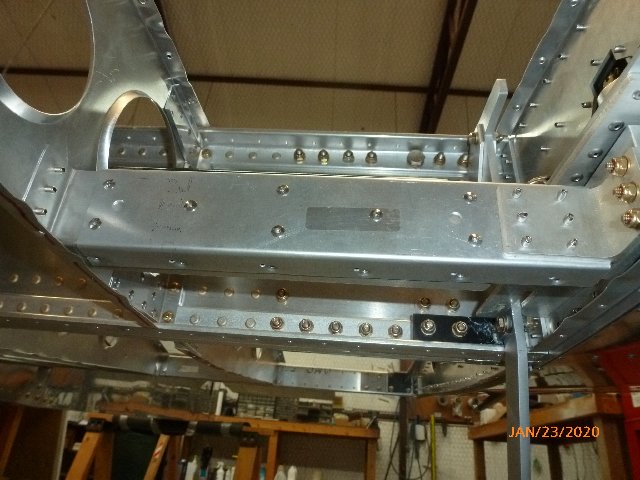
For some reason, my cross braces for the paddles didn't match up well at all. If you look closely at the picture you can see the pre-punched holes as well as the final dimpled holes. So, I just cut the flange off, lined up the rib as close as possible, and riveted on the new flange. I also extended the bottom flange a bit since the rivets were going to hit close to the edge. Probably not necessary but it couldn't hurt. If anyone ends up in the same spot, be sure the "paddle ribs" are clamped together while setting the length of the modified brace. This because the skin will push the ribs together when installed.

Image

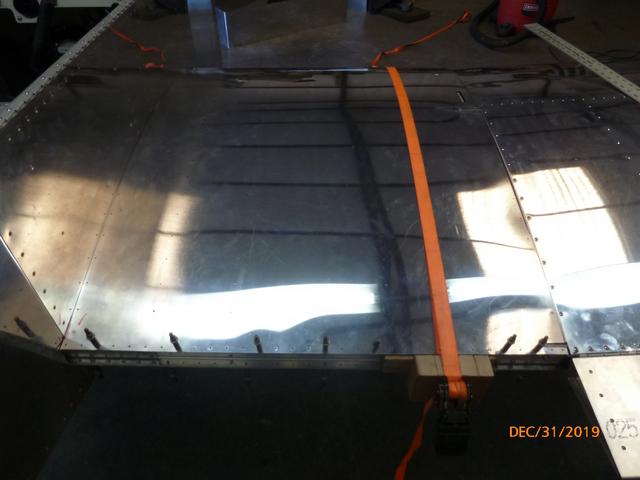
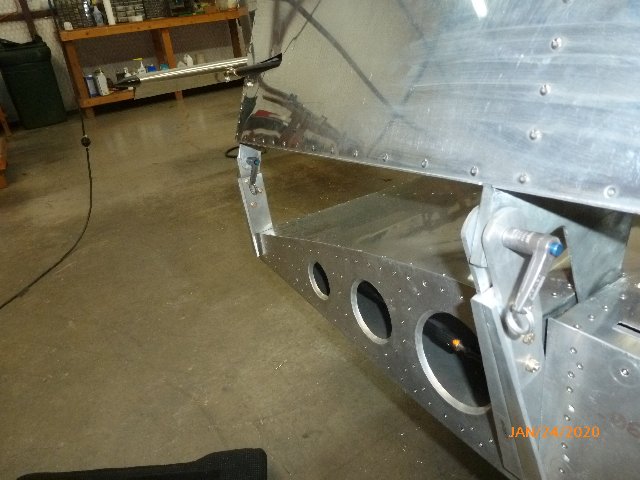
I had the wings locked for the entirety of the wing stub skinning and riveting. That means a lot of lying on your back but it ensures that the wing lock will still work after you finish.

The end result is satisfying. The locking action couldn't be described as smooth, but feels right for its purpose. It takes a firm push to get the pins through all the holes. The wing lock handle locking pin seems plenty strong. I accidentally subjected one of them to a pretty severe test just after it was installed and I had forgotten about it. No damage :-)

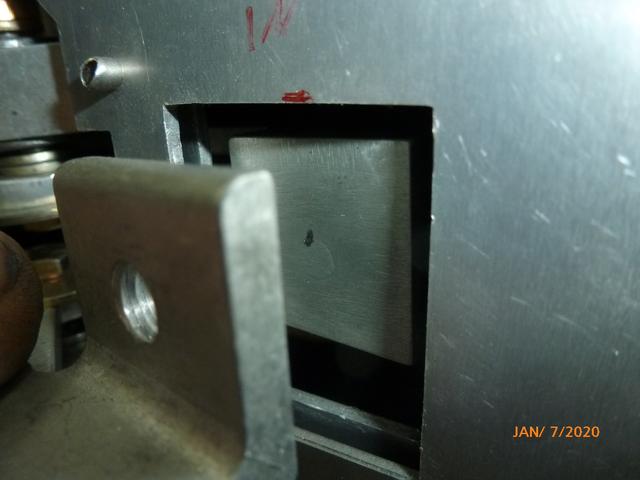
The wing fold locks are custom made to the angle of fold as set by filing the stop. I checked the fold of my wings and there are two degrees of difference between them. Since I have already made the right wing locks I will file the left wing stop to match and then make the left wing locks.

Image

Kinda glad this is almost in the rearview :-)

Wes