

random user submitted photo
My simple dimple die solution
6 posts
• Page 1 of 1
My simple dimple die solution
Hey all,
I'm getting ready to drill the front skin for the wings and did alot of research on here as to the proper process to dimple the holes in the skin and ribs for the flush rivets. Here is a summation of what I found and what is going to work for me.
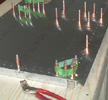
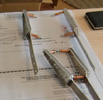
The plans call for a #31 or 32 drill bit to be used to updrill from the 3/32 pilot holes. After reading alot of techniques and experiences on here with various opinions I decided to "experiment" on my own to learn what I needed to do. I took a piece of scrap 6061 and drilled multiple holes from #30, 1/8, 31,32, and 33 drill bits following the process of updrill to size (30-33), deburr, dimple, then rivet. The #30 hole is clearly too big once dimpled and so is the #31 in my opinion. The #32 is getting close but still a tad too big and I found that like so many mentions on here, that the copper cleco won't fit into a #32 hole and I tried putting the silver ones in and they barely hold..pretty much not at all. However, the #33 size hole allows for the silver clecos to hold the skin and ribs together to maintain good alignment as I'll be updrilling all the pilot holes to #33. This way I shouldn't have to do the process twice of assembling with clecos, drill half the holes to #32, disassemble, dimple, reassemble, and then do the rest.
Also, during this initial process I learned 2 things that I couldn't find on here that I'd like to add. First, I used my Milwaukee electric rivet gun to dimple the holes. Just squeezing the trigger until I see movement works great and doesn't snap the nail or apply too much pressure. This thing is awesome by the way. No air/noise to deal with and it works great for me! No need for a hand squeezer unless I want the workout. The next thing I found out was that the replacement nail needed for the sonex simple dimple is a 4D 1 1/2" nail. I used a flat head as it seems to be more streamlined. The nail that comes with the die is 2" and I couldn't find one of those. However, the 1.5" seems to be working just fine!
- DWest
- Posts: 22
- Joined: Mon May 02, 2022 9:12 am
Re: My simple dimple die solution
Update: I think for the left wing I will use a #34 bit to upsize the leading edge holes. Main reason is because the silver clecos don’t hold the parts quite as tight as needed.
Ugh Im alittle taken confused by why the plans say 31 or 32 bit and the fact that dimple die comes with that finishing nail that is too skinny for the die and for a 31/32 hole. Perhaps the next the bigger common nail would be too big??
Ugh Im alittle taken confused by why the plans say 31 or 32 bit and the fact that dimple die comes with that finishing nail that is too skinny for the die and for a 31/32 hole. Perhaps the next the bigger common nail would be too big??
- DWest
- Posts: 22
- Joined: Mon May 02, 2022 9:12 am
Re: My simple dimple die solution
Darn it!
Now I want to go into the workshop and practice with dimple dies...
Now I want to go into the workshop and practice with dimple dies...
Bob Dz...
Sonex B, Tri-gear
(technically within walking distance of Sonex)
N624DZ (reserved)
Plans exist to eliminate confusion, not create it.
Sonex B, Tri-gear
(technically within walking distance of Sonex)
N624DZ (reserved)
Plans exist to eliminate confusion, not create it.
- BobDz
- Posts: 259
- Joined: Mon Oct 02, 2023 3:44 pm
Re: My simple dimple die solution
The purpose of the hobby is to buy tools.
https://www.aircraft-tool.com/detail?id=AE14877
Used:
https://www.caseyspm.com/c/cpm/up_flypa ... g=up_00013
New:
https://www.aircraftspruce.com/catalog/ ... mptool.php
https://www.aircraft-tool.com/detail?id=AE14877
Used:
https://www.caseyspm.com/c/cpm/up_flypa ... g=up_00013
New:
https://www.aircraftspruce.com/catalog/ ... mptool.php
Bryan Cotton
Poplar Grove, IL C77
Waiex 191 N191YX
Taildragger, Aerovee, acro ailerons
dual sticks with sport trainer controls
Prebuilt spars and machined angle kit
Year 2 flying and approaching 200 hours December 23
Poplar Grove, IL C77
Waiex 191 N191YX
Taildragger, Aerovee, acro ailerons
dual sticks with sport trainer controls
Prebuilt spars and machined angle kit
Year 2 flying and approaching 200 hours December 23
-

Bryan Cotton - Posts: 5034
- Joined: Mon Jul 01, 2013 9:54 pm
- Location: C77
Re: My simple dimple die solution
Bryan Cotton wrote:The purpose of the hobby is to buy tools.
https://www.aircraft-tool.com/detail?id=AE14877
Used:
https://www.caseyspm.com/c/cpm/up_flypa ... g=up_00013
New:
https://www.aircraftspruce.com/catalog/ ... mptool.php
Haha not my purpose…but I’m weird!
- DWest
- Posts: 22
- Joined: Mon May 02, 2022 9:12 am
Re: My simple dimple die solution
Cant ever argue with more tools and i wish i had gotten the c frame but in all honesty since its only the leading edge skin it was fine to do it manually but not great you can make the bronze clecos fit but its not fun. That being said the dimpling worked great i did half with the dimple dies and the nails, and the other half with a manual squeezer i bought for the light lens install and an oversized 5" yolk i got used but would not recommend buying it to do the leading edge its like 200 new at spruce and you really only get like one more row of dimples. If you have the cash the DRDT is awesome and has several upgrade paths to make it pneumatic and can be used on other airframes with significantly more dimpling work needed.
Saturday's Building Live Stream
Jill's Build Log
PPL-ASEL
Tail = Complete
Wings Closed Out = 02/04/2024
Waiex-B 0054
Panel G3X
Engine Spyder 120 corvair conversion
Jill's Build Log
PPL-ASEL
Tail = Complete
Wings Closed Out = 02/04/2024
Waiex-B 0054
Panel G3X
Engine Spyder 120 corvair conversion
-

lakespookie - Posts: 249
- Joined: Wed Aug 07, 2019 2:39 pm
- Location: San Diego California
6 posts
• Page 1 of 1
Who is online
Users browsing this forum: No registered users and 8 guests


