

random user submitted photo
Mounting the horizontal stabilizer
8 posts
• Page 1 of 1
Mounting the horizontal stabilizer
I have read through others posts and could still use some help.
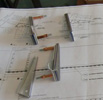
When I fit up my horizontal and vertical stabilizer I'm getting zero degree up movement and 25 degrees down. The elevator horn is hitting the vertical part of the vertical stabilizer. I thought I made my part bad so I ordered a factor made part just to have the same issue. I'm considering taking the horn off, remaking the root ribs and cheat the edge distance by moving the horn forward and down. The rivets are already close to the limit so I don't expect to get enough movement from this.
Seems like I would have to grind a lot of material to get it to clear the vertical. Is this much grinding typical?
Here is a link to a youtube video showing what I have going on.
https://youtu.be/QVkyV1G7rz0
Thanks
Mike
Scratch building #1604
Tail dragger
Thinking Turbo Aerovee
Tail dragger
Thinking Turbo Aerovee
- lstinthot
- Posts: 103
- Joined: Fri Aug 03, 2012 12:11 pm
Re: Mounting the horizontal stabilizer
Trim the horizontal stabilizer skins until you can move it forward more. I think the plans call for 3 1/4”
From the rear vertical channel. I would suggest 3 1/2.
From the rear vertical channel. I would suggest 3 1/2.
1735
Longassproject
E-A-G-L-E-S Eagles (next year 16- 0)
Longassproject
E-A-G-L-E-S Eagles (next year 16- 0)
- Rofomoto
- Posts: 606
- Joined: Sun Aug 06, 2017 2:51 pm
Re: Mounting the horizontal stabilizer
Right now the distance is just over 3 1/4". I guess you bend the front bracket to make it move that far forward. I will give that a try. Looks like the front mounting holes will be getting close to not having adequate edge distance if you go too far forward.
Scratch building #1604
Tail dragger
Thinking Turbo Aerovee
Tail dragger
Thinking Turbo Aerovee
- lstinthot
- Posts: 103
- Joined: Fri Aug 03, 2012 12:11 pm
Re: Mounting the horizontal stabilizer
I am sure others will chime in here, but it appears to me you have the same problem I did. The horn is hitting the vertical channel.
I had to rather aggressively grind material off that horn. And apparently I am not alone in that task.
I put Sharpie marker all over where it hit, then reassembled it and moved the stabilizer to make it rub so I could see where to grind.
I then took it apart and ground the back of the horn until it moved enough. I never got the full amount of travel, but I certainly have enough.
Just one mans opinion.
Robbie Culver
Sonex 1517
Aero Estates (T25)
First flight 10/10/2015
325+ hours
Jabiru 3300 Gen 4
Prince P Tip
Taildragger
N1517S
Sonex 1517
Aero Estates (T25)
First flight 10/10/2015
325+ hours
Jabiru 3300 Gen 4
Prince P Tip
Taildragger
N1517S
-

Sonex1517 - Posts: 1651
- Joined: Fri Jun 03, 2011 10:11 am
- Location: Chicagoland
Re: Mounting the horizontal stabilizer
Right now it is as far forward as possible and I am just over 3 1/4". Could someone measure their distance from the turtle skins to the end of the longerons? I am a scratch builder and wonder if I messed up the longerons or some other measurement. I could take some material off the turtle deck skins to get some more forward movement.
Last edited by lstinthot on Sat Feb 02, 2019 10:42 am, edited 1 time in total.
Scratch building #1604
Tail dragger
Thinking Turbo Aerovee
Tail dragger
Thinking Turbo Aerovee
- lstinthot
- Posts: 103
- Joined: Fri Aug 03, 2012 12:11 pm
Re: Mounting the horizontal stabilizer
Yep, If I recall, I ended up spending considerable time getting the elevator throw to meet spec. I trimmed the horizontal skin as well as notched the turtle deck skin slightly so that the stab could be moved forward further. The vertical stab skin was trimmed so that the horn assm would not contact it a full up throw. You lose your nice straight line on the skin right there, but it all gets covered up with trim anyway. I also did some grinding on the control horn to keep it from contacting throughout its arc. I also had to add a plate to the stop area on the back side to stay within the specified throw spec. I'm sure that varies on each build. In the end, with a lot of on and off test fitting parts, and checking elevator throw, I ended up right on spec. You just have to be patient and not be afraid to do some trimming.
Gregg Kaat
Sonex B #0014
Sonex B #0014
- T41pilot
- Posts: 135
- Joined: Sat Nov 26, 2016 3:57 pm
- Location: Howard City, Michigan
Re: Mounting the horizontal stabilizer
With the caveat that my ship still hasn't flown (I'm hoping to finally get back to it this weekend, actually) - I want to echo Robbie's comment. I found that I had to do a little bit of trimming of the skins to get things to sit flush where they were supposed to; and then the elevator horn was hitting in a couple of spots that prevented full travel. I used a hand-file to trim the horn/stops to get the required elevator throw, and then re-painted the filed areas to prevent corrosion.
Good luck!
--Noel
Sonex #1339
Good luck!
--Noel
Sonex #1339
- NWade
- Posts: 527
- Joined: Mon Aug 08, 2011 3:58 pm
Re: Mounting the horizontal stabilizer
I also ground material from the horn. From memory I also remade the root ribs of the elevators and moved the horn forward.
Phil Bird
Sonex 759 JAB 2.2 Tailwheel
Mittagong NSW Australia
http://www.mykitlog.com/corby202/
https://www.flickr.com/photos/78427482@ ... otostream/
Sonex 759 JAB 2.2 Tailwheel
Mittagong NSW Australia
http://www.mykitlog.com/corby202/
https://www.flickr.com/photos/78427482@ ... otostream/
- Corby202
- Posts: 223
- Joined: Mon Dec 30, 2013 2:08 am
8 posts
• Page 1 of 1
Who is online
Users browsing this forum: No registered users and 7 guests


