Page 85 of 153

Re: Cotton Waiex 191 - N191YX

PostPosted: Wed Nov 30, 2016 1:28 am
by Bryan Cotton
Nutplates installed in the tail tip:
Image

I have to open up the hole in the front of the glass tip to get the tube in.
Image

Re: Cotton Waiex 191 - N191YX

PostPosted: Wed Nov 30, 2016 8:28 am
by ScottM-Sonex1629
Bryan,

That looks...beautiful!

I'm sure that modification only set you back a month or so on the build progress...LOL

Re: Cotton Waiex 191 - N191YX

PostPosted: Fri Dec 02, 2016 12:00 am
by Bryan Cotton
Scott,
Maybe- but the cool factor is worth it. On the bright side I saved all that time not plumbing the wing. I have to chamfer my phenolic a bit, to make it easier to find the hole.
Image

Re: Cotton Waiex 191 - N191YX

PostPosted: Fri Dec 02, 2016 8:57 am
by Area 51%
I want one too.

Can I borrow Adam to drill out my stabilizer rivets?

Re: Cotton Waiex 191 - N191YX

PostPosted: Sun Dec 11, 2016 7:25 pm
by Bryan Cotton
I have my plumbing scheme for the pitot figured out. Looks a lot like Kip's:
Image

I wonder if WD40 will help the tube slide through the grommets. Very frustrating when the grommet pulls out of the sheetmetal.

Slightly off topic, but my wing spar box is becoming a hovercraft:
Image

Here is the kit website:
http://hovercraft.com/content/index.php ... th=5_33_39

In other off topic news, I had to spend a bunch of my hangar time today replacing a leaky Moen shower cartridge. What a horrible design! Makes me wonder how the non-resourceful people get them out.

Re: Cotton Waiex 191 - N191YX

PostPosted: Sun Dec 11, 2016 7:50 pm
by N111YX
Looks great but I think you have more nutplates :D

I used a carbon fiber tube slid into grommets as a "runner" for my pitot line through the stabilizer. I'm not sure if that's the best approach but I did it anyway.

Re: Cotton Waiex 191 - N191YX

PostPosted: Sun Dec 11, 2016 8:22 pm
by Bryan Cotton
I was thinking the same thing about more nutplates. I did make an amazing discovery- you can dimple undimpled nutplates.

Re: Cotton Waiex 191 - N191YX

PostPosted: Sat Dec 17, 2016 2:25 pm
by Bryan Cotton
I posted in the other thread that the WD40 was like a miracle for running the tube through the grommets. I am mentioning it here for continuity in this thread. Spray a bit on a paper towel, wipe the tube, pull it through.

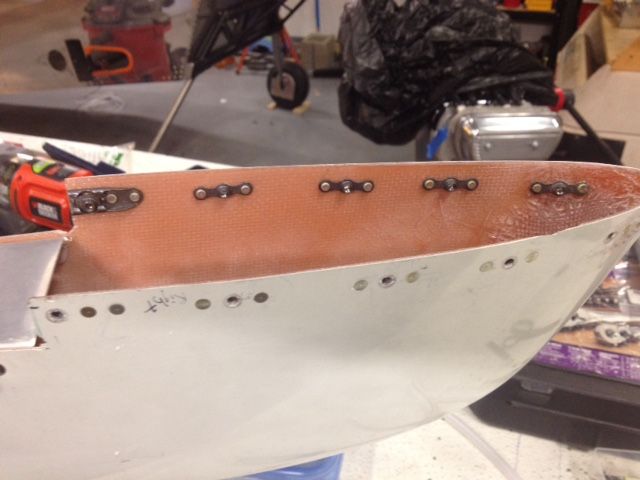
Time to rig the mini rudder and cables. I didn't take a picture, but I had to clearance the strike plate on the back edge where the drive horn hit. I also made the aft bottom rivets flush, and put a little notch on the drive horn to clear the forward rivet. I had to take a small amount of material off the right side drive horn. To line up the mini rudder I did 3 things:
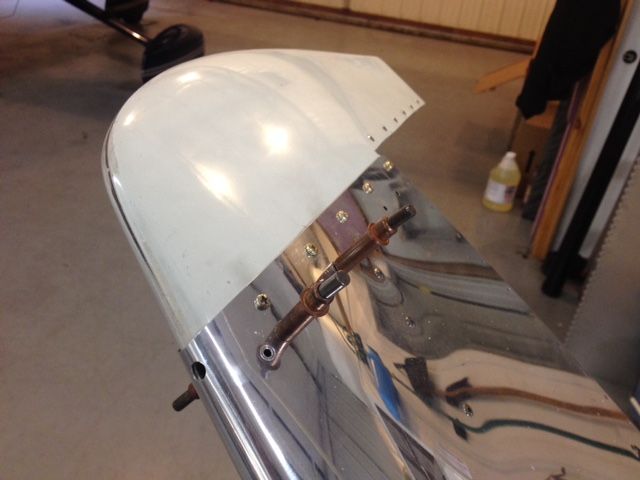
1) Line it up with the tail spring
2) Sight down the top of the rudder and fuselage
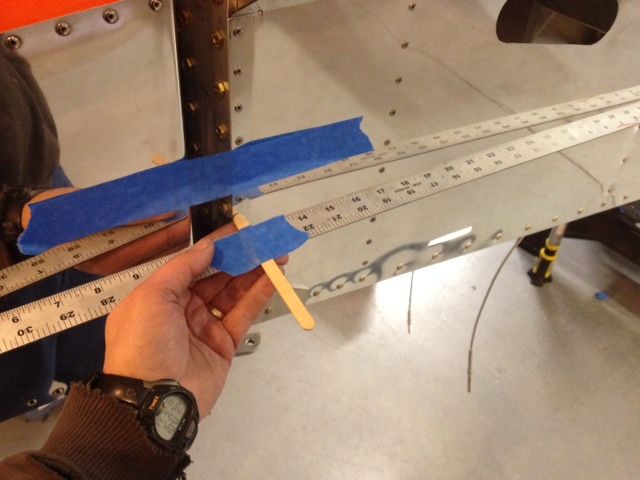
3) use this nifty tool on both sides. I line up the back edge of the rudder with one end, and when the far end of the ruler just touches the fuselage the stick just touches the aft edge of the tailcone.
Image

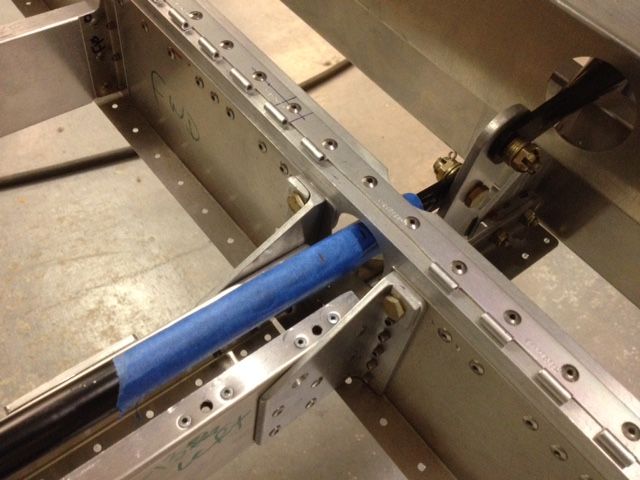
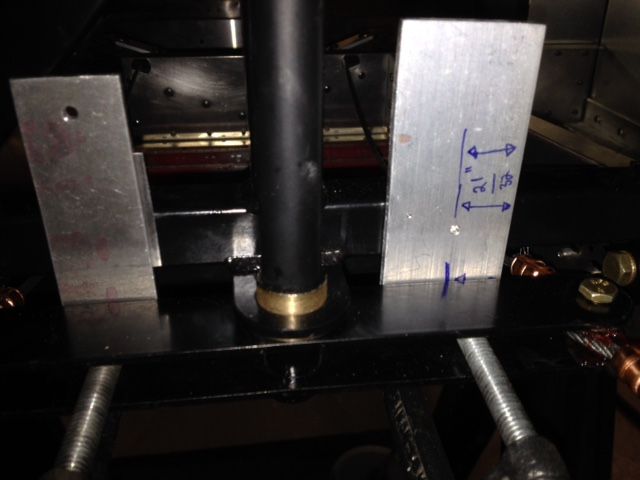
Next I clamped a couple pieces of 1/8" scrap to the mixer. I then wedged a couple .032" shims in there and the mixer was centered for yaw.
Image

I put a piece of blue tape on the idler pushrod. I marked full forward and aft, then made a mark halfway between the two. I clamped the stick assembly in the halfway spot.
Image

Re: Cotton Waiex 191 - N191YX

PostPosted: Wed Jan 04, 2017 11:49 pm
by Bryan Cotton
No engine mount bolts. So, we started bolting the tail on. Here you can see a red eyed tailcone demon torquing the AN4's.

Image

Before bolting we clecoed the bulkhead in place and used a transfer punch to mark the bolt locations. We drilled a #40 hole in front of each bolt. If God forbid we have to unbolt the tail someday we can updrill those holes and gain access to the bolts.

Re: Cotton Waiex 191 - N191YX

PostPosted: Sun Jan 15, 2017 5:30 pm
by Bryan Cotton
We had a slight delay of game while the engine mount bolts came from spruce. They came the day I left for India - my first overseas trip. I'm back, we hung the engine.
Image

Image