Page 76 of 157

Re: Cotton Waiex 191 - N191YX

PostPosted: Wed Jun 01, 2016 8:36 am
by Darick
Good luck on the wing rigging. I've been putting it off, waiting for the perfect weather since I must do it outside.

Re: Cotton Waiex 191 - N191YX

PostPosted: Wed Jun 01, 2016 1:55 pm
by Direct C51
Bryan, your polishing looks absolutely fantastic. I was hoping you could help me figure out how to become half as good as you at polishing. I have probably 10 hours or so of polishing on my Sonex and none of it looks anywhere near as good as yours. I seem to get a lot of black buildup on my aluminum, especially around rivet heads, and the skin never really gets that shiny and the grain is never removed. Even with very small amounts of polish, I still get a slight black buildup and little shine. I seem to have tried everything, different amounts of polish, different pressure, speeds, everything. The only thing that has remotely worked was to set the polisher at maximum speed and move extremely fast across the surface, but that takes so much energy that it isn't sustainable. Do you have a video of your polishing process? Can you help me answer a few questions.

How much polish are you using?
How much pressure?
How fast do you move over the surface?
How fast do you set your polisher speed?
How long do you polish before reapplying?
Do you wipe the aluminum between passes?

Thank you so much for your help. I am getting frustrated with doing so much polishing and getting such poor results.

Re: Cotton Waiex 191 - N191YX

PostPosted: Wed Jun 01, 2016 2:34 pm
by Bryan Cotton
Randy,
This is the only non-timelapse video of polishing that I have:
https://youtu.be/YhvaZHnpo1A

Except for the ruddervators we have done it all prior to riveting. That is the way to do it.

I use a small amount of polish-a finger dab like on Kerry's EAA video.
On the table I use a boatload of pressure especially with F9.
I use a slower motion than Adam does in the video.
I use a high polisher speed.
I polish until the polish haze/black stuff dissapears.
I generally clean between passes.
One other thing: I smear my finger dab of polish around and then spread it out with the buffer at slow speed. That makes it look tarnished. Then I go back and show that aluminum no mercy.

Edit: link to Sonex instructions page. They have written tips and a link to Kerry's video.
http://www.sonexaircraft.com/support/instructions.html
Re: Cotton Waiex 191 - N191YX

PostPosted: Thu Jun 02, 2016 10:35 pm
by Bryan Cotton
Time to build the fuselage stand, seeing as how I have updated my signature. I introduced Adam to Mr. radial arm saw.
Image

We had most of a 4X4 left over from a "yard dice" project Matthew and I did.
Image

I think it will work out ok.
Image

Image

Image

Re: Cotton Waiex 191 - N191YX

PostPosted: Sat Jun 04, 2016 1:41 pm
by Bryan Cotton
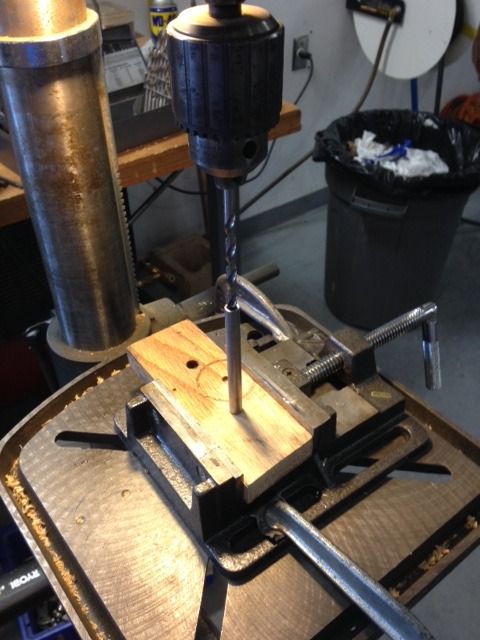
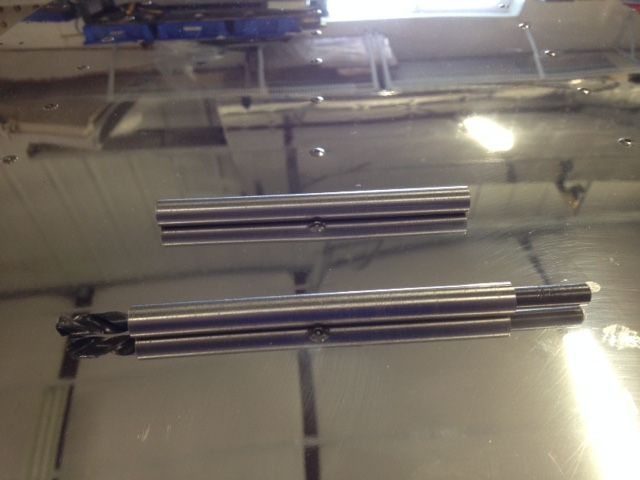
The ID of my bushings was a bit small. The right tool is a lathe of course. I don't have one but didn't want to back down from the challenge. So I drilled an undersize hole on a piece of oak, used the chuck to press in the tube, and drilled up in a couple steps.
Image

I suspect these may be passed around when I am done.
Image

Re: Cotton Waiex 191 - N191YX

PostPosted: Sat Jun 04, 2016 8:34 pm
by Bryan Cotton
Adam and I did a trial fit of the flap and aileron.
Image

They fit.

Re: Cotton Waiex 191 - N191YX

PostPosted: Sat Jun 04, 2016 9:09 pm
by ScottM-Sonex1629
Watch the thumbs with the radial arm saw! Adam is growing up!

Re: Cotton Waiex 191 - N191YX

PostPosted: Sun Jun 05, 2016 9:42 pm
by Bryan Cotton
Left wing is now off the shelf:
Image

Re: Cotton Waiex 191 - N191YX

PostPosted: Sat Jun 11, 2016 4:42 pm
by Bryan Cotton
I have redone the left wingtip.
Image

Re: Cotton Waiex 191 - N191YX

PostPosted: Sun Jun 12, 2016 5:14 pm
by Bryan Cotton
I know the plans say this rivet line is not needed, but I like it. Plus I plan to use at least one to anchor my nav light. Here is a tool I made from flashing to transfer the holes to the new wingtip.
Image

Here is the new wingtip about to receive those holes:
Image

Worked great.