


random user submitted photo
Scott's Sonex 1629 - N629SX
Re: Scott's Sonex #1629 - Progress
![]() by ScottM-Sonex1629 » Sat Aug 02, 2014 6:26 pm
by ScottM-Sonex1629 » Sat Aug 02, 2014 6:26 pm
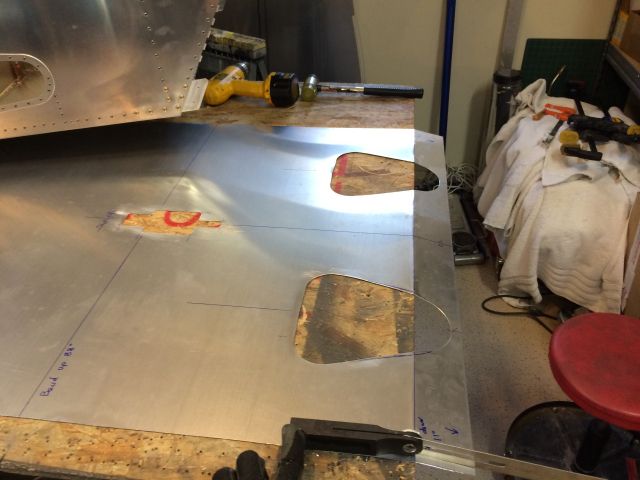
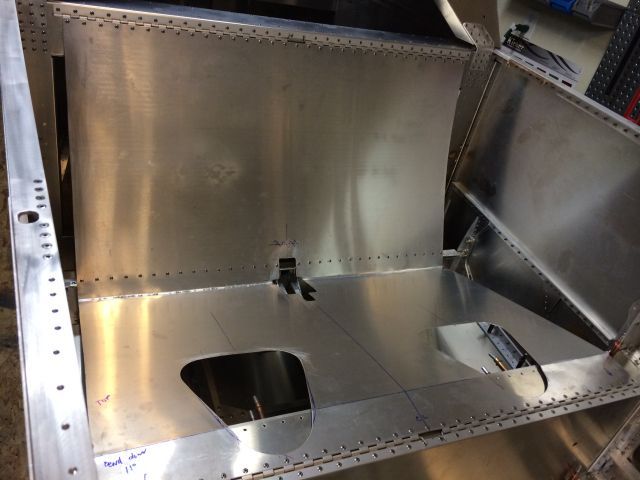
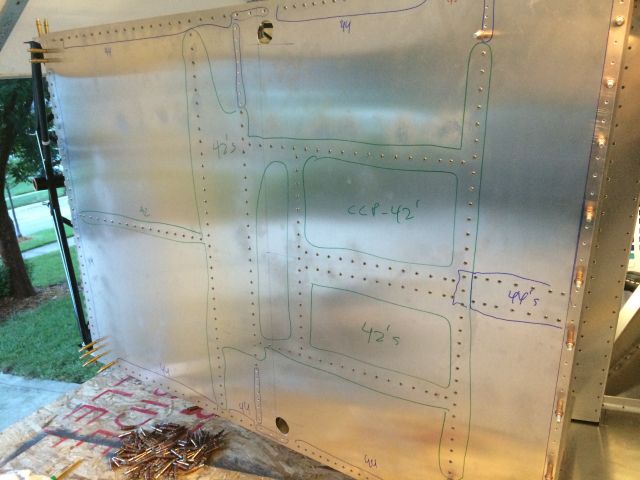
Made one step forward two steps backwards today. Thought I had everything wrapped up with the glare shield and instrument panel assembly (was drilled out to final rivet size) and figured it was time to test the fuel tank.
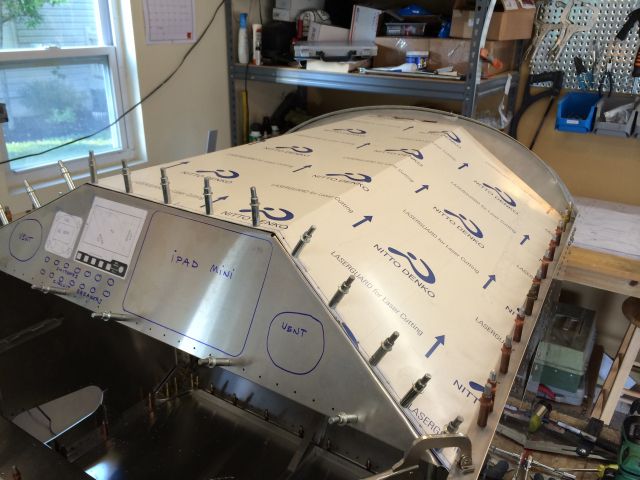
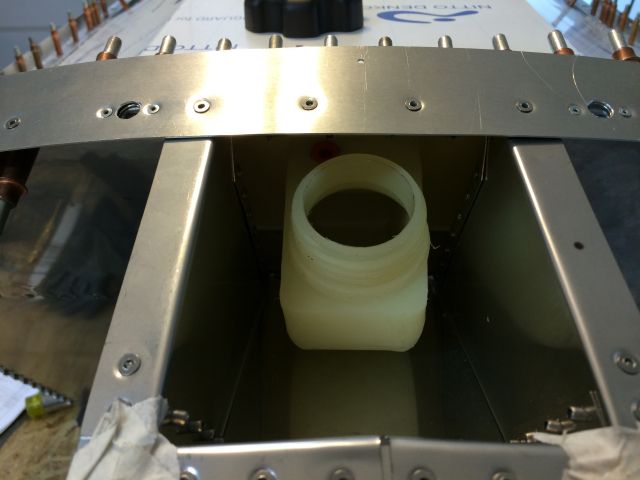
One step back...it didn't want to come "forward" enough in the filler box. WTF.
took the glare shield completely off, and tried dropping the tank in with the straps in place. It fits fine, but I can see the top of the tank is sitting way higher than where my glare shield top was. Another step backwards.
After a few choice words...a beer, and some downtime...I figured there has to be a simple solution. I want to get the tank to fit before I need it to fit, and it's too far into the build to find a solution.
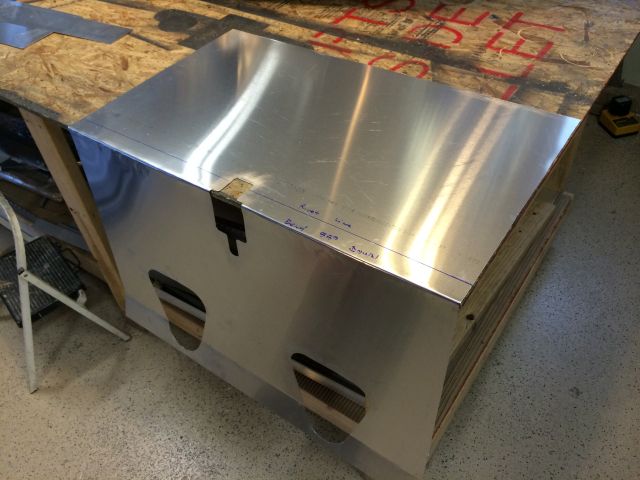
Realized if the the glare shield would sit up higher and the sides came in a little under the longerons, it would work. So I had to redrill several holes along the glare shield and longeron. Will make a doubler for underneath this area. When I got to the firewall, I had to find a different solution. The firewall to glare shield angles were already final drilled. Remade the two side angles, and used the holes from the bad piece to transfer to the new piece on the glareshield side. Then back drilled from the firewall into the new piece. Everything fits tight now,and looks acceptable.

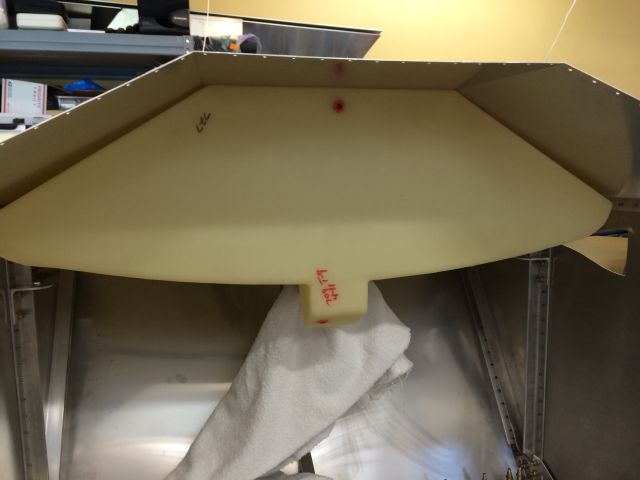

So in the end it I accomplished what I wanted to do today, but learned that maybe the fuel tanks are a bit too tall per plans? Hard to say.
Advice for others, fit the fuel tank before you begin drilling the glareshield to the longerons. You'll thank me later.
One step back...it didn't want to come "forward" enough in the filler box. WTF.
took the glare shield completely off, and tried dropping the tank in with the straps in place. It fits fine, but I can see the top of the tank is sitting way higher than where my glare shield top was. Another step backwards.
After a few choice words...a beer, and some downtime...I figured there has to be a simple solution. I want to get the tank to fit before I need it to fit, and it's too far into the build to find a solution.
Realized if the the glare shield would sit up higher and the sides came in a little under the longerons, it would work. So I had to redrill several holes along the glare shield and longeron. Will make a doubler for underneath this area. When I got to the firewall, I had to find a different solution. The firewall to glare shield angles were already final drilled. Remade the two side angles, and used the holes from the bad piece to transfer to the new piece on the glareshield side. Then back drilled from the firewall into the new piece. Everything fits tight now,and looks acceptable.
So in the end it I accomplished what I wanted to do today, but learned that maybe the fuel tanks are a bit too tall per plans? Hard to say.
Advice for others, fit the fuel tank before you begin drilling the glareshield to the longerons. You'll thank me later.
Scott Meyer
Sonex 1629 - Sold...9/2019
Sonex 1629 - Sold...9/2019
- ScottM-Sonex1629
- Posts: 441
- Joined: Sun Aug 11, 2013 10:00 pm
- Location: Dublin, Ohio (MRT)
Re: Scott's Sonex #1629 - Progress
![]() by ScottM-Sonex1629 » Thu Aug 07, 2014 9:44 pm
by ScottM-Sonex1629 » Thu Aug 07, 2014 9:44 pm
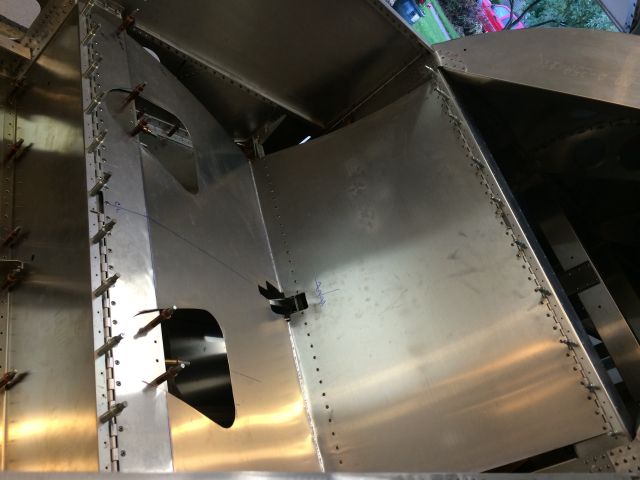
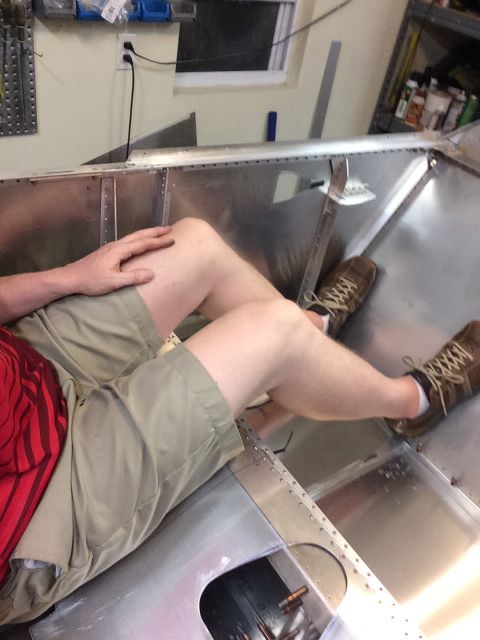
The seat sling is now cut to shape and installed in the fuselage! Running out of fuselage assembly pages...next weekend the goal is to mate the wings and drill them to the fuselage with the help of Mike Farley and Steve Stahl (fellow/local Waiex owners).
Scott Meyer
Sonex 1629 - Sold...9/2019
Sonex 1629 - Sold...9/2019
- ScottM-Sonex1629
- Posts: 441
- Joined: Sun Aug 11, 2013 10:00 pm
- Location: Dublin, Ohio (MRT)
Re: Scott's Sonex #1629 - Progress
![]() by Bryan Cotton » Thu Aug 07, 2014 11:20 pm
by Bryan Cotton » Thu Aug 07, 2014 11:20 pm
Very cool Scott! I am still working backwards but we did make forward progress on the firewall tonight. Cool that you have a seat!
Bryan Cotton
Poplar Grove, IL C77
Waiex 191 N191YX
Taildragger, Aerovee, acro ailerons
dual sticks with sport trainer controls
Prebuilt spars and machined angle kit
Year 2 flying and approaching 200 hours December 23
Poplar Grove, IL C77
Waiex 191 N191YX
Taildragger, Aerovee, acro ailerons
dual sticks with sport trainer controls
Prebuilt spars and machined angle kit
Year 2 flying and approaching 200 hours December 23
-

Bryan Cotton - Posts: 5489
- Joined: Mon Jul 01, 2013 9:54 pm
- Location: C77
Re: Scott's Sonex #1629 - Progress
![]() by ScottM-Sonex1629 » Sun Aug 10, 2014 10:36 pm
by ScottM-Sonex1629 » Sun Aug 10, 2014 10:36 pm
I have the rear spar carry through section complete and ready for next weekends wing install! Mike ans Steve are coming over to lend a hand. Should be fun to get that done.
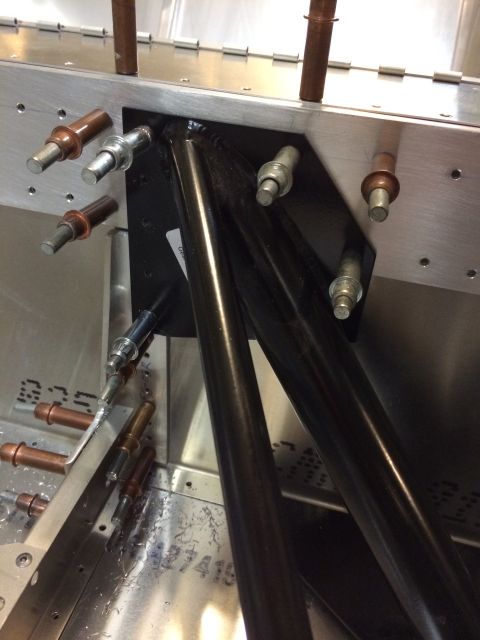
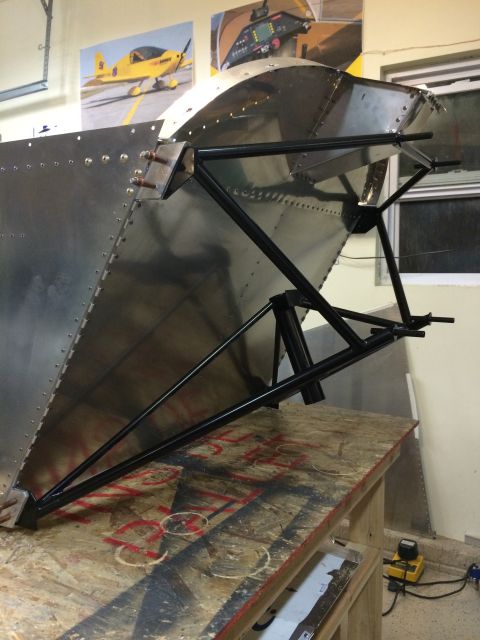
My decision on tri-gear or tail dragger was decided tonight. Bought the kit as a tri-gear, and still to this day have not logged one hour of dual in a tail dragger...so tri-gear it is. Began mounting and drilling the right main gear weldment to the fuselage and spar tunnel.
My decision on tri-gear or tail dragger was decided tonight. Bought the kit as a tri-gear, and still to this day have not logged one hour of dual in a tail dragger...so tri-gear it is. Began mounting and drilling the right main gear weldment to the fuselage and spar tunnel.
Scott Meyer
Sonex 1629 - Sold...9/2019
Sonex 1629 - Sold...9/2019
- ScottM-Sonex1629
- Posts: 441
- Joined: Sun Aug 11, 2013 10:00 pm
- Location: Dublin, Ohio (MRT)
Re: Scott's Sonex #1629 - Progress
![]() by ScottM-Sonex1629 » Wed Aug 13, 2014 10:04 pm
by ScottM-Sonex1629 » Wed Aug 13, 2014 10:04 pm
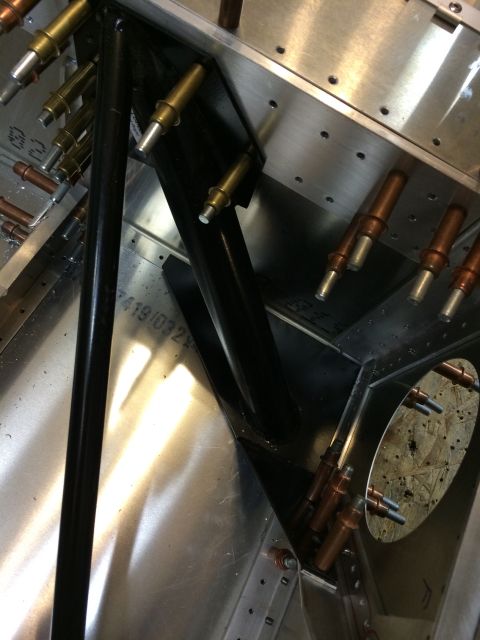
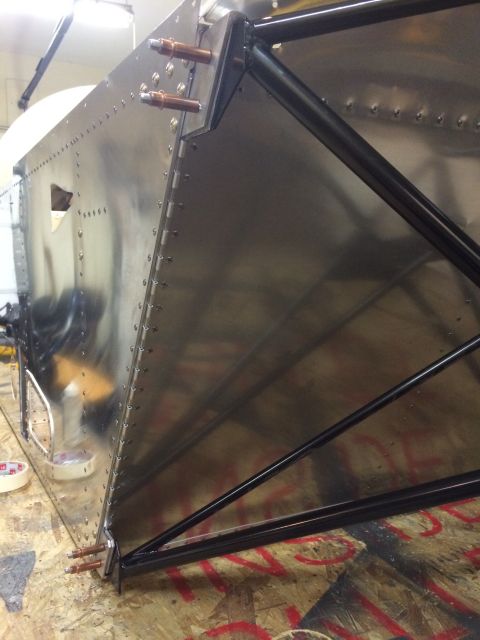
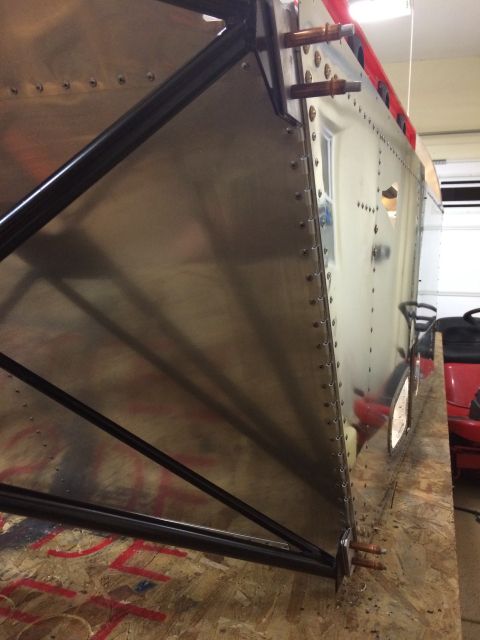
Both main gear weldments are fully drilled now to final hole size.
This also required rotating the fuselage onto its side to drill from the bottom skin pilot holes into the flange of the main gear weldments.
What to do next while waiting for the weekend to come? Hmmm...how about fitting the engine mount?
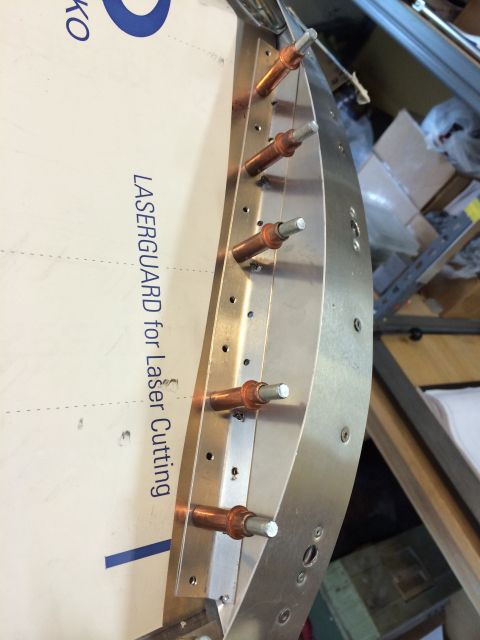
Both mounting tabs at the bottom of the mount needed to be trimmed in order to square up the mount with the fuselage and also achieve the required distance from bottom edge of firewall to the tip of the motor mount pins of 22-13/16". Once the trimming of the steel tabs was done (in stages but total amount removed was probably about 1/4" or more) The tops did not trimming, but each tab required shimming to the motor mount fuselage angles. Everything is nicely aligned now, shimmed and drilled to 1/8" hole size.
Up next? Rearranging the garage and work table. Dropping the wings down from the ceiling and a couple of friends (Mike and Steve) helping to install the wings this weekend!
This also required rotating the fuselage onto its side to drill from the bottom skin pilot holes into the flange of the main gear weldments.
What to do next while waiting for the weekend to come? Hmmm...how about fitting the engine mount?
Both mounting tabs at the bottom of the mount needed to be trimmed in order to square up the mount with the fuselage and also achieve the required distance from bottom edge of firewall to the tip of the motor mount pins of 22-13/16". Once the trimming of the steel tabs was done (in stages but total amount removed was probably about 1/4" or more) The tops did not trimming, but each tab required shimming to the motor mount fuselage angles. Everything is nicely aligned now, shimmed and drilled to 1/8" hole size.
Up next? Rearranging the garage and work table. Dropping the wings down from the ceiling and a couple of friends (Mike and Steve) helping to install the wings this weekend!
Scott Meyer
Sonex 1629 - Sold...9/2019
Sonex 1629 - Sold...9/2019
- ScottM-Sonex1629
- Posts: 441
- Joined: Sun Aug 11, 2013 10:00 pm
- Location: Dublin, Ohio (MRT)
Re: Scott's Sonex #1629 - Progress
![]() by Bryan Cotton » Wed Aug 13, 2014 10:37 pm
by Bryan Cotton » Wed Aug 13, 2014 10:37 pm
Scott,
Good to see you are meeting our goal of on the gear in a year (9/7/14). I think Adam and I are switching to on the gear by reindeer.
Good to see you are meeting our goal of on the gear in a year (9/7/14). I think Adam and I are switching to on the gear by reindeer.
Bryan Cotton
Poplar Grove, IL C77
Waiex 191 N191YX
Taildragger, Aerovee, acro ailerons
dual sticks with sport trainer controls
Prebuilt spars and machined angle kit
Year 2 flying and approaching 200 hours December 23
Poplar Grove, IL C77
Waiex 191 N191YX
Taildragger, Aerovee, acro ailerons
dual sticks with sport trainer controls
Prebuilt spars and machined angle kit
Year 2 flying and approaching 200 hours December 23
-
Bryan Cotton - Posts: 5489
- Joined: Mon Jul 01, 2013 9:54 pm
- Location: C77
Re: Scott's Sonex #1629 - Progress
![]() by ScottM-Sonex1629 » Thu Aug 14, 2014 8:22 am
by ScottM-Sonex1629 » Thu Aug 14, 2014 8:22 am
Bryan,
If I try to make your goal I have 2 weeks left! My kit arrived 8/23/2013. Didn't officially start working on it until Labor Day weekend after inventory and building work table, etc.
I believe Labor Day is realistic for me to have my fuselage on its own gear!
If I try to make your goal I have 2 weeks left! My kit arrived 8/23/2013. Didn't officially start working on it until Labor Day weekend after inventory and building work table, etc.
I believe Labor Day is realistic for me to have my fuselage on its own gear!
Scott Meyer
Sonex 1629 - Sold...9/2019
Sonex 1629 - Sold...9/2019
- ScottM-Sonex1629
- Posts: 441
- Joined: Sun Aug 11, 2013 10:00 pm
- Location: Dublin, Ohio (MRT)
Re: Scott's Sonex #1629 - Progress
![]() by ScottM-Sonex1629 » Fri Aug 22, 2014 11:02 pm
by ScottM-Sonex1629 » Fri Aug 22, 2014 11:02 pm
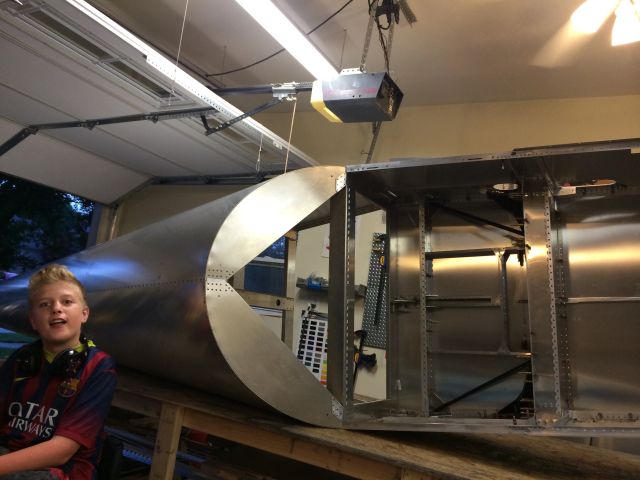
August has been a productive month. Tomorrow I will have had my kit for one year to the day! Everything on the airframe is essentially built. Tonight I finished up the bolts for the lower engine mount brackets and rear splice plates. Last night the floor of the cabin was riveted to the structure. Over the previous weekend we mated the wings and completed the rear spar carry through and the challenging tasks of updrilling the main wing spar bolts.
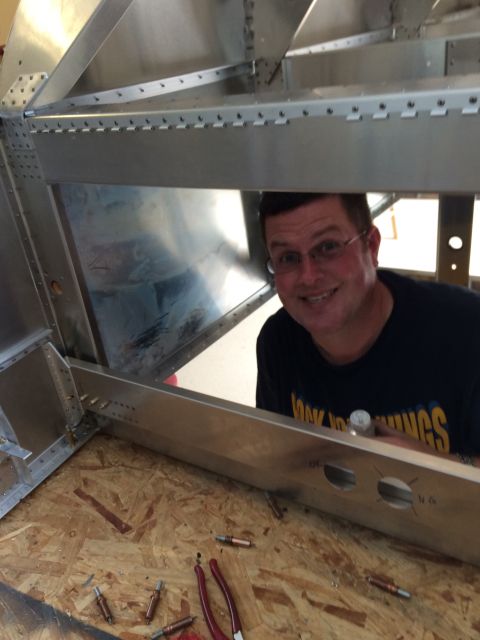
Some random pictures from the past week:
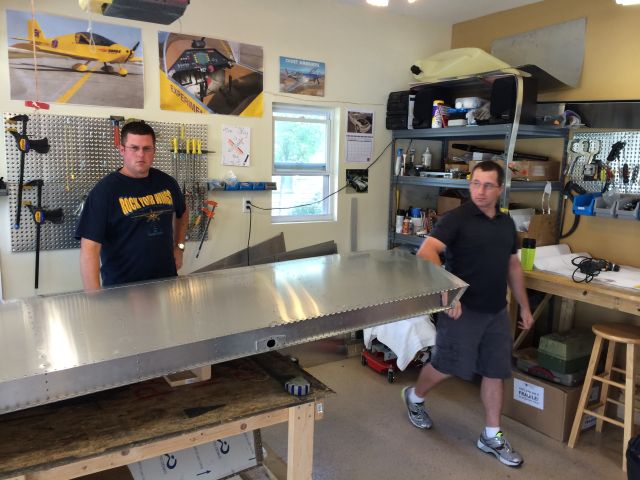
Here is our Sonex Builders and Pilots Foundation Vice Pres. Mike Farley!
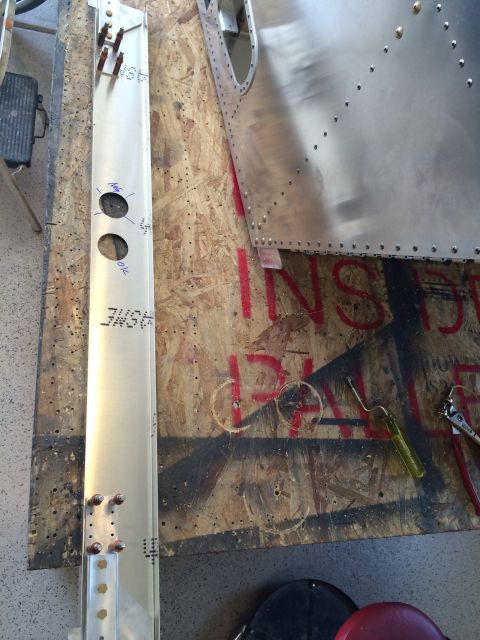
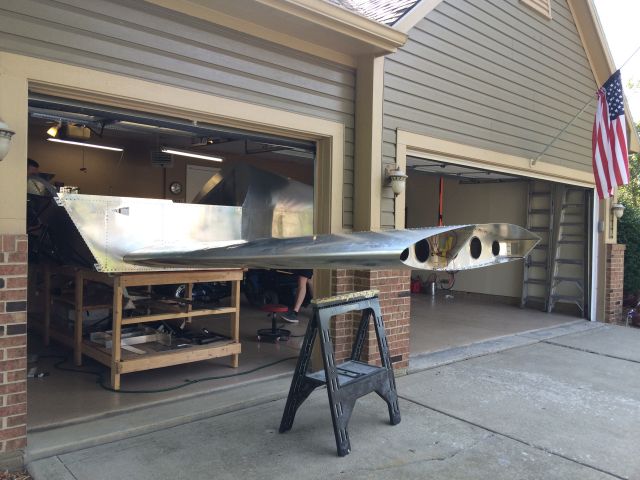
Wings are on, getting ready to drill the mounting blocks.
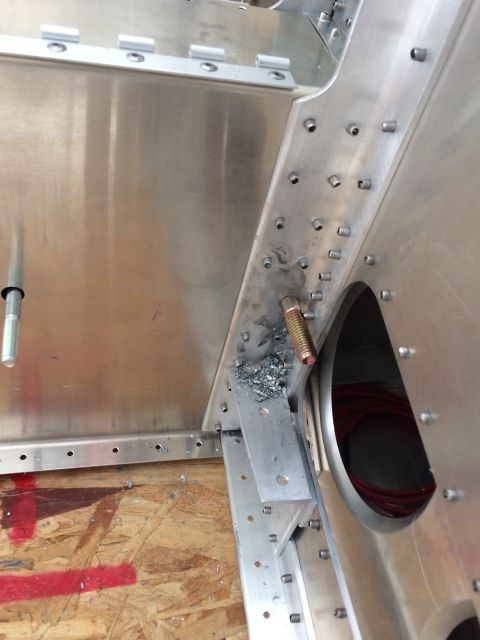
And we have a solid and straight bolt hole!
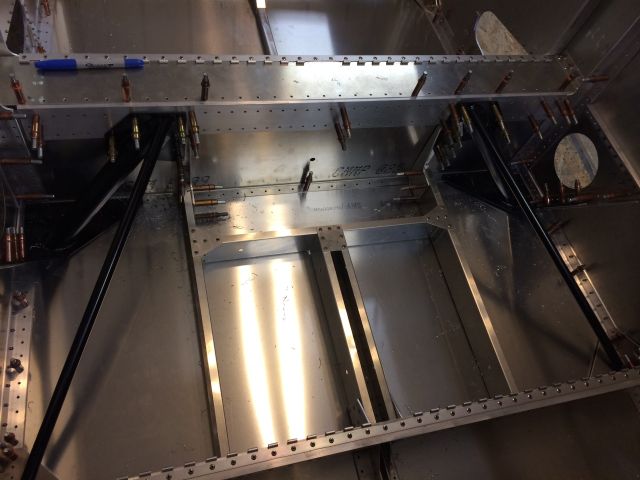
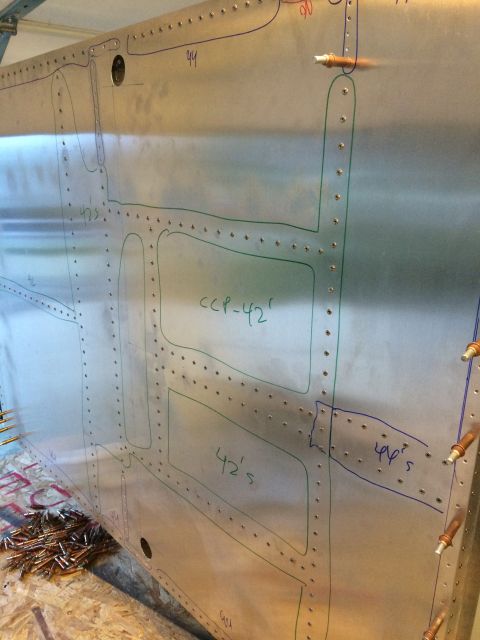
Floor is in, lower structure is riveted in place.
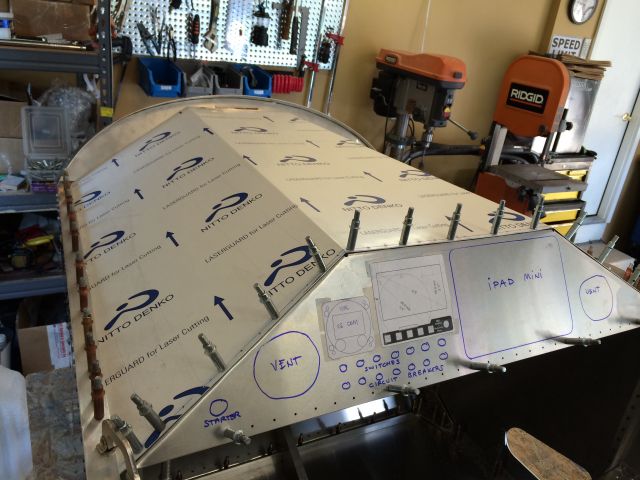
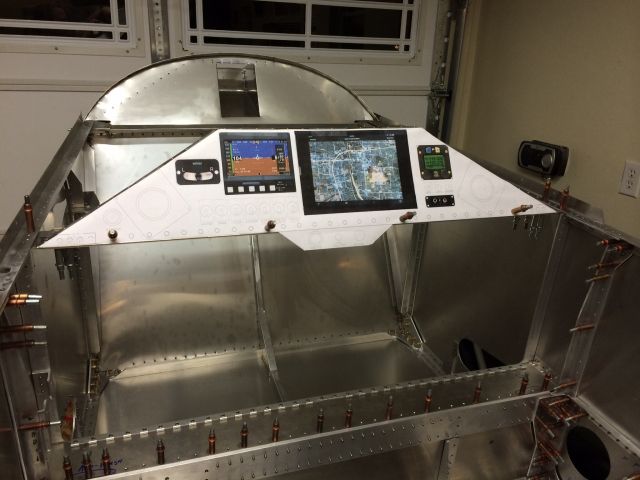
This week I also completed the panel layout to scale in AutoCAD, and imported color images of the main elements. Plotted it out in color and taped this to the panel tonight for mockup. I also ordered all of the switches, circuit breakers, slip indicator and the RAM iPad mini mount from aircraft spruce, which arrived today. My MGL V6 radio came last week but MGL Xtreme is on back order. I'm about ready to start cutting and drilling the panel! Just need to order wire and connectors and I'm ready to go on the electrical items.
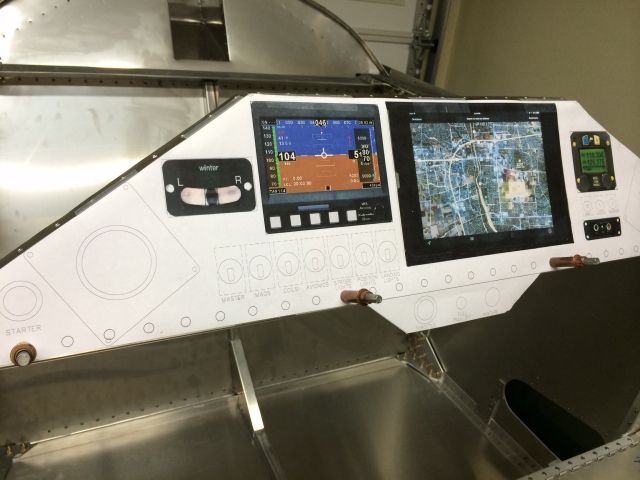
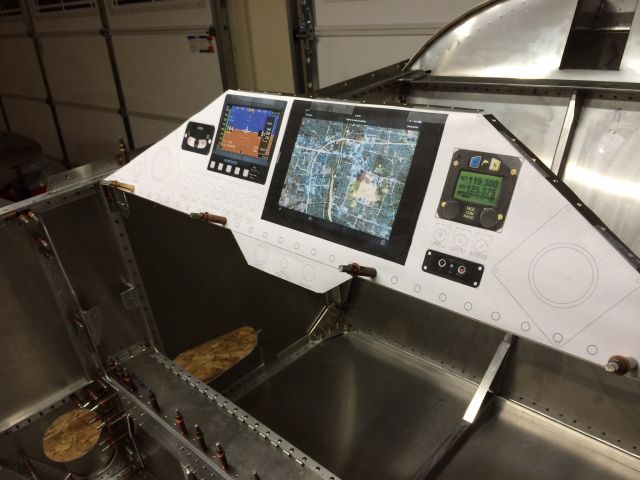
Has anyone experimented with a Cessna style friction lock throttle like I have drawn in my mockup, and used it with the AeroVee? It would require a reversing bellcrank to properly operate the slide plate in the Aero Injector carb.
Some random pictures from the past week:
Here is our Sonex Builders and Pilots Foundation Vice Pres. Mike Farley!
Wings are on, getting ready to drill the mounting blocks.
And we have a solid and straight bolt hole!
Floor is in, lower structure is riveted in place.
This week I also completed the panel layout to scale in AutoCAD, and imported color images of the main elements. Plotted it out in color and taped this to the panel tonight for mockup. I also ordered all of the switches, circuit breakers, slip indicator and the RAM iPad mini mount from aircraft spruce, which arrived today. My MGL V6 radio came last week but MGL Xtreme is on back order. I'm about ready to start cutting and drilling the panel! Just need to order wire and connectors and I'm ready to go on the electrical items.
Has anyone experimented with a Cessna style friction lock throttle like I have drawn in my mockup, and used it with the AeroVee? It would require a reversing bellcrank to properly operate the slide plate in the Aero Injector carb.
Scott Meyer
Sonex 1629 - Sold...9/2019
Sonex 1629 - Sold...9/2019
- ScottM-Sonex1629
- Posts: 441
- Joined: Sun Aug 11, 2013 10:00 pm
- Location: Dublin, Ohio (MRT)
Re: Scott's Sonex #1629 - Progress
![]() by Bryan Cotton » Fri Aug 22, 2014 11:35 pm
by Bryan Cotton » Fri Aug 22, 2014 11:35 pm
Awesome Scott! I hope to put a Cessna style throttle in as well. I like it better for center throttle. I always thought the quadrant in the Arrow was clunky.
Bryan Cotton
Poplar Grove, IL C77
Waiex 191 N191YX
Taildragger, Aerovee, acro ailerons
dual sticks with sport trainer controls
Prebuilt spars and machined angle kit
Year 2 flying and approaching 200 hours December 23
Poplar Grove, IL C77
Waiex 191 N191YX
Taildragger, Aerovee, acro ailerons
dual sticks with sport trainer controls
Prebuilt spars and machined angle kit
Year 2 flying and approaching 200 hours December 23
-
Bryan Cotton - Posts: 5489
- Joined: Mon Jul 01, 2013 9:54 pm
- Location: C77
Re: Scott's Sonex #1629 - Progress
![]() by XenosN42 » Sat Aug 23, 2014 10:21 am
by XenosN42 » Sat Aug 23, 2014 10:21 am
Hi Scott,
Nice looking plane and impressive progress in 1 year. You say that you've already riveted the lower floor in place. To all the builders out there that haven't done that yet I would strongly suggest that you delay riveting the floor into place until the very last possible moment. Right before you paint, or if you are polishing just days before your inspection. Why? It is very difficult to wire up the panel unless you have access from the bottom. Yes you can reach things from within the cockpit, but you'll need to bend in ways you never thought possible. Just my 2 cents.
-- Michael
XENOS N42XE; flying 3 years
ONEX kit # 169; in planning stage
-- Michael
OneX N169XE
author of the 'Flight Data Viewer'
OneX N169XE
author of the 'Flight Data Viewer'
- XenosN42
- Posts: 421
- Joined: Thu Jul 24, 2014 4:45 pm
- Location: PA, USA
Who is online
Users browsing this forum: autopro and 22 guests


