


random user submitted photo
Alexseal Paint (Prep)
6 posts
• Page 1 of 1
Alexseal Paint (Prep)
![]() by WesRagle » Thu Feb 27, 2020 7:40 pm
by WesRagle » Thu Feb 27, 2020 7:40 pm
So, I've been off on a painting adventure. This adventure started after I saw these videos on youtube.
https://www.youtube.com/watch?v=aO2u2RShmZs
and
https://www.youtube.com/watch?v=QtD0wvNAjD0
If you watch the two videos you will know what I knew when I started. Also, I've attached the Alexseal application guide. There is a lot of information there so I've highlighted most of the relevant "stuff".
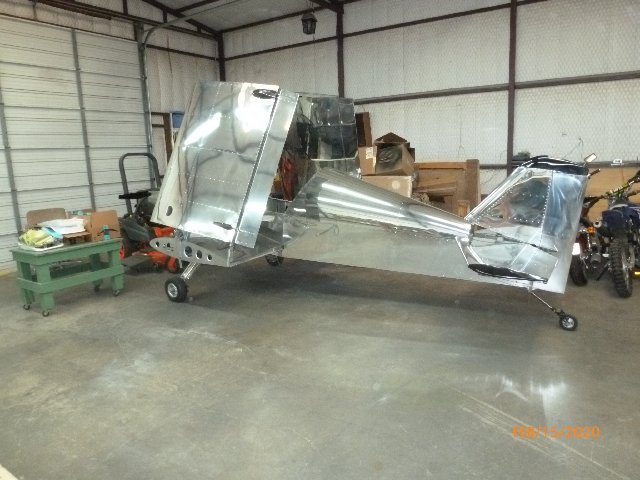
So here we go. Time to fold the Onex up and stick it in the corner. Those folding wings are as handy as a pocket.
I'm going to write this as if you have never painted before. I know that's probably not true, but just in case.
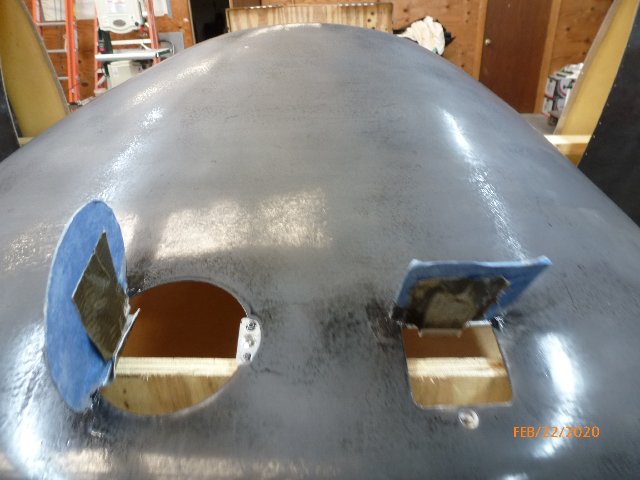
First the prep. This step is the same no matter what paint you chose to use. It's all about filling rivet holes and imperfections in the surface, cleaning the surface, and sanding the shine off the gel-coat. You will need something to hold the parts while they are being painted so why not go ahead and jury-rig the fixtures now to help support the parts while sanding. I'd like to give a little shout out to Sonex for the quality of their fiberglass parts. In this instance they were much superior to the Van's wheel pants I decided to use.
The cowl after filling and sanding.

The wheel pants had an ugly seam down the middle that had to be fixed.
Also, there was a void and a hole that mysteriously showed up just before priming. To late now, I just painted over it.
I used Superfil for the filler. Remember, if you can feel it you will be able so see it through the finish. Remember to clean the surface before sanding. I cleaned with alcohol followed by a dewaxer/surface prep. I used 3M "Faster Sanding" 150 grit to sand the gel-coat. 150 grit proved to be a little too cores. If I were starting over I would bump it up a grit. I also used a soft/flexible sanding block since I'd be sanding irregular surfaces. Try not to sand through the gel-coat Careful along the edges and on the ridges while sanding. A recurring theme.
More to come.
Wes
https://www.youtube.com/watch?v=aO2u2RShmZs
and
https://www.youtube.com/watch?v=QtD0wvNAjD0
If you watch the two videos you will know what I knew when I started. Also, I've attached the Alexseal application guide. There is a lot of information there so I've highlighted most of the relevant "stuff".
So here we go. Time to fold the Onex up and stick it in the corner. Those folding wings are as handy as a pocket.
I'm going to write this as if you have never painted before. I know that's probably not true, but just in case.
First the prep. This step is the same no matter what paint you chose to use. It's all about filling rivet holes and imperfections in the surface, cleaning the surface, and sanding the shine off the gel-coat. You will need something to hold the parts while they are being painted so why not go ahead and jury-rig the fixtures now to help support the parts while sanding. I'd like to give a little shout out to Sonex for the quality of their fiberglass parts. In this instance they were much superior to the Van's wheel pants I decided to use.
The cowl after filling and sanding.
The wheel pants had an ugly seam down the middle that had to be fixed.
Also, there was a void and a hole that mysteriously showed up just before priming. To late now, I just painted over it.
I used Superfil for the filler. Remember, if you can feel it you will be able so see it through the finish. Remember to clean the surface before sanding. I cleaned with alcohol followed by a dewaxer/surface prep. I used 3M "Faster Sanding" 150 grit to sand the gel-coat. 150 grit proved to be a little too cores. If I were starting over I would bump it up a grit. I also used a soft/flexible sanding block since I'd be sanding irregular surfaces. Try not to sand through the gel-coat Careful along the edges and on the ridges while sanding. A recurring theme.
More to come.
Wes
- Attachments
-
 ALXS_app_guide_1_2_1_WEB.pdf
- Application Guide
- (830.37 KiB) Downloaded 310 times
Wes Ragle
Onex #89
Conventional Gear
Long Tips
Hummel 2400 w/Zenith Carb
Prince P Tip 54x50
First Flight 06/23/2020
42.8 Hrs. as of 10/30/21
Onex #89
Conventional Gear
Long Tips
Hummel 2400 w/Zenith Carb
Prince P Tip 54x50
First Flight 06/23/2020
42.8 Hrs. as of 10/30/21
- WesRagle
- Posts: 841
- Joined: Fri Jan 05, 2018 12:35 pm
- Location: Weatherford, Tx
Re: Alexseal Paint (Prime)
![]() by WesRagle » Thu Feb 27, 2020 8:25 pm
by WesRagle » Thu Feb 27, 2020 8:25 pm
Ok, I messed up the name of the thread, but consider this to be the priming post.
Assuming you watched the videos, you will know that the next step for me is applying the primer. I picked up the can of 442 primer and shook it for a good while and opened it up. There was still a lot of solids in the bottom of the container so I got a stir stick (tongue depressor) and pried the solids off the bottom, resealed, and shook some more. BTW, I chose grey primer since I would be applying a black top coat.
Next I gave the parts a final wipe down, mixed the primer, and rolled on the first coat. I waited the specified amount of time and rolled on a second coat. Since it didn't take long to role, and I had some mixed primer left, and since the pot time of the primer allowed it, on with the third coat.
Looked good to me. I called it a day.
The next morning I was feeling pretty good about the situation. Looked like I could be in a paint shop.

Then I looked closer. Trouble in paradise. What I had really done is texture the surface of all my fiberglass parts.
I had never used "guide coat" before but went and got a can at O'Reilly's and put some on. I tried sanding with 400 grit. It soon became obvious that I would grow old(er) sanding all the parts. That left me with but one option. So, I pulled out the 150 grit and sanded the primer off. Not to be deterred, I tried once again with a single coat of the primer. Same result.
So, as for the 442, my opinion, it's impossible to get good results rolling it on. The fumes are horrible. It dries so fast that there is no way to put a coat on without rolling over drying edges as you go.
My review, it sucks, two thumbs down, 0 out of 5 stars.
My first clue should have been when Andy (the presenter in the videos) sanded right through the primer. Here is a guy who works on fiber glass all the time, has a flat panel, is using his favorite guide coat, and sands through the primer trying for a smooth surface.
Anyway, time to sand the crap off again. By this time I'm getting pretty frustrated. I didn't sand the primer as much as I should have but I'm moving on.
Now, at this point I'm kicking myself for applying primer in the first place. The parts have a good gel-coat. Why should I need to prime them? Here is a quote straight out of the Application Guide: "If no filling and fairing is required, you may proceed to the application of
ALEXSEAL® Finish Primer 442 and/or an ALEXSEAL® Topcoat.". I wish I had proceeded directly to the topcoat.
More to come.
Wes
Assuming you watched the videos, you will know that the next step for me is applying the primer. I picked up the can of 442 primer and shook it for a good while and opened it up. There was still a lot of solids in the bottom of the container so I got a stir stick (tongue depressor) and pried the solids off the bottom, resealed, and shook some more. BTW, I chose grey primer since I would be applying a black top coat.
Next I gave the parts a final wipe down, mixed the primer, and rolled on the first coat. I waited the specified amount of time and rolled on a second coat. Since it didn't take long to role, and I had some mixed primer left, and since the pot time of the primer allowed it, on with the third coat.
Looked good to me. I called it a day.
The next morning I was feeling pretty good about the situation. Looked like I could be in a paint shop.
Then I looked closer. Trouble in paradise. What I had really done is texture the surface of all my fiberglass parts.
I had never used "guide coat" before but went and got a can at O'Reilly's and put some on. I tried sanding with 400 grit. It soon became obvious that I would grow old(er) sanding all the parts. That left me with but one option. So, I pulled out the 150 grit and sanded the primer off. Not to be deterred, I tried once again with a single coat of the primer. Same result.
So, as for the 442, my opinion, it's impossible to get good results rolling it on. The fumes are horrible. It dries so fast that there is no way to put a coat on without rolling over drying edges as you go.
My review, it sucks, two thumbs down, 0 out of 5 stars.
My first clue should have been when Andy (the presenter in the videos) sanded right through the primer. Here is a guy who works on fiber glass all the time, has a flat panel, is using his favorite guide coat, and sands through the primer trying for a smooth surface.
Anyway, time to sand the crap off again. By this time I'm getting pretty frustrated. I didn't sand the primer as much as I should have but I'm moving on.
Now, at this point I'm kicking myself for applying primer in the first place. The parts have a good gel-coat. Why should I need to prime them? Here is a quote straight out of the Application Guide: "If no filling and fairing is required, you may proceed to the application of
ALEXSEAL® Finish Primer 442 and/or an ALEXSEAL® Topcoat.". I wish I had proceeded directly to the topcoat.
More to come.
Wes
Last edited by WesRagle on Fri Feb 28, 2020 5:34 pm, edited 1 time in total.
Wes Ragle
Onex #89
Conventional Gear
Long Tips
Hummel 2400 w/Zenith Carb
Prince P Tip 54x50
First Flight 06/23/2020
42.8 Hrs. as of 10/30/21
Onex #89
Conventional Gear
Long Tips
Hummel 2400 w/Zenith Carb
Prince P Tip 54x50
First Flight 06/23/2020
42.8 Hrs. as of 10/30/21
- WesRagle
- Posts: 841
- Joined: Fri Jan 05, 2018 12:35 pm
- Location: Weatherford, Tx
Alexseal Paint (Top Coat)
![]() by WesRagle » Thu Feb 27, 2020 10:15 pm
by WesRagle » Thu Feb 27, 2020 10:15 pm
Hi Guys,
So, after an appropriate period of self loathing for texturing my beautifully gel-coated parts, it's on to topcoat.
The topcoat is, of course, a totally different paint. I shook the can, opened it up, and there were no solids in the bottom. So, I surface prep'ed the parts, got everything ready, mixed up some paint, and here we go. I'm determined to fly this process all the way into the crash :-)
Now, my experience with the primer led me to make two mistakes while applying the first coat of topcoat. First, I mixed it as thin as the Application Manual allowed. Second, I felt like I had to move along quickly to prevent the paint from drying while I was still working on the part.
The paint is very thin in the first place so using the minimum amount of reducer makes more sense. The paint has a pot life of 6 hours and does not cure fast. All you have to do is keep moving at a deliberate pace. No need to rush, but no breaks until the part you are working on is finished.
First coat and more remorse.
I wasn't really loving life when I took a good look at what had just transpired. In fact I was trying to figure a way out of this mess. My unlucky run with paint just keeps on going.
Then, a glimmer of hope. I took a look along the surface and to my surprise I couldn't really see the runs on the surface. It's almost like the runs are beneath the surface. Weird stuff.
Since (for some reason) I decided to paint the parts black I knew that the first coat would only get me started toward black, On to the second coat.
Re-coat means sanding. In my shop (between 40 and 60 Deg. F) it takes about 48 hours before the paint has cured to the point that it doesn't clog the sand paper. I sanded between coats with 600 grit. A problem is that the coats are so thin that you can't sand much without sanding through. So, sanding went fast. I just knocked the high spots down, surface prepped the parts, tack rag, roll on another coat.
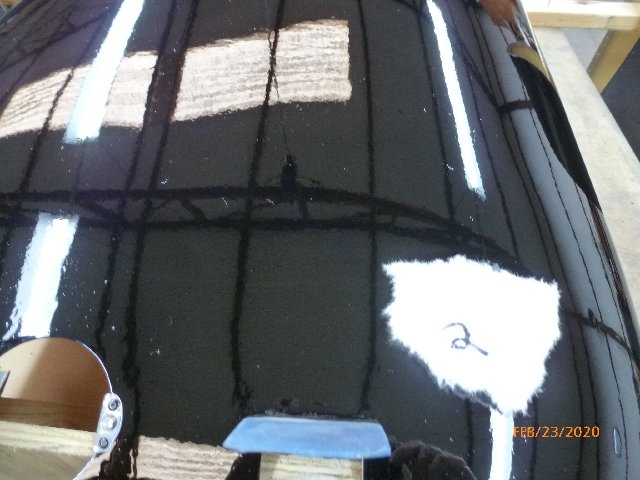
Top cowl after sanding:
Top cowl after second coat:
I determined that for a dark color (lack of color?) I would need four coats to feel comfortable with the coverage. Keep in mind that it only takes about 2 to 3 hours to sand and re-coat. It's the 48 hours between that is the killer.
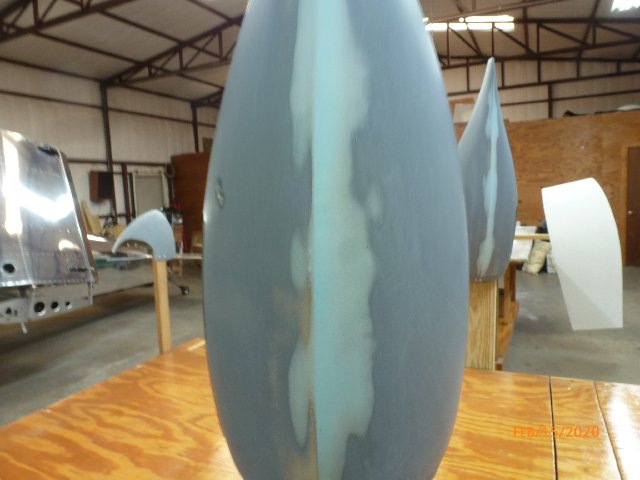
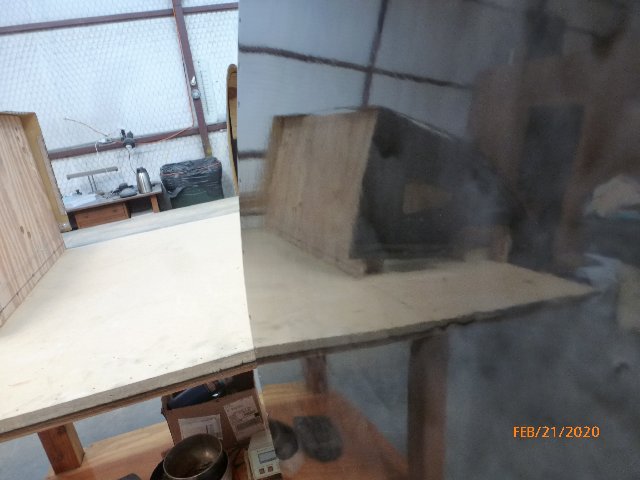
The fiberglass farm after three coats:
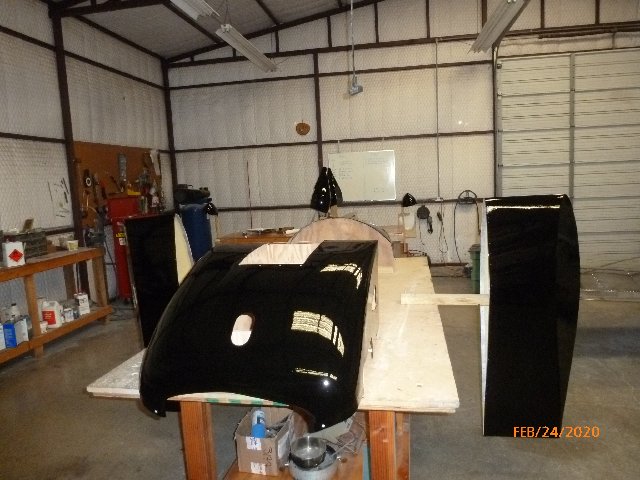
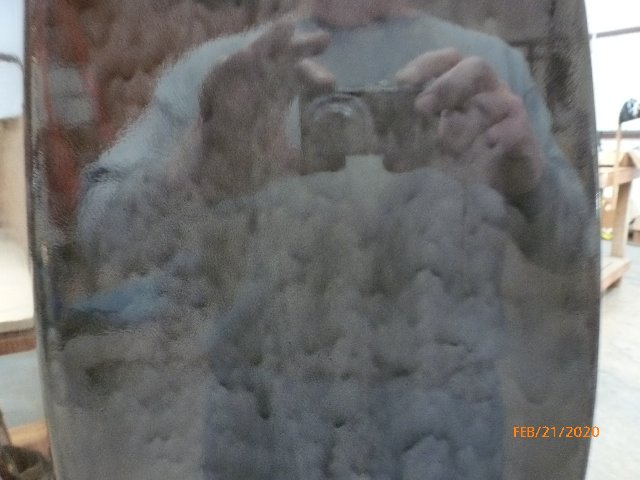
It's hard to capture the results of a black paint job in pictures. Here are some pics after adjusting exposure.
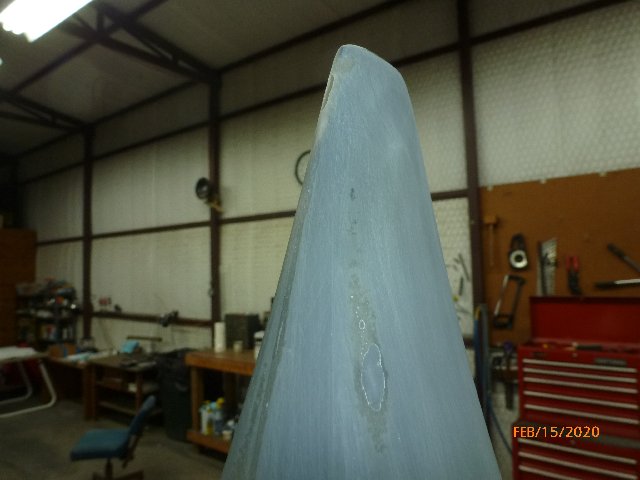
The wing tip in the first pic after four coats:
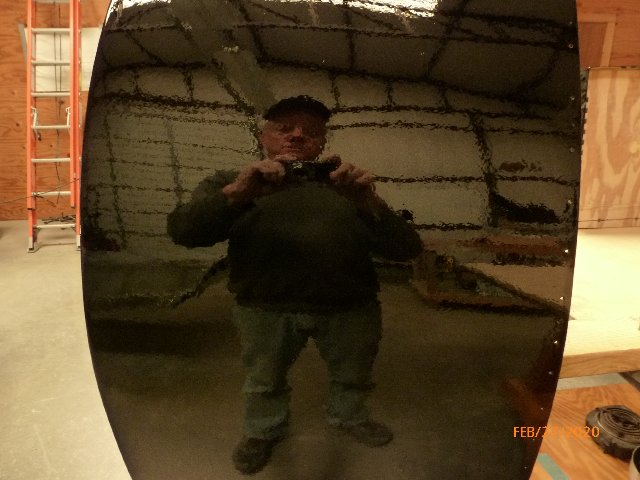
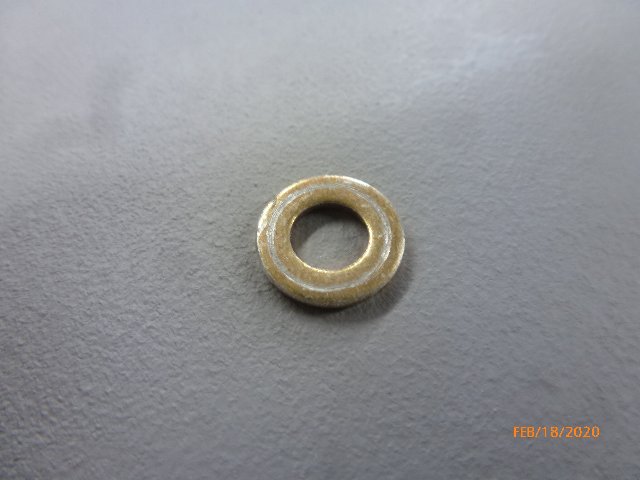
And what would life be with out at least one errant moth:
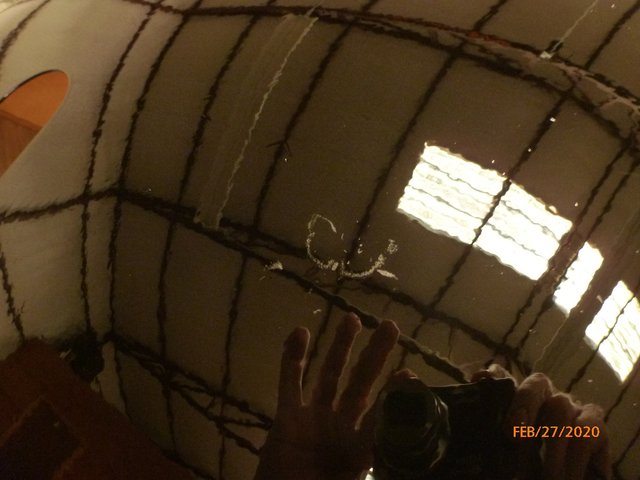
Most of the imperfections that remain stem directly from my not sanding enough of that #$%*& primer off and runs in the initial top coat.
So that's it. Far from perfect, but time to move on.
One more post to go for closing thoughts.
Wes
So, after an appropriate period of self loathing for texturing my beautifully gel-coated parts, it's on to topcoat.
The topcoat is, of course, a totally different paint. I shook the can, opened it up, and there were no solids in the bottom. So, I surface prep'ed the parts, got everything ready, mixed up some paint, and here we go. I'm determined to fly this process all the way into the crash :-)
Now, my experience with the primer led me to make two mistakes while applying the first coat of topcoat. First, I mixed it as thin as the Application Manual allowed. Second, I felt like I had to move along quickly to prevent the paint from drying while I was still working on the part.
The paint is very thin in the first place so using the minimum amount of reducer makes more sense. The paint has a pot life of 6 hours and does not cure fast. All you have to do is keep moving at a deliberate pace. No need to rush, but no breaks until the part you are working on is finished.
First coat and more remorse.
I wasn't really loving life when I took a good look at what had just transpired. In fact I was trying to figure a way out of this mess. My unlucky run with paint just keeps on going.
Then, a glimmer of hope. I took a look along the surface and to my surprise I couldn't really see the runs on the surface. It's almost like the runs are beneath the surface. Weird stuff.
Since (for some reason) I decided to paint the parts black I knew that the first coat would only get me started toward black, On to the second coat.
Re-coat means sanding. In my shop (between 40 and 60 Deg. F) it takes about 48 hours before the paint has cured to the point that it doesn't clog the sand paper. I sanded between coats with 600 grit. A problem is that the coats are so thin that you can't sand much without sanding through. So, sanding went fast. I just knocked the high spots down, surface prepped the parts, tack rag, roll on another coat.
Top cowl after sanding:
Top cowl after second coat:
I determined that for a dark color (lack of color?) I would need four coats to feel comfortable with the coverage. Keep in mind that it only takes about 2 to 3 hours to sand and re-coat. It's the 48 hours between that is the killer.
The fiberglass farm after three coats:
It's hard to capture the results of a black paint job in pictures. Here are some pics after adjusting exposure.
The wing tip in the first pic after four coats:
And what would life be with out at least one errant moth:
Most of the imperfections that remain stem directly from my not sanding enough of that #$%*& primer off and runs in the initial top coat.
So that's it. Far from perfect, but time to move on.
One more post to go for closing thoughts.
Wes
Last edited by WesRagle on Mon Feb 19, 2024 1:39 am, edited 3 times in total.
Wes Ragle
Onex #89
Conventional Gear
Long Tips
Hummel 2400 w/Zenith Carb
Prince P Tip 54x50
First Flight 06/23/2020
42.8 Hrs. as of 10/30/21
Onex #89
Conventional Gear
Long Tips
Hummel 2400 w/Zenith Carb
Prince P Tip 54x50
First Flight 06/23/2020
42.8 Hrs. as of 10/30/21
- WesRagle
- Posts: 841
- Joined: Fri Jan 05, 2018 12:35 pm
- Location: Weatherford, Tx
Re: Alexseal Paint (In Closing)
![]() by WesRagle » Thu Feb 27, 2020 10:52 pm
by WesRagle » Thu Feb 27, 2020 10:52 pm
HI Guys,
So, why did I do it? What are my thoughts? What did I learn?
Why did I do it?
I didn't want to spray paint. I don't have enough experience spraying painting. I didn't want to wreck my shop. I didn't want to build a paint booth. I didn't want to .... Also, inquiring minds want to know, can you really roll urethane?
What about rattle can?
There is a lot of fiberglass on a Onex. With those wing tips there is probably close to twice the fiberglass area as on a Sonex. I think it would feel like filling up a lake with a garden hose. Rolling sounded much better. Plus, I hope the urethane paint will be more durable.
Would you do it again?
Yes, with several modifications to the process learned from my one and only experience with it.
So, how would I do it if I could start fresh?
Well, obviously I wouldn't prime with 442. If I felt there were some spots that *had* to be primed I would seek advice from an experienced painter.
I also learned that with this process, less is more. It takes no more that 8 oz. of mixed paint per coat. And remember, that is with those giant wing tips. The only way to really mess up is to get a run, and yes, I got plenty on the first coat. Since the paint coats are thin, there is really no way to sand out a run without sanding through the surrounding area. So, if I could start over, each coat would be applied very carefully to avoid runs and roller marks in the paint.
Again, with the less is more philosophy, never approach a hard area, such as the nose of the cowl, with a full roller of paint. First paint a flat area and then, just before going back to the paint pan, paint a difficult area. That will help prevent runs and sags.
Except where absolutely necessary never touch the surface with a paint brush. If you do, expect the same result Andy got, only worse. The only place I used a brush was just around the doors on the cowl top. Anywhere a brush is needed, apply the paint very thin, feather it out away from the spot painted, and then start close to there with the roller and roll as close to the inaccessible area as possible.
I think I would try a different roller next time. From the Application Guide: "High density solvent resistant foam rollers are recommended because they do not apply too much material at one time, and the ends of the roller are tapered – which reduces overlap marks, and results in a more even finish." I used the rollers Andy used. Once I learned not to use too much paint, they were easy to use. However, I think they were the source of a lot surface "lint" in the finished surface. And yes I taped them just like Andy did, only twice :-)
As far as cost, if I had purchased the correct amount of paint it would cost no more than the 20 some odd cans of spray paint it would take. One quart of 501 is more than enough for a Onex and will probably be enough for two Sonexs. Cost is about $200 once rollers, handle, etc. are purchased.
Oh yea, one thing that is great about rolling, no paint in the piano hinges or the stupid expensive quarter turn receptacles. Another thing is that the area doesn't have to be as dust/dirt free because there is no sprayer to kick up trash while your painting.
Knowing what I know now I think I could get much better results. But that's life, always wanting but never getting a mulligan :-)
Thanks,
Wes
Last edited by WesRagle on Fri Feb 28, 2020 5:35 pm, edited 1 time in total.
Wes Ragle
Onex #89
Conventional Gear
Long Tips
Hummel 2400 w/Zenith Carb
Prince P Tip 54x50
First Flight 06/23/2020
42.8 Hrs. as of 10/30/21
Onex #89
Conventional Gear
Long Tips
Hummel 2400 w/Zenith Carb
Prince P Tip 54x50
First Flight 06/23/2020
42.8 Hrs. as of 10/30/21
- WesRagle
- Posts: 841
- Joined: Fri Jan 05, 2018 12:35 pm
- Location: Weatherford, Tx
Re: Alexseal Paint (Prep)
![]() by builderflyer » Fri Feb 28, 2020 10:52 am
by builderflyer » Fri Feb 28, 2020 10:52 am
Hi Wes, thank you for your interesting writeup. One question..........it's difficult to tell from the photographs...........say from 5 feet away, how would you compare the appearance of the parts you had sprayed with Dupli-color vs rolled with Alexseal, say for shine and smoothness. Which process would win the prize from strictly an appearance point of view?
Thanks,
Art,,,,,,,,,,,,,,,,,,,,,,,Sonex taildragger #95,,,,,,,,,,,,,,,,Jabiru 3300 #261
Thanks,
Art,,,,,,,,,,,,,,,,,,,,,,,Sonex taildragger #95,,,,,,,,,,,,,,,,Jabiru 3300 #261
- builderflyer
- Posts: 422
- Joined: Sat Jul 09, 2016 12:13 pm
Re: Alexseal Paint (Prep)
![]() by WesRagle » Fri Feb 28, 2020 2:51 pm
by WesRagle » Fri Feb 28, 2020 2:51 pm
builderflyer wrote:Hi Wes, thank you for your interesting writeup. One question..........it's difficult to tell from the photographs...........say from 5 feet away, how would you compare the appearance of the parts you had sprayed with Dupli-color vs rolled with Alexseal, say for shine and smoothness. Which process would win the prize from strictly an appearance point of view?
Thanks,
Art,,,,,,,,,,,,,,,,,,,,,,,Sonex taildragger #95,,,,,,,,,,,,,,,,Jabiru 3300 #261
HI Art,
I don't know. It's such a subjective thing.
The Alexseal is intensely shiny. I like shiny but it's a doubled edge sword. A shiny surface highlights all of the imperfections. I think the telling tale will be when the parts are brought outside into the sunlight and right now the parts are still too wet to handle. I will probably try buffing after the parts are fully cured but I'm not sure it will do much good. It's like the "clear coat" in the paint all comes to the surface as the paint levels out. It seems like you are looking through a smooth surface and seeing the underlying imperfections. I don't know. We'll see.
After the Dupli-Color is buffed and waxed it looks nice, smooth, and shiny. My only experience with it is painting the tail tips. It's hard to compare a tail tip to a wing tip.
Right now I would say it's a toss up at 5 ft. As you get closer Dupli-Color would win for smoothness. Further away the the Alexseal would win for shiny.
I do think that given a second chance I could make Alexseal win overall. And, unlike the primer, the Alexseal top coat is not unpleasant to apply. The fumes are minimal and it drys slow enough that you don't feel rushed.
I would like to make one more comment on Alexseal painting that I forgot to mention earlier. You can't look at how well the paint is hiding the undercoat as you apply it. My best results came when I applied just enough paint to wet the surface. That means rolling off most of the paint before leaving the roller pan.
Wes
Wes Ragle
Onex #89
Conventional Gear
Long Tips
Hummel 2400 w/Zenith Carb
Prince P Tip 54x50
First Flight 06/23/2020
42.8 Hrs. as of 10/30/21
Onex #89
Conventional Gear
Long Tips
Hummel 2400 w/Zenith Carb
Prince P Tip 54x50
First Flight 06/23/2020
42.8 Hrs. as of 10/30/21
- WesRagle
- Posts: 841
- Joined: Fri Jan 05, 2018 12:35 pm
- Location: Weatherford, Tx
6 posts
• Page 1 of 1
Who is online
Users browsing this forum: No registered users and 3 guests


