Page 1 of 1

Sonex up elevator travel limited by Vertical stabilizer

PostPosted: Sun Dec 04, 2016 11:02 pm
by jowens
Hi,
I did a test fit of the tail of my sonex and the elevator up travel is limited to about 1 1/4" inches measured at the trailing edge. The elevator bell crank is hitting the vertical stabilizer at the tube weld- not the end of the horn. The horizontal stabilizer is set tight against the front mount of the vertical stabilizer. The vertical stabilizer mount is forward of the horizontal stabilizer. It appears the weld needs 1/4" more clearance.
20161204_205320.jpg
20161204_205320.jpg (24.56 KiB) Viewed 4274 times

Re: Sonex up elevator travel limited by Vertical stabilizer

PostPosted: Sun Dec 04, 2016 11:54 pm
by Corby202
I had a similar problem so I moved the bell crank forward on the elevator halves. (had to fit new ribs)

Re: Sonex up elevator travel limited by Vertical stabilizer

PostPosted: Mon Dec 05, 2016 9:21 am
by tonyr
Hi there..

I had to remake my elevator ribs as per Corby2 to get the horn as far forward as possible without blowing rivet clearances on the ribs.
I also ground off some of the weld and horn flange along the weldment to make clearance
Another thing I was careful with was placing the elevator and drilling the mount holes, from memory if you havent drilled them yet, you have about a 1/16" of play to move the horizontal stab fwd-rearwd. This can help with elevator travel, but then you run into clearance issues on the horn.. and if its mounted already, forget that one!
I also had my elevator pushrod bolted as well to the idler to check travel and clearance on the formers (but not permanently drilled and bolted at the forward end)

Expect to do a fair bit of grinding on the horn, the vertical stab skins above the horn tube, the rearmost former for the pushrod and on the stops to get your travel even after repositioning the elevator horn on new ribs (if you go that far)

Yes its a juggling act!

Cheers
Tony

Re: Sonex up elevator travel limited by Vertical stabilizer

PostPosted: Mon Dec 05, 2016 10:55 am
by Fastcapy
When I inquired about this issue a few years back I was told not to worry about it because you will never need to use full deflection anyway and the seat cushion won't allow it to go to full deflection either.

I think I ended up modifying the angle that interferes with the bell crank.

Re: Sonex up elevator travel limited by Vertical stabilizer

PostPosted: Mon Dec 05, 2016 12:45 pm
by andrewp
Pretty sure that is what I did too from memory...

Re: Sonex up elevator travel limited by Vertical stabilizer

PostPosted: Mon Dec 05, 2016 5:26 pm
by rizzz
I vaguely remember having to do some grinding in that area, I've been looking though my logs but can't find the detail.
Just don't compromise the weld, I think I only modified the angle slightly.

Re: Sonex up elevator travel limited by Vertical stabilizer

PostPosted: Thu Dec 22, 2016 12:11 am
by jowens
VICTORY!!! For any future builders that may run across this problem I'll expand: (tail was not permanently secured or drilled to the empennage)

One of those moments that I'm happy I stepped away to make sure I wasn't missing something. The empennage and stabilizers were well constructed by the previous kit owner. In reviewing plan T01 I found a few things that I hoped would fix my elevator control horn issues and I'm so happy to say that they did!!!
-Important measurement on View-A on how far in on mounting location the horizontal stabilizer should be away from the vertical stab. I was 1/4" short on this measurement.
-Important note View-A about adjusting horizontal stabilizer location to allow full elevator travel.

How I got stuck was the vertical stabilizer forward attach fitting/spar was slightly overbent so I incorrectly perceived that as the limiting factor of how far the horizontal stabilizer could go in. Also, the skins on the horizontal stabilizer were previously well trimmed and bottoming out on the empennage.

Solution:
-Remove vertical stabilizer and temporarily forget about fitting that, focus on the horizontal stabilizer fit and measurements.
-Mark and CAREFULLY file the forward/nose part of the horizontal stabilizer so it would seat more forward. I installed and removed the stab numerous times, taking small amounts of material each time. I lifted up stabilizer a few times during my marking process since there are a few pesky rivets on the fuselage skin that I didn't want file out for until I had the nose seating correct since the location would change as I improved the seating.
-After the nose seating was correct I made some small relief files for the fuselage rivet heads.
-Achieved the golden 3 1/4" measurement
-Filed out the underside skins. For the trailing edge I had to remove 4 rivets in each corner to lift the skin and trim it. Getting the rivet tails out of the stabilizer was not easy :)
-Increased the notch in the turtle deck for the vertical stabilizer forward attach fitting/spar.
-Test fit vertical and horizontal stabilizer, confirmed the vertical stabilizer forward attach fitting was incorrectly limiting the horizontal stabilizer from reaching the expected location.
-Put the vertical stabilizer forward attach fitting in a big table mounted vise as far down as I could and reduced the bend angle.
-Reinstalled and happy place! The horn was not unexpectedly bottoming out except at the very top of travel. Filed out just a tiny bit of skin on the vertical stabilizer sides.
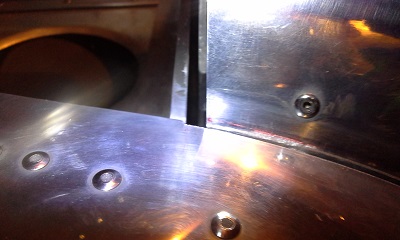
20161221_205309.jpg
before (simulated)
20161221_205309.jpg (33.57 KiB) Viewed 4027 times
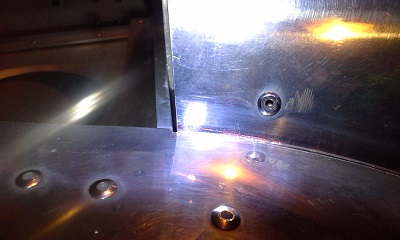
20161221_205254.jpg
after
20161221_205254.jpg (32.99 KiB) Viewed 4027 times