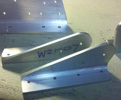


random user submitted photo
Flyboys Tailwheel
6 posts
• Page 1 of 1
Flyboys Tailwheel
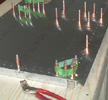
If you bought the Flyboys Sonex specific tailwheel and your plane has a Y tail, then you have an issue.
I questioned them about why the pivot angle is forward instead of aft. Seems I am the 1st person that brought that to their attention. They said it was designed for a Onex and the regular tail Sonex has a steeper angle tailwheel spring. The angle is aft with that spring.
My ground handling is not the best in my Xenos. Brakes and tailwheel leave a lot to be desired. Now I know why. I am in the works of getting some parts from Flyboys and I'll weld them at the 10 deg aft angle that it needs.
I am also in the process of throwing away the Aeroconversion hydraulic brakes and buying Okeefe hydraulic brakes.
Rick Caldwell
Xenos 0057 26 hrs
- Attachments
-
- Wrong angle on tailwheel
- Tailwheel Flyboys Sm.jpg (162.27 KiB) Viewed 2016 times
- racaldwell
- Posts: 400
- Joined: Thu May 22, 2014 4:52 pm
Re: Flyboys Tailwheel
Rick,
In your picture the tail wheel is ahead of your main gear wheel. I'm trying to imagine what the rest looks like ;-)
For wheels/brakes you might consider Matco. I like them very much on my Sonex-A.
In your picture the tail wheel is ahead of your main gear wheel. I'm trying to imagine what the rest looks like ;-)
For wheels/brakes you might consider Matco. I like them very much on my Sonex-A.
-Brock
Sonex-A (s/n 1013)
R2300, P-tip 54/50
Center Stick
V16, TT22
Sonex-A (s/n 1013)
R2300, P-tip 54/50
Center Stick
V16, TT22
-

BRS - Posts: 425
- Joined: Thu Aug 20, 2020 4:50 pm
Flyboys Tailwheel
racaldwell wrote:If you bought the Flyboys Sonex specific tailwheel and your plane has a Y tail, then you have an issue.
I questioned them about why the pivot angle is forward instead of aft. Seems I am the 1st person that brought that to their attention. They said it was designed for a Onex and the regular tail Sonex has a steeper angle tailwheel spring. The angle is aft with that spring.
My ground handling is not the best in my Xenos. Brakes and tailwheel leave a lot to be desired. Now I know why. I am in the works of getting some parts from Flyboys and I'll weld them at the 10 deg aft angle that it needs.
I am also in the process of throwing away the Aeroconversion hydraulic brakes and buying Okeefe hydraulic brakes.
Rick Caldwell
Xenos 0057 26 hrs
Hi Rick
I have the same combination (XENOS + Flyboy’s tailwheel), but still far from flying, thus waiting for your modification to follow you.
Thanks
Carlos
Enviado do meu iPhone usando o Tapatalk
- Carlos Trigo
- Posts: 154
- Joined: Fri Feb 14, 2020 3:46 pm
Re: Flyboys Tailwheel
BRS wrote:For wheels/brakes you might consider Matco. I like them very much on my Sonex-A.
Brock,
What model or part numbers are you using? Do they require any adapters for the sonex axles?
Jeff
- sonex1374
- Posts: 605
- Joined: Thu Mar 27, 2014 1:02 am
Re: Flyboys Tailwheel
sonex1374 wrote:BRS wrote:For wheels/brakes you might consider Matco. I like them very much on my Sonex-A.
Brock,
What model or part numbers are you using? Do they require any adapters for the sonex axles?
Jeff
Hey Jeff,
I also have the Matco wheels/brake and master cylinders I used for differential toe brakes. Matco has a Sonex conversion kit for the wheels that includes an aluminum adaptor. Here's the adaptor kit: http://www.matcomfg.com/ADAPTERKITSONEX ... 32-45.html
I really like this Matco setup, I've been using it since 2012 with no issues. I did weld on an extra bolt ring on the bottom of my Sonex axle assembly to help stabilize them to the adaptor. No brake fade or weakness.
Lorin Miller
Waiex N81YX
- ldmill
- Posts: 90
- Joined: Mon Nov 21, 2011 2:30 am
Re: Flyboys Tailwheel
Blake at Flyboys said no parts are available and the weldments are outsourced. In other words, you have to fix your tailwheel on your own.
This is not a big project. Fortunately, I had bought a 2nd hand TIG welder a few months ago and trying to learn how to TIG weld. This seemed like (and was) an easier weld project than the RV-6 gusseted rudder pedals I made last month. Here are the steps and some pictures of how to do this. It is a major improvement in taxiing capability. I can now do a 180 turn on the taxiway.
Here are the dimensions to make the angle change. The bottom length of the socket needs to be cut back to 2-1/8".
After removing the tailwheel and taking it apart, the plastic bushings inside need to be pressed out with a 1" dia. rod and arbor press.
The socket is cut off the tube with a small cut off wheel. I used my Dremel with a 1-1/2" dia. thin cut off wheel that I bought from McM-Carr. A half round file after dremelling the socket to the new dimension get the socket to nest tight to the tube.
The socket and tube is checked on the tail spring and the end of the titanium spring had to be filed some reuse the same taper pin hole.
The socket and tube are clamped on the spring and aligned with the fuselage. They are tacked in place to assure alignment.
Once tacked together, the piece is welded. I still have a ways to go to get pretty welds but at least I feel comfortable they are sufficient to do the job.
Then epoxy primer and paint to finish it up.
The plastic bushings are re-installed with the arbor press. Before I did this, I wire brushed and sanded out the weld crud from inside the tube. All the parts are reassembled and the steering rod I had made years ago is adjusted longer to fit the new positioning.
Total job including painting took me about 12 hrs. But then I am not known to work fast.
Rick Caldwell
Xenos 0057 29.5 engine hrs + 3 hrs no engine
- racaldwell
- Posts: 400
- Joined: Thu May 22, 2014 4:52 pm
6 posts
• Page 1 of 1
Who is online
Users browsing this forum: No registered users and 9 guests


