Page 1 of 1
I bought a Sonex! Some transport damage...

Posted:
Wed Aug 22, 2012 2:32 amby revlis240
Hello guys!
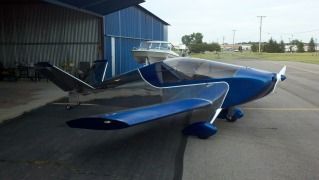
Well, 10 years of dreaming, 5 years of planning, and one year of looking and I am finally the owner of Sonex Kit #875! I bought it 50% complete from am absolutely wonderful person in Arizona. He has done an excellent job of assembling the fuselage and wings so far. I hope I can keep up his quality as I progress onward with the build.
That being said, it sustained some slight damage to the wing skin in transport. Not bad for a 300 mile journey home, this is the only thing that went wrong. Please see the pictures attached, and let me know what you think would be the best course of action to repair! Its on the top side of the right wing.


Thanks guys!
Abe
Sonex | VW | NoseDragger | Sport Trainer | In progress
Re: I bought a Sonex! Some transport damage...
Posted:
Wed Aug 22, 2012 3:07 amby rizzz
I guess it depends on whether you're planning to paint or polish.
If polishing, you'll probably need to drill out and replace that leading edge skin and remake it from scratch, I don't think you can repair this damage so you won't notice on a polished aircraft.
This is not as hard to do as it sounds though, just straighten the dented one and use it as a template for the new one, if you're careful enough everything will line up perfectly, then use the vacuum method to bend the new one.
You could potentially order a new one from Sonex but I'm not sure how accurate their production process is, i.e. will all the holes line up perfectly or are there small deviations from one skin they produce to the next, probably need to check with them.
If you're painting your Sonex the job is a much easier one, use a filler or putty of some sort to fill up the dents, an automotive bondo filler should do the trick, then sand smooth and after paining you won't know the difference.
Re: I bought a Sonex! Some transport damage...
Posted:
Wed Aug 22, 2012 4:09 pmby structurespilot
Hello Abe,
If you are going for the polished finish you should replace the L/E or at least a section of it.
But if you are painting it, there are many options. It looks like you were lucky and the spar didn't get dented. You may want to lay a strait edge along the spar and make sure it hasn't sustained any damage. If it looks good, you should carefully blend the scratches out with a scotchbrite disk, or sand paper. This will prevent crack propagation in the future.
If the opposite skin isn't riveted yet you could push on the back side of the dent with a smooth piece of wood, and work out some of the dent. Back it up with another block of wood, so you don't create a dent in the other direction. 6061 aluminum can surprisingly take a fair bit of rework.
The remaining damage can be filled with automotive filler and sanded.
Even on a polished aircraft, people will sometimes paint the L/E anyway. It makes the polishing job easier. The bugs smashing into the L/E create extra work. I am considering painting the belly of my aircraft when I'm finished, so I don't have to polish underneath either.
Good luck, and PM me if you would like any further advice with your repair. I do structural repairs on certified aircraft for a living. This little bit of damage shouldn't set you back too much.
Regards, Norm
Re: I bought a Sonex! Some transport damage...
Posted:
Wed Aug 22, 2012 5:08 pmby MichaelFarley56
Norm's got it...ask me why my leading edge is filled and painted:
Personally I think the damage is small enough you can just fill it and paint it, but I would ask Kerry just to make sure.
Re: I bought a Sonex! Some transport damage...
Posted:
Wed Aug 22, 2012 11:40 pmby fastj22
I had some hangar rash that left a small dent in my waiex stabilator. I have no desire to reskin it. I'm glad to hear that simple body filler is an acceptable solution. I do plan on painting. If polishing, I would have reskinned it.
Re: I bought a Sonex! Some transport damage...
Posted:
Tue Aug 28, 2012 5:13 pmby Andy Walker
I'd use a fine grade (white) scotch-brite pad to work the roughness out of that divot, to prevent cracking as mentioned. Then fill, sand, paint, and enjoy!