Page 12 of 12

Re: Waiex Build Status and Completion Photos

PostPosted: Fri Dec 13, 2013 5:08 pm
by EricS
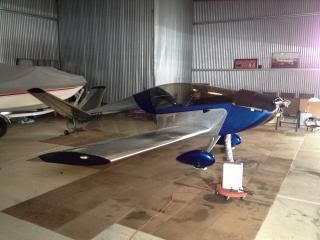
Hi All! Just wanted to pass along a milestone that I hit this week. After starting my kit last October, 2012, I finally was able to get Waiex 153 standing on its own. I'm doing something a little different as far as engine type and going with a UL Power engine for this airframe. I've done a lot of research and have discussed this possibility with Jeremy at Sonex. While Sonex does not have the time or resources to develop a FWF kit for this engine, they are very interested in its potential. Jeremy did do a CAD drawing showing that the UL Power 260i or 260iS would fit using the Sonex supplied Jabiru 2200 engine mount and universal cowling. My kit originally came with the 3300 standard gear mount, so I decided to order the 2200 mount and give it a go. Robert Helms at UL Power North America has been very helpful answering questions and providing info about fitting the engine.

I'll keep everyone posted with updates and info as I go along with the install of the engine. For now it's on to the wings, flight controls and attaching the stabilators to the tail.
Waiex_153_Front_View.jpg
Front View of Waiex 153 finally on the gear.
Waiex_153_Front_View.jpg (149.53 KiB) Viewed 19121 times

Waiex Build Status and Completion Photos

PostPosted: Fri Dec 13, 2013 6:20 pm
by Sonex1517
Excellent progress!! Congratulations Eric!!

Robbie


Sent from my iPad using Tapatalk HD

Re: Waiex Build Status and Completion Photos

PostPosted: Fri Dec 13, 2013 7:08 pm
by N111YX
Looks great! I'll be looking forward to hearing about your UL Power experience.

I really like that D-Motor but I'm not about to be a beta tester...:)

Re: Waiex Build Status and Completion Photos

PostPosted: Fri Dec 13, 2013 10:13 pm
by MichaelFarley56
That looks great Eric! You've been making great progress. It's quite an accomplishment to reach that milestone. Is that the Jab 2200 mount you've installed on the airplane? What happened to the 3300 mount?

I hope you're able to start making good progress on the wings! Keep us up to date on how the progress continues.

Re: Waiex Build Status and Completion Photos

PostPosted: Sun Dec 15, 2013 10:12 pm
by EricS
Thanks all! Mike, I am using the 2200 mount because it will fit the UL Power 260iS engine. I still have the 3300 mount and will hold on to it just in case something doesn't work out with the UL Power.

Re: Waiex Build Status and Completion Photos

PostPosted: Thu Feb 06, 2014 11:22 pm
by MichaelFarley56
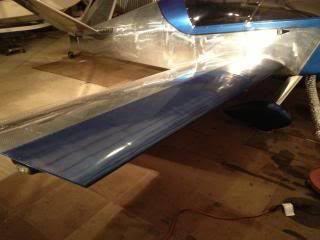
As I was building Waiex #0056, one of the parts of building that I knew I could do better was my wing leading edge skins. During the build, I was somehow able to deform one skin slightly, then I topped that feat by dinging up the other skin when I moved the airplane to my hangar! As a result, in order to save time I ended up filling the dings and painting the leading edges, but I've never been all that happy with the result. I put a wing rebuild/wing skin replacement on my airplane's "bucket list" to accomplish someday...

Old skins: Image

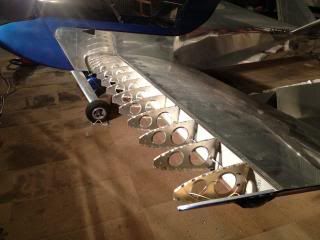
This winter I finally decided to start working on this project. I purchased two new skins from Sonex right after Christmas and after prepping the new skins, I began the long process of drilling off the old ones:

Image

This week I finally began the riveting the new skins in place, and was overall very happy with the results. Not perfect and they need a lot of polishing once it gets warmer, but overall I'm very happy with the results! I'd estimate the whole process took around 30 hours, but it really wasn't too bad. I also took the opportunity to run some wires in the ribs in case I add some landing lights in the future...another item on the "bucket list".

Bad pic but you get the idea:

Image

Thanks guys!

Re: Waiex Build Status and Completion Photos

PostPosted: Fri Feb 07, 2014 6:39 am
by ScottM-Sonex1629
Mike is too honest when he says "not perfect"! He did a great job doing selective surgery on his finished airplane and wings. He even sent me a photo of a rube-Goldberg contraption he made for stretching the leading edge skins down around the lower side of the wing. I thought it was pretty slick so asked if I could borrow his "tool" while I am completing my right wing!

Great Job Mike!